Cisco SASE with Cisco Secure Connect Design Guide
Available Languages
Bias-Free Language
The documentation set for this product strives to use bias-free language. For the purposes of this documentation set, bias-free is defined as language that does not imply discrimination based on age, disability, gender, racial identity, ethnic identity, sexual orientation, socioeconomic status, and intersectionality. Exceptions may be present in the documentation due to language that is hardcoded in the user interfaces of the product software, language used based on RFP documentation, or language that is used by a referenced third-party product. Learn more about how Cisco is using Inclusive Language.
Today’s workforce expects seamless access to applications wherever they are, on any device. With the rise of remote work, the growing push of company data and infrastructure into the cloud, and the increasing number of cloud applications such as Office 365 and Salesforce utilized by the workforce, the amount of traffic directed to the Internet has increased significantly. The need for cloud-enabled security services expands daily as contractors, partners, IoT devices and more each require network access no matter where they are. IT needs to protect and ensure optimal application performance for users and devices as if they were located at a corporate office or branch. Each requires secure access to applications and must now be treated as a ‘branch of one.’
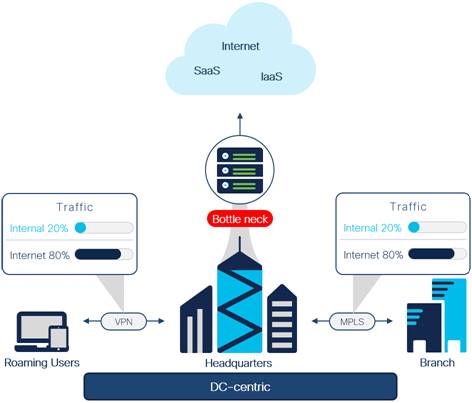
High level DC-Centric Architecture
Because of these changes, the DC-centric model has become costly and inefficient for handling this traffic. Consider the following:
● Remote work and hybrid work are here to stay as people work from anywhere on a continuous basis. This makes user mobility a paramount capability for modern enterprises
● Distributed users and applications are hard to manage and increase security risk due to a larger attack surface
● There are significant problems with application performance and user experience using traditional networking architectures with modern cloud applications
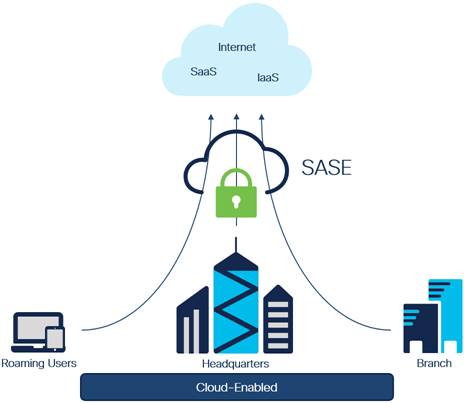
High level SASE Architecture
In this new paradigm, IT requires a simple and reliable approach to protect and connect with agility. This is forcing a convergence of network and security functions closer to users and devices, at the edge—and is best delivered as a cloud-enabled model called secure access service edge (SASE).
In scope
The Cisco SASE with Secure Connect design guide covers the following components:
● Cisco Secure Connect
◦ Site Interconnect set up with Meraki AutoVPN and IPsec VPN
◦ Secure Service Edge (SSE) capabilities DNS-layer Security, Secure Web Gateway (SWG), Firewall As a service (FWaaS), Cloud Access Security Broker (CASB), Data Loss Prevention (DLP), and Zero Trust Network Access (ZTNA)
◦ Client-Based Remote Access via Secure Client VPN module
◦ DNS and SWG for roaming users via Secure Client Roaming Security module powered by Umbrella
● Cisco Meraki MX
◦ AutoVPN
● Cisco Catalyst 8000 Edge Platform
◦ IPsec VPN
● Cisco Duo
◦ Multi-factor authentication (MFA)
◦ Duo Single Sign On (SSO)
● Cisco ThousandEyes
◦ Enterprise Agent
◦ Endpoint Agent
● Cisco SecureX
◦ Secure Client Cloud Management module
Out of Scope
The Cisco SASE with Secure Connect design guide does not cover the following components:
● The Meraki scope has been limited to basic WAN connectivity and the creation of IPsec tunnels to Secure Connect from a high availability pair. Capabilities such as quality of service, TCP flow optimization or service chaining have not been evaluated in this design
● Meraki MX Full Tunnel VPN exclusions for applications
● Cisco Meraki Systems Manager for cloud-based mobile device management
● Integration of Viptela SD-WAN with Secure Connect
● Security has been assumed to exist in the Data Center, but the level of security, and the use of those tools have not been included in this design guide
● Cloud Malware Detection
● Duo SSO SAML configuration for public and private applications
● At the time of writing of this design guide, the Secure Connect ZTNA proxy does not support “Bring your own domain” and so private applications that use SAML authentication may not work with Secure Connect without a workaround. This is because SAML may redirect the user’s browser to an internal domain. Therefore, SAML authentication for private applications is out of scope for this version of the design guide.
● Cisco Secure Malware Analytics
● Cisco Secure XDR
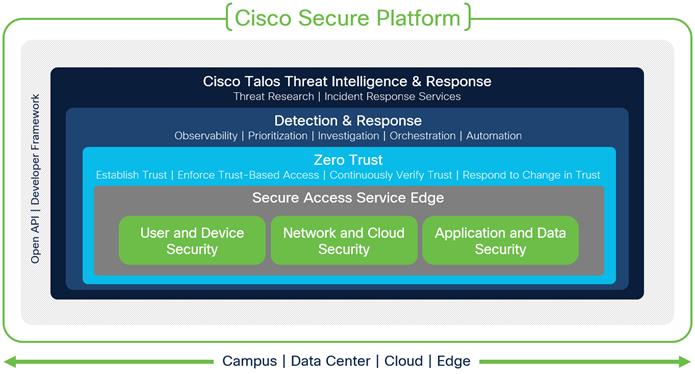
Cisco Secure Framework
Security is not a one-size-fits-all solution. To help understand the architecture, Cisco has broken it down into three pillars:
● User and Device Security: making sure users and devices can be trusted as they access systems, regardless of location
● Network and Cloud Security: protect all network resources on-prem and in the cloud, and ensure secure access for all connecting users
● Application and Data Security: preventing unauthorized access within application environments irrespective of where they are hosted
A SASE architecture converges networking and security functions in the cloud to connect users to the applications and data they need, wherever it lives, from wherever they are. It should be built on a Zero Trust foundation that allows you to mitigate, detect, and respond to risks across your environment. Additionally, access to any resource should not be granted without first verifying trust. This design guide primarily focuses on securing these three pillars from a unified SASE perspective using SAFE (Secure Architecture for Everyone).
A unified SASE solution is more than just a SaaS service provided by a single vendor that provides all SASE network and security capabilities within a single product. A unified SASE design must also be highly integrated and provide ease of management. Some of the benefits of a unified SASE design are:
● Unified management allowing for efficient creation and deployment of network and security policies
● Improved user experience through consistent security policy enforcement regardless of the user’s location
● Improved visibility with integrated SASE components due to unified data
This unified SASE design uses Secure Connect for the primary SASE security capabilities and is complemented by Cisco Duo for SAML (Security Assertion Markup Language) and MFA (Multi-Factor Authentication), and Cisco ThousandEyes for DEM (Digital Experience Monitoring).
For a full breakdown of the architecture, reference the Cisco SASE/SSE Architecture Guide.
Cisco SASE with Secure Connect Business Flows
SAFE uses the concept of business flows to simplify the analysis and identification of threats, risks, and policy requirements for effective security. This enables the selection of very specific capabilities necessary to secure them. This is a sample set of business flows.
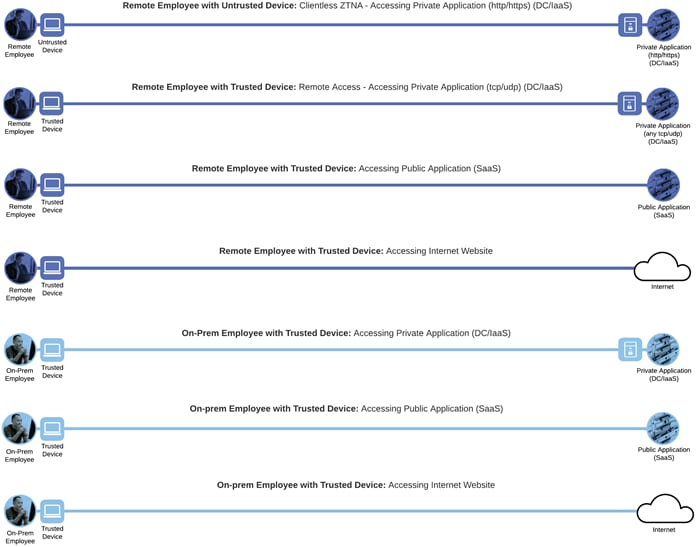
Cisco SASE with Secure Connect Business Flows
Not all business flows have the same requirements. Some use cases are subject to a smaller attack vector and therefore require less security to be applied. Some have larger and multiple vectors and require more security. Evaluating the business flow by analyzing the attack surfaces provides the information needed to determine and apply the correct capabilities for flow specific and effective security. This process also allows for the application of capabilities to address risk and administrative policy requirements. The gray capabilities are out of scope for this design guide.

Cisco SASE with Secure Connect Business Flows with SAFE Capabilities
The primary capability Endpoint Security can be expanded to the following secondary capabilities:
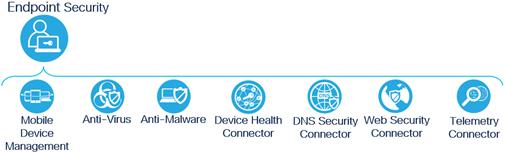
Endpoint Security Secondary Capabilities
Note: Only the DNS Security Connector and Web security Connector capabilities will be discussed within this design guide. Other Endpoint Security capabilities are out of scope for this solution.
SASE can be broken down into two primary components:
● SD-WAN
● Secure Service Edge
SSE can be further broken down into the primary capabilities:
● DNS-layer Security
● Secure Web Gateway
● Firewall as a Service
● Cloud Access Security Broker
● Zero Trust Network Access
While there can be other security capabilities built into an SSE solution, these capabilities are considered fundamental. The SWG, FWaaS, CASB, and ZTNA primary security capabilities can be expanded to the following secondary capabilities:
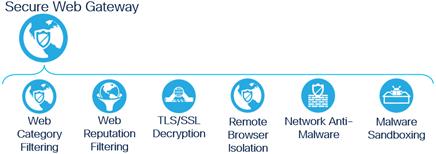
Secure Web Gateway Secondary Capabilities
Note: At the time of writing this guide, Secure Connect does not support Remote Browser Isolation (RBI) so this secondary capability will not be validated within this design guide.
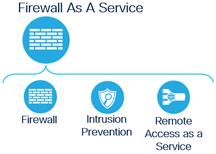
Firewall as a Service Secondary Capabilities
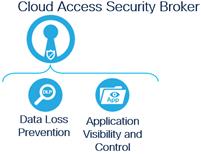
Cloud Access Security Broker Capabilities
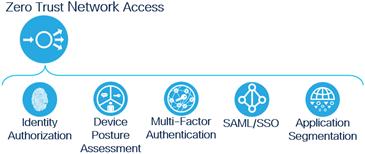
Zero Trust Network Access Capabilities
This Cisco Validated Design guide covers the following platforms for Secure Access Services Edge:
| Product |
License(s) |
| Cisco Secure Connect |
Secure Connect Foundation Essentials Secure Connect Foundation Advantage Secure Connect Complete Essentials Secure Connect Complete Advantage* |
| Cisco Meraki MX |
Enterprise* Advanced Security Secure SD-WAN Plus |
| Cisco Catalyst 8000 Edge Platform (Autonomous mode) |
Network Essentials* Network Advantage Network Premier |
| Cisco Secure Client |
Included with Secure Connect Complete* |
| Cisco Duo |
Free Essentials* Advantage Premier |
| Cisco ThousandEyes |
Endpoint Agent Essentials* Endpoint Agent Advantage Enterprise/Cloud Agents use unit-based billing* |
| Cisco SecureX |
Included with Secure Connect |
*Minimum licenses required for capabilities validated within this design guide.
Cisco Secure Connect
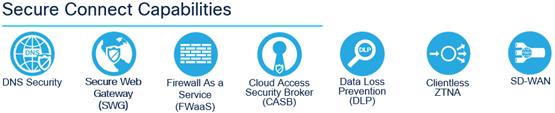
Cisco Secure Connect Capabilities
Cisco Secure Connect is a turnkey, unified SASE offer that radically simplifies the way companies can securely access applications and resources hosted anywhere from any location at any time. It is easy to deploy, use, and manage through a unified cloud dashboard, significantly reducing an organization’s operational complexities to deliver greater agility, speed, and scalability. Secure Connect focuses on delivering a unified SASE experience that centralizes management of security and networking in the Meraki dashboard. It enables secure Internet access with enhanced performance and additional use cases such as remote access, ZTNA, interconnections between users, sites, and applications, and unified technical support. Highlights include:
● Unified Management: Secure Connect provides a unified dashboard for management, configuration, troubleshooting and visibility into both the SD-WAN and SSE components of SASE. Secure Connect is managed via the Meraki dashboard, with few cross launches into the Umbrella dashboard for specific tasks. The Meraki and Umbrella dashboards are tightly coupled, with single sign-on and RBAC synchronized between the two for a seamless experience.
● Integration with Meraki SD-WAN: Simple, seamless support with Meraki SD-WAN for secure branch connectivity. The Meraki MX connects to the Secure Connect fabric using proprietary AutoVPN functionality, allowing customers to extend their SD-WAN fabric to Secure Connect with the click of a button. No need to spend hours on manual configuration or building complex routing tables and redundancy anymore. Meraki SD-WAN also supports VPN exclusions for direct Internet access to resources and SaaS applications.
● Integration with Viptela SD-WAN: Cisco Catalyst SD-WAN customers will be able to enjoy the key use cases that Secure Connect offers, as a turnkey SASE solution. Secure Connect with Cisco Catalyst SD-WAN gives a unified management and policy control for integration of private applications or resources behind the Viptela Service Hub. This enables interconnect capabilities where Remote Access users can securely access private applications and resources behind Cisco Catalyst SD-WAN routers integrated with Secure Connect.
● Secure Internet Access powered by Umbrella: Cisco’s best in class cloud-based security powered by Umbrella, all configured and managed through a unified dashboard. Leveraging Umbrella, Secure Connect unifies multiple functions that traditionally required a set of on-premises security appliances (firewalls, proxies, gateways) or single function cloud-based security solutions. These functions include secure web gateway, firewall, DNS-layer security, cloud access security broker functionality, and data loss prevention.
● Clientless ZTNA and Client-Based Remote Worker Access: ZTNA use cases include secure connectivity from unmanaged devices of remote workers or B2B (Business to Business) contractors, to private applications. End users can securely access applications using only their browser through clientless ZTNA, where Cisco even supplies the certificates and domain names for quick admin config, making setup a snap. Alternatively, IT admins can get similar outcomes with Cisco Secure Client (formerly AnyConnect) installed on the users’ device, enabling granular access between users and applications with posture checks.
Refence the Secure Connect Data Sheet for licensing information.
Cisco Meraki MX
The Cisco Meraki MX are multifunctional security & SD-WAN enterprise appliances with a wide set of capabilities to address multiple use cases–from an all-in-one device. The MX is 100% cloud-managed, so installation and remote management is truly zero touch, making it ideal for distributed branches, campuses, and data center locations. Natively integrated with a comprehensive suite of secure network and assurance capabilities, the MX eliminates the need for multiple appliances.
Reference Meraki MX/Z Security and SD-WAN Licensing for licensing information.
Cisco Catalyst 8000 Edge Platform (Autonomous Mode)
The Cisco Catalyst 8000 Edge Platforms Family provides a flexible, scalable, and secure WAN edge for business-first resiliency and cloud-native agility. Advanced features include industry-leading performance and automation for SD-WAN, multi-cloud onramp, 5G wireless WAN, and SASE architectures. Cisco Catalyst 8000 platforms can be deployed in autonomous mode (IOS XE non SD-WAN deployment) or controller mode (SD-WAN deployment). The Catalyst 8000 platforms used in this design guide will be deployed in autonomous mode, rather than as Viptela SD-WAN routers in controller mode, for validation of non-Meraki IPsec tunnels.
Reference Cisco DNA Software SD-WAN and Routing Matrices for licensing information.
Cisco Secure Client
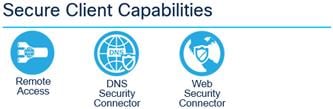
Cisco Secure Client Capabilities
Cisco Secure Client is a unified security endpoint agent that delivers multiple security services to the roaming workforce. It is available across multiple platforms, including Windows, MacOS, Linux, and more. Cisco Secure Client not only provides VPN access through Datagram Transport Layer Security (DTLS) but also offers enhanced security through various built-in modules. Modules used or referenced in this design guide include:
● AnyConnect VPN: Cisco Secure Client provides many options for automatically connecting, reconnecting, or disconnecting VPN sessions. These options offer a convenient way for your users to connect to Secure Connect and access resources securely.
● Umbrella Roaming Security: The Roaming Security module installs two agents on the localhost, the Roaming Security agent, and Secure Web Gateway agent. The Roaming Security agent enforces security at the DNS layer to block malware, phishing, and command and control callbacks over any port while the user is not on a trusted network. The Secure Web Gateway agent enforces security at the URL layer to provide security and visibility for web traffic.
● Cloud Management: SecureX Cloud Management Deployment for Cisco Secure Client enables Administrators to create cloud-managed deployments of Cisco Secure Client. The deployment configuration generates the option to download a lightweight bootstrapper that contains the information needed by the endpoint to contact the cloud for the specified Cisco Secure Client modules by the deployment with their associated profiles.
Cisco Duo
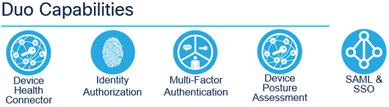
Cisco Duo Capabilities
Zero Trust can be summed up as “never trust; always verify.” This security approach treats every access attempt as if it originates from an untrusted network — so access won’t be allowed until trust is demonstrated. Once users and devices have been deemed trustworthy, Zero Trust ensures that they have access only to the resources they absolutely need to prevent any unauthorized lateral movement through an environment. Cisco Duo is a cloud-based security platform that protects access to all applications, for any user and device, from anywhere. Duo is designed to be both easy to use and deploy while providing complete endpoint visibility and control. Highlights include:
● Multifactor Authentication: Multifactor Authentication adds a second layer of trust that your users are who they say they are. After completing primary authentication (usually by entering a username and password), users verify their identity a second time, through a different channel. This reduces the likelihood that someone else can log in, since they would need both the password and their second factor to pose as the original user.
● Passwordless Authentication: Passwordless authentication is the term used to describe a group of identity verification methods that don’t rely on passwords. Biometrics, security keys, and specialized mobile applications are all considered passwordless authentication methods. Passwordless eliminates reliance on passwords and delivers a host of business benefits, including a better user experience, reduced IT time and costs and a stronger security posture.
● Duo Single Sign On: Duo provides a cloud based Single Sign On solution, Duo Single Sign On, that is hosted and maintained by Duo. Duo SSO provides a consistent login experience for any SAML 2.0 enabled app, letting your users log in once to access all of their cloud and internal work applications. This SSO is protected by MFA and contextual access policies, and will check the security of your users’ devices each time before granting access.
Reference Duo Editions & Pricing for licensing information.
Cisco ThousandEyes
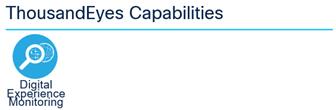
Cisco ThousandEyes Capabilities
With the increased reliance on the internet and cloud services, more networks are outside your ownership or direct control. Organizations need to ensure the performance and integrity of the underlying transport, even when you don’t own the infrastructure or control how service providers route traffic.
Cisco ThousandEyes is a network intelligence SaaS platform that allows users to run a variety of tests using global vantage points to monitor DNS resolution, browser response characteristics, detailed aspects of network pathing and connectivity, the status of network routing, and VoIP streaming connection quality. Highlights include:
● Reduce Mean Time to Identify and resolve by immediately pinpointing the source of issues across internal network, ISPs, and cloud and application providers
● Improve service provider escalations with clear and detailed outage and latency data that can be easily shared with both internal and external stakeholders
● Eliminate wasteful finger pointing and effectively manage OLAs/SLAs across internal teams and external providers
Reference ThousandEyes Pricing for licensing information.
Cisco SecureX
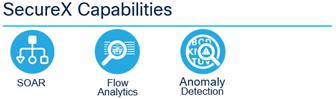
Cisco SecureX Capabilities
Cisco has been on a mission for several years to simplify security. That mission culminated in the launch of the Cisco SecureX platform, which integrates the entire Cisco security portfolio as well as additional security, networking, and IT technologies from both Cisco and third parties. It is included with all the Cisco security products, so once you have one, you can begin using SecureX. Highlights include:
● Threat Response: Accelerate threat investigations and incident management by aggregating and correlating global intelligence and local context in one view
● Orchestration: Automate routine tasks using prebuilt workflows that align to common use cases, or build your own workflows with a no-to-low code, drag-and-drop canvas
● Device Insights: Allows you to discover, normalize, and consolidate information about the devices in your environment.
● Ribbon and Single Sign On: Use the dashboard ribbon for quick access to Cisco SecureX features. SSO helps share and maintain context around incidents in one location
● SSO Across All Cisco Platforms: Easily access all your Cisco Security products, with one set of credentials, from any device.
Cisco SASE with Secure Connect Design
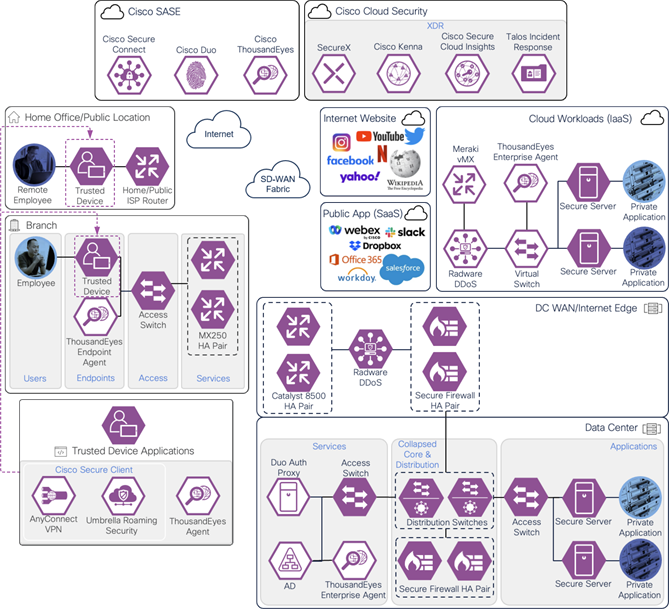
Cisco SASE with Secure Connect Design
This section expands on the remote worker business flows, further detailing the process a hybrid or remote worker would go through to access resources off the network. The capabilities within the Secure Remote Worker flows allow for secure access to remote resources, including private applications within the data center or IaaS, public SaaS applications, and internet resources.
Private Application (Clientless ZTNA)
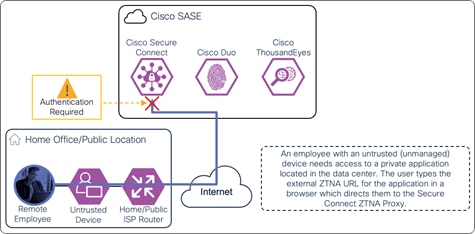
Clientless ZTNA remote access provides a way for users to access HTTP/HTTPS private applications located within a data center or IaaS environment without the need for additional software needing to be installed on the user’s device. Typically, there is less control over unmanaged/untrusted devices because they are not managed by the organization’s mobile device manager (MDM) and do not have applications issued by the organization such as anti-malware software or a VPN client. With ZTNA, users with these devices are authenticated and device posture is verified before access is provided to these resources.
In this example, a remote employee with an untrusted device requires access to a private application located within the data center. To access this application, the user enters the external ZTNA URL for the application in their browser. This external URL was provided by Secure Connect when access to the application was set up in the ZTNA configuration. The user is directed to the Secure Connect ZTNA Proxy.
Remote Employee (Untrusted Device) to Private Application – Initial Connection to Secure Connect ZTNA Proxy
Secure Connect redirects the user to a SAML Identity Provider (IdP) that authenticates the user. In this example, the user is redirected to Duo SSO which has been setup to query an Active Directory (AD) server within the data center to validate the user’s primary credentials. Duo SSO does query through the Duo Authentication Proxy which has been setup in the data center. The user enters their primary credentials. When Active Directory has validated the employee’s primary credentials, Duo sends a Duo Push to the user along with an option to use other MFA methods that have been approved for the application. This second factor authentication must be validated before the user can proceed. Duo SSO can also check the posture of the device, however that will not be covered in this design guide.
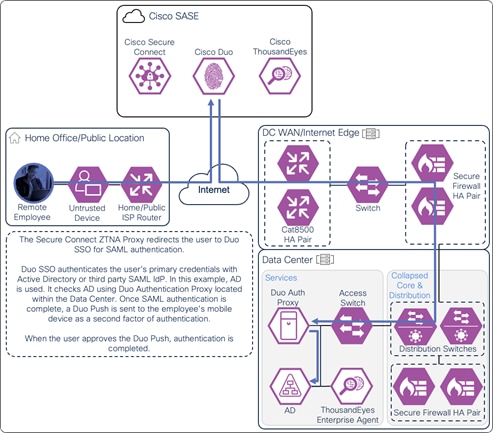
Remote Employee (Untrusted Device) to Private Application – SAML Authentication with Duo SSO
After the user approves the Duo Push, the user is redirected back to the Secure Connect ZTNA proxy and device posture is checked by the endpoint posture policy. This can include verification of the device’s OS version, browser version, and location.
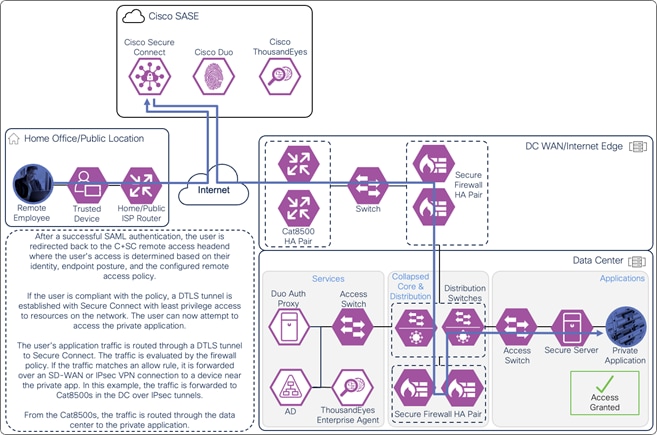
If the user is compliant with the policy, the user is given access to only the applications needed for their role through a proxied session with Secure Connect. Identity collected through authentication allows for granular control and visibility. The user’s application traffic is sent from their device to Secure Connect through a TLS tunnel, then through an SD-WAN or IPsec tunnel to a device near where the private application is hosted. In this case, the traffic goes through an IPsec tunnel between Secure connect and a Cisco Catalyst 8500 located at the data center. From the Cat8500, traffic is routed to the application (passing through data center security).
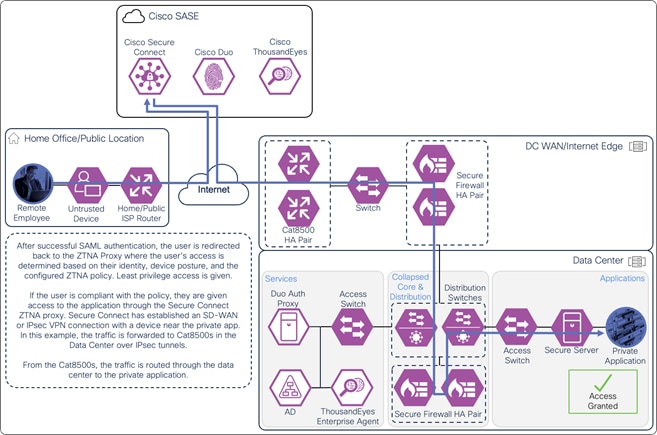
Remote Employee (Untrusted Device) to Private Application – Access Granted
Private Application (Client-Based Remote Access)
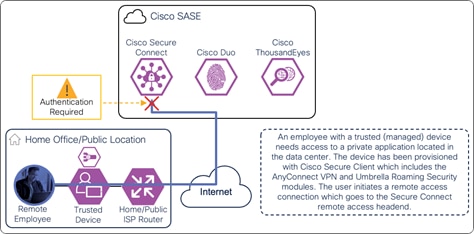
In the scenario where an organization has control over the device, applications can be installed to provide more protection for the user and the organization’s assets that are being accessed. Client-based remote access uses software to establish a connection with Secure Connect in order to provide access to private applications within a data center or IaaS environment. One of the benefits of this method is greater security through additional device posture options. With clientless remote access, security services typically can only collect data provided by the user’s browser and the HTTP/HTTPS flow itself. Client-based remote access allows for the collection of this data as well as more granular information on the device being used to access the resource. This can allow for more data points to assess the risk of allowing the user to access certain applications. Client-based remote access can also provide access to any TCP or UDP application rather than just HTTP/HTTPS applications.
In this example, a remote employee with a trusted device requires access to a private application located within the data center. The device has been provisioned with Cisco Secure Client which has the AnyConnect VPN and Umbrella Roaming Security modules included. To access this application, the user initiates a connection with the AnyConnect VPN module. The user is directed to the Secure Connect remote access headend.
Remote Employee (Trusted Device) to Private Application – Initial Connection to the Secure Connect Remote Access headend
Secure Connect redirects the user to a SAML Identity Provider (IdP) that authenticates the user. In this example, the user is redirected to Duo SSO which has been setup to query an Active Directory (AD) server within the data center to validate the user’s primary credentials. Duo SSO can do this query through the Duo Authentication Proxy which has been setup in the data center. The user enters their primary credentials. When Active Directory has validated the employee’s primary credentials, Duo sends a Duo Push to the user along with an option to use other MFA methods that have been approved for the application. This second factor authentication must be validated before the user can proceed. Duo SSO can also check the posture of the device, however that will not be covered in this design guide.

Remote Employee (Trusted Device) to Private Application – SAML Authentication with Duo SSO
After the user has approved the Duo Push, the user is redirected back to the Secure Connect remote access headend and device posture is checked by the endpoint posture policy. This can include verification of a certificate being present on the device, OS version, active firewall, active anti-malware software, and disk encryption.
If the user is compliant with the policy, a DTLS tunnel is established with Secure Connect through the AnyConnect VPN module. Identity collected through authentication allows for granular control and visibility. The user can now attempt to access the application. The user’s application traffic is tunneled from their device to Secure Connect through the DTLS tunnel. When traffic reaches Secure Connect, it is evaluated by the L3/L4 firewall policy. If permitted, Secure Connect routes the traffic through an SD-WAN or IPsec tunnel to a device near where the private app is hosted. In this case, the traffic goes through an IPsec tunnel between Secure Connect and a Cisco Catalyst 8500 located at the data center. From the Cat8500, traffic is routed to the application (passing through data center security).
Remote Employee (Trusted Device) to Private Application – Access Granted
The ThousandEyes agent on the managed computer monitors the digital experience to the private application from the user’s perspective. Using the connection already established by the device, the agent collects data about the path including the devices the traffic traverses to get to the application, packet loss, and latency. The agent collects information on the application including page load times, response times, and packet loss. Finally, the agent collects information about the endpoint itself including the network interface configuration, current user, memory and CPU levels at the time of capture, and Wi-Fi strength. These data points are used to provide insights on why the user is experiencing poor performance whether their device is on a company network or not.
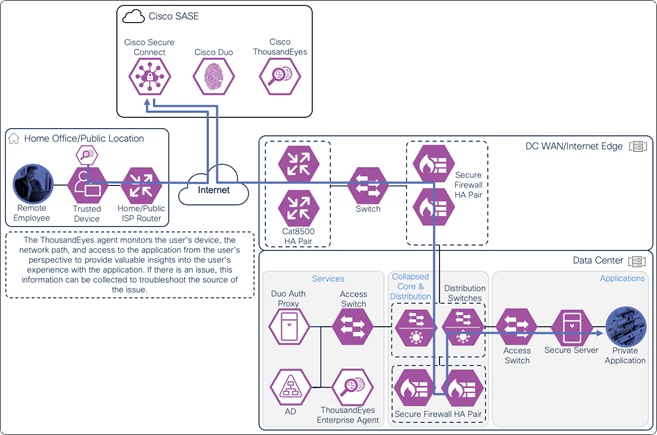
Remote Employee (Trusted Device) to Private Application – Digital Experience Monitoring with ThousandEyes
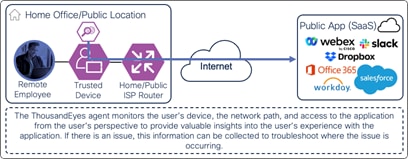
Public Application (SaaS) – Through Secure Connect
Not all the applications a remote employee uses will be located within an environment controlled by the organization. SaaS applications such as Microsoft 365 and Salesforce are increasingly used by the workforce of different organizations but access to both the application and sensitive data held within the application need to be controlled.
In this example, a remote employee with a trusted device needs to access a public application. The device has been provisioned with Cisco Secure Client which has the AnyConnect VPN and Umbrella Roaming Security modules included. To access this application, the user enters the URL for the public application in their browser. There are two similar paths this traffic will take to reach the application through Secure Connect depending on the state of Secure Client.
If the AnyConnect VPN module has established a DTLS tunnel with Secure Connect and is configured in tunnel all mode or in split tunnel mode with IP address routes for the SaaS application or with domain (dynamic) inclusions for the SaaS application’s domains, web and non-web traffic for the SaaS application will be routed through the DTLS tunnel to reach Secure Connect as showed in the diagram below. The user would have needed to authenticate to the Secure Connect remote access headend with SAML before the tunnel was established as seen in Figure 21. The user may also need to log into the SaaS Application.
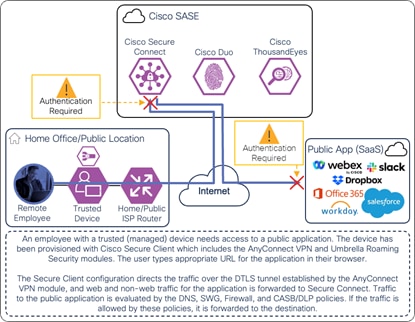
Remote Employee (Trusted Device) to Public Application – Initial Connection with AnyConnect VPN Module
If AnyConnect VPN is connected and SaaS application traffic is excluded from the DTLS tunnel, or the AnyConnect VPN is disconnected, only web traffic for the SaaS application will be routed through the HTTPS proxy to reach Secure Connect as showed in the diagram below. The Umbrella Roaming Security module automatically creates this HTTPS proxy. The user may need to log into the SaaS Application.
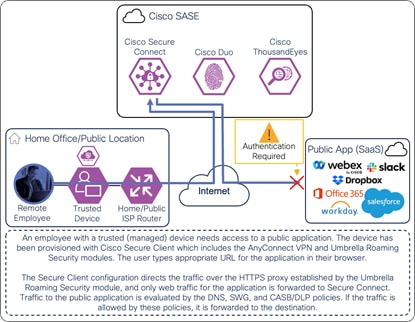
Remote Employee (Trusted Device) to Public Application – Initial Connection with Umbrella Roaming Security Module
Note: Traffic may also be allowed to go directly to the SaaS application, bypassing Secure Connect. This scenario will be covered in the next section. In all scenarios, DNS resolutions will be evaluated by Secure Connect unless a policy is put in place to explicitly not have the Umbrella resolve the domain.
When traffic reaches Secure Connect, it is evaluated by DNS, SWG, and CASB/DLP policies. If traffic is tunneled through the AnyConnect VPN module, the firewall policy will also evaluate non-web traffic. Identity collected through this process allows for granular control and visibility. After evaluation through Umbrella policies, traffic is forwarded to the public application through Secure Connect.
If the public application is configured to authenticate users with SAML, it redirects the user to a SAML Identity Provider (IdP) to identify and authenticate the user. In this example, the user is redirected to Duo SSO which has been setup to query an Active Directory server within the data center to validate the user’s primary credentials. Duo SSO can do this query through the Duo Authentication Proxy which has been setup in the data center. The user enters their primary credentials. When Active Directory has validated the employee’s primary credentials, Duo sends a Duo Push to the user along with an option to use other MFA methods that have been approved for the application. This second factor authentication must be validated before the user can proceed. Duo SSO can also check the posture of the device however that will not be covered in this design guide.

Remote Employee (Trusted Device) to Public Application – SAML Authentication with Duo SSO
Once the user and device have been identified and authenticated, the user is redirected back to the public application and is granted access. Traffic over the connection continues to be monitored by DLP policies. Additionally, out-of-band SaaS DLP policies are enforced on supported platforms.
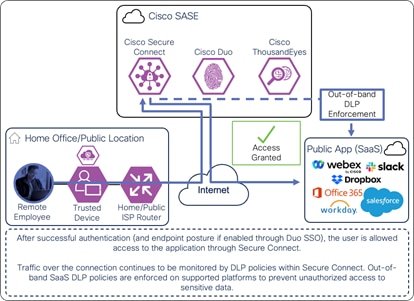
Remote Employee (Trusted Device) to Public Application – Access Granted
The ThousandEyes agent on the managed computer monitors the digital experience to the public application from the user’s perspective. Using the connection already established by the device, the agent collects data about the path including the devices the traffic traverses to get the application, packet loss, and latency. The agent collects information on the application including page load times, response times, and packet loss. Finally, the agent collects information about the endpoint itself including the network interface configuration, current user, memory and CPU levels at the time of capture, and Wi-Fi strength. These data points are used to provide insights on why the user is experiencing poor performance whether their device is on a company network or not.
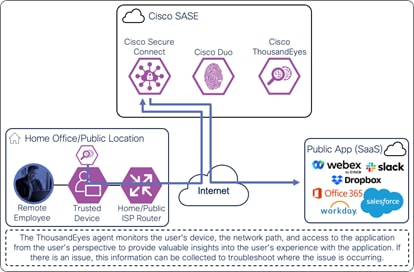
Remote Employee (Trusted Device) to Public Application – Digital Experience Monitoring with ThousandEyes
Public Application (SaaS) – Direct Connection
While decryption and inspection of web traffic to certain domains is valuable from a security perspective, the return in investment for certain SaaS applications may not be worth the added latency that inspection adds to traffic. For example, WebEx encrypts and compresses real-time traffic and there is little benefit decrypting that traffic or forcing that traffic through a VPN tunnel. Additionally, HTTPS inspection can cause performance issues with SaaS applications like Microsoft 365. In scenarios like this, an organization may consider to instead allow remote users to directly connect to that application.
In this example, a remote employee with a trusted device needs to access a public application. The device has been provisioned with Cisco Secure Client which has the AnyConnect VPN and Umbrella Roaming Security modules included. To access this application, the user enters the URL for the public application in their browser.
If SaaS application traffic is excluded from the AnyConnect VPN tunnel and configured to bypass Umbrella security, traffic will go directly to the application as shown in the diagram below.
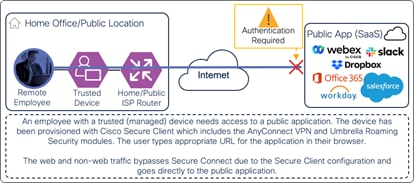
Remote Employee (Trusted Device) to Public Application – Initial Connection with AnyConnect VPN Module
If the public application is configured to authenticate users with SAML, it redirects the user to a SAML Identity Provider to identify and authenticate the user. In this example, the user is redirected to Duo SSO which has been setup to query an Active Directory server within the data center to validate the user’s primary credentials. Duo SSO can do this query through the Duo Authentication Proxy which has been setup in the data center. The user enters their primary credentials. When Active Directory has validated the employee’s primary credentials, Duo sends a Duo Push to the user along with an option to use other MFA methods that have been approved for the application. This second factor authentication must be validated before the user can proceed. Duo SSO can also check the posture of the device however that will not be covered in this design guide.

Remote Employee (Trusted Device) to Public Application – SAML Authentication with Duo SSO
Once the user and device have been identified and authenticated, the user is redirected back to the public application and is granted access. Traffic over the connection continues to be monitored by DLP policies within Secure Connect. Additionally, out-of-band SaaS DLP policies are enforced on supported platforms.
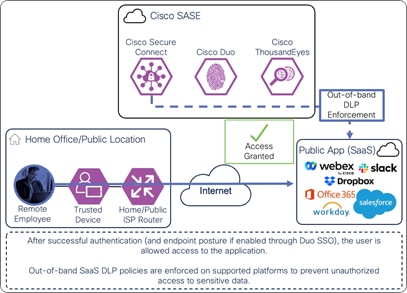
Remote Employee (Trusted Device) to Public Application – Access Granted
The ThousandEyes agent on the managed computer monitors the digital experience to the public application from the user’s perspective. Using the connection already established by the device, the agent collects data about the path including the devices the traffic traverses to get the application, packet loss, and latency. The agent collects information on the application including page load times, response times, and packet loss. Finally, the agent collects information about the endpoint itself including the network interface configuration, current user, memory and CPU levels at the time of capture, and Wi-Fi strength. These data points are used to provide insights on why the user is experiencing poor performance whether their device is on a company network or not.
Remote Employee (Trusted Device) to Public Application – Digital Experience Monitoring with ThousandEyes
Internet – Through Secure Connect
In addition to SaaS applications, users may access Internet resources on their device. This could include HTTP/HTTPS based resources like Wikipedia or Netflix. It could also include non-web resources like peer-to-peer traffic.
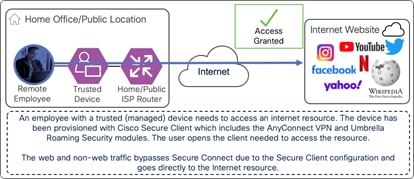
In this example, a remote employee with a trusted device needs to access an internet resource. The device has been provisioned with Cisco Secure Client which has the AnyConnect VPN and Umbrella Roaming Security modules included. The user opens the client needed to access the resource.
If the AnyConnect VPN module has established a DTLS tunnel with Secure Connect and is configured in tunnel all mode or in split tunnel mode with IP address routes for the Internet resource or with domain (dynamic) inclusions for the Internet resource’s domains, web and non-web traffic for the resource will be routed through the DTLS tunnel to reach Secure Connect as showed in the diagram below. The user would have needed to authenticate to the Secure Connect remote access headend with SAML before the tunnel was established as seen in Figure 21.
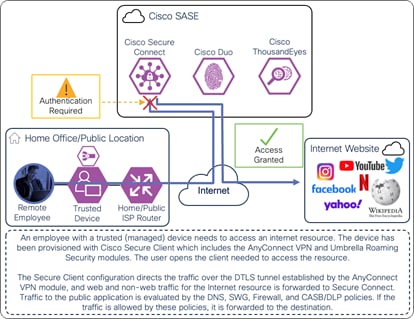
Remote Employee (Trusted Device) to Internet Resource – Initial Connection with AnyConnect VPN Module
If the AnyConnect VPN module is connected and traffic from the Internet resource is excluded from the DTLS tunnel, or the AnyConnect VPN module is disconnected, only web traffic for the Internet resource will be routed through the HTTPS proxy to reach Secure Connect as showed in the diagram below. The Umbrella Roaming Security module automatically creates this HTTPS proxy.
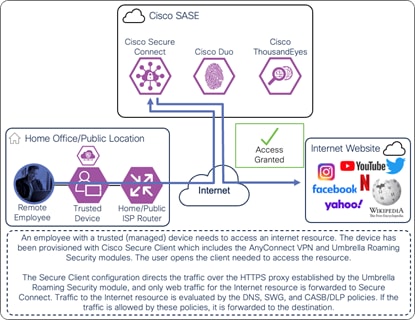
Remote Employee (Trusted Device) to Internet Resource – Initial Connection with Umbrella Roaming Security Module
Note: Traffic may also be allowed to go directly to the Internet resource, bypassing Secure Connect. This scenario will be covered in the next section. In all scenarios, DNS resolutions will be evaluated by Secure Connect unless a policy is put in place to explicitly not have the Umbrella resolve the domain.
When traffic reaches Secure Connect, it is evaluated by DNS, SWG, and CASB/DLP policies. If traffic is tunneled through the AnyConnect VPN module, the firewall policy will also evaluate non-web traffic. Identity collected through this process allows for granular control and visibility. If access to the application is allowed and no malicious activity is detected that traffic is forwarded to the Internet resource through Secure Connect. Traffic over the connection continues to be monitored by DLP policies within Secure Connect.
The ThousandEyes agent on the managed computer monitors the digital experience to the Internet resource from the user’s perspective. Using the connection already established by the device, the agent collects data about the path including the devices the traffic traverses to get the application, packet loss, and latency. The agent collects information on the application including page load times, response times, and packet loss. Finally, the agent collects information about the endpoint itself including the network interface configuration, current user, memory and CPU levels at the time of capture, and Wi-Fi strength. These data points are used to provide insights on why the user is experiencing poor performance whether their device is on a company network or not.
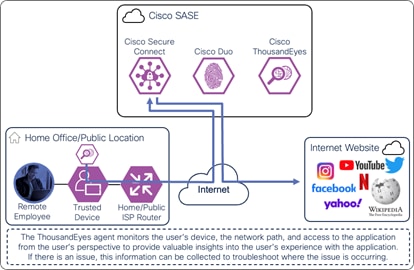
On-prem Employee (Trusted Device) to Internet Resource – Digital Experience Monitoring with ThousandEyes
For low-risk Internet resources, an organization may consider bypassing sending this traffic to Secure Connect for evaluation.
In this example, a remote employee with a trusted device needs to access an internet resource. The device has been provisioned with Cisco Secure Client which has the AnyConnect VPN and Umbrella Roaming Security modules included. The user opens the client needed to access the resource.
If traffic from the Internet resource is excluded from the AnyConnect VPN tunnel and bypasses Umbrella security altogether, traffic will go directly to the resource as shown in the diagram below.
On-prem Employee (Trusted Device) to Internet Resource – Access Granted
The ThousandEyes agent on the managed computer monitors the digital experience to the Internet resource from the user’s perspective. Using the connection already established by the device, the agent collects data about the path including the devices the traffic traverses to get the application, packet loss, and latency. The agent collects information on the application including page load times, response times, and packet loss. Finally, the agent collects information about the endpoint itself including the network interface configuration, current user, memory and CPU levels at the time of capture, and Wi-Fi strength. These data points are used to provide insights on why the user is experiencing poor performance whether their device is on a company network or not.
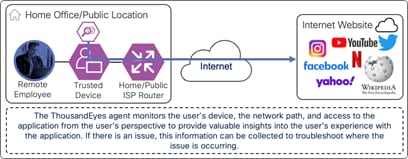
On-prem Employee (Trusted Device) to Internet Resource – Digital Experience Monitoring with ThousandEyes
This section expands on the secure edge business flows, detailing the process an employee located at a branch would go through to access resources on and off the network. Like secure remote worker, the capabilities within the Secure Edge flows allow for secure access to internal and external resources, including private applications within the data center or IaaS, or other branch sites, public SaaS applications, and internet websites. Organizations may leverage additional security controls for on-premises employees to identify users and implement segmentation on user traffic. Sites with Meraki MX appliances can be integrated with Active Directory to restrict access to the network based on AD member groups. For sites using Catalyst 8000 edge platforms, users can be identified through methods such as 802.1x and TrustSec can be used to restrict access to the network based on a centralized identity access policy. These additional controls go further to enforce a zero trust policy while on the network. This topic is out of scope for this design guide.
Private Application (Branch to DC/IaaS)
Despite the increasing amount workforce traffic accessing public applications on the Internet, for organizations hosting their own applications there is still a need to provide and secure access to these private applications. Firewall policies can be put in place to limit L3/L4 access to these applications and services.
In this example, an on-prem employee with a trusted device requires access to an application located within the data center. The device has been provisioned with Cisco Secure Client which has the AnyConnect VPN and Umbrella Roaming Security modules included. The user opens the client needed to access the resource.
The traffic is routed to the SD-WAN edge router which is configured to forward the traffic to Secure Connect over an IPsec or SD-WAN tunnel. In this example, the SD-WAN edge routers are MX250s configured for high availability. The traffic is evaluated by the firewall policy. Identity collected through this process allows for granular control and visibility. Based on the firewall policy, the user is given access to only the resources needed for their role. The user’s traffic is then tunneled through an SD-WAN or IPsec tunnel to a device near where the private app is hosted. In this case, the traffic goes through an IPsec tunnel between Secure Connect and a Cisco Catalyst 8500 located at the data center. From the Cat8500, traffic is routed to the application (passing through data center security).
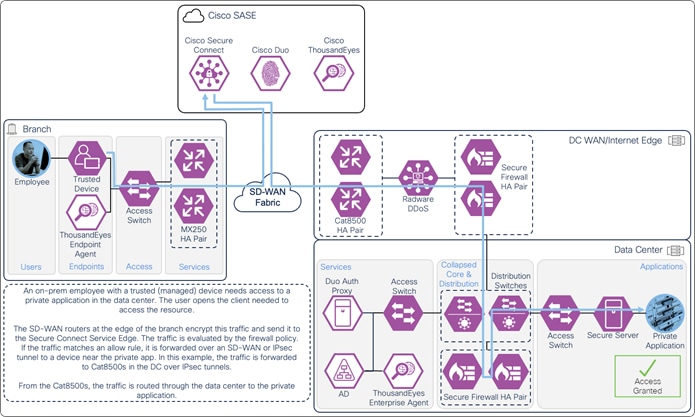
On-prem Employee (Trusted Device) to Private Application – Secure Access through Secure Connect
A ThousandEyes enterprise agent located on the user subnet monitors the digital experience to the private application from the user’s perspective. The agent traverses the same path to the application using the same DNS, routing, and firewall policies. The agent collects data about the path including the devices the traffic traverses to get the application, packet loss, latency, and bandwidth. The agent collects information on the application including page load times, response times, and packet loss. The agent can also test access to network critical resources like DNS as well as perform agent to agent tests to detect issues along a network path. These data points are used to provide insights on why users are experiencing poor performance when their device on at the branch.
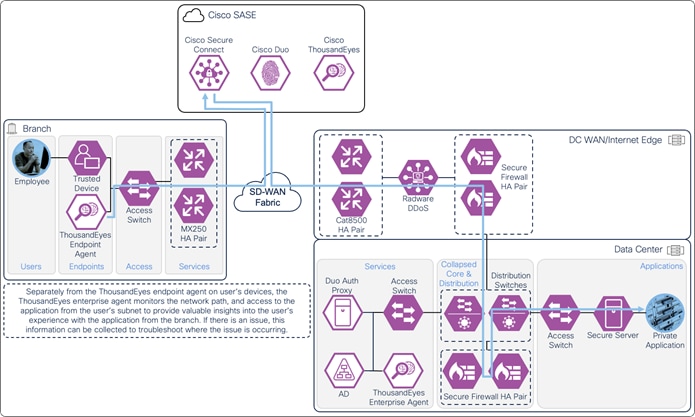
On-prem Employee (Trusted Device) to Private Application – Digital Experience Monitoring with ThousandEyes
Organizations have seen a shift in the amount of traffic needing to go to the Internet. No longer is it likely that most of an organization’s workforce traffic will go to the data center. This is because of the shift to cloud-based applications and services such as Microsoft 365 and Salesforce. Despite this, it is still important that security is enforced on these use cases without compromising the user experience for these applications.
In this example, an on-prem employee with a trusted device requires access to a public application. The device has been provisioned with Cisco Secure Client which has the AnyConnect VPN and Umbrella Roaming Security modules included. To access this application, the user enters the URL for the public application in their browser.
The traffic is routed to the SD-WAN edge router which is configured to forward the traffic to Secure Connect over an IPsec or SD-WAN tunnel. In this example, the SD-WAN edge routers are MX250s configured for high availability. Identity collected through this process allows for granular control and visibility. The traffic is evaluated by the DNS, SWG, CASB/DLP, and Firewall policies. After evaluation through Umbrella policies, traffic is forwarded to the public application through Secure Connect.
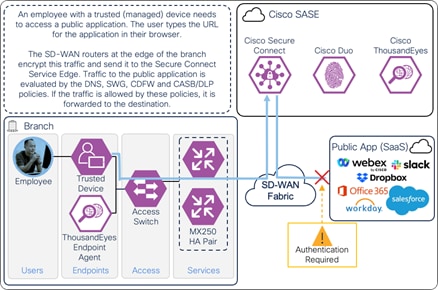
On-Prem Employee (Trusted Device) to Public Application – Connection though Secure Connect
If the public application is configured to authenticate users with SAML, it redirects the user to a SAML Identity Provider to identify and authenticate the user. In this example, the user is redirected to Duo SSO which has been setup to query an Active Directory server within the data center to validate the user’s primary credentials. Duo SSO can do this query through the Duo Authentication Proxy which has been setup in the data center. The user enters their primary credentials. When Active Directory has validated the employee’s primary credentials, Duo sends a Duo Push to the user along with an option to use other MFA methods that have been approved for the application. This second factor authentication must be validated before the user can proceed. Duo SSO can also check the posture of the device however that will not be covered in this design guide.

On-Prem Employee (Trusted Device) to Public Application – SAML Authentication with Duo SSO
Once the user and device have been identified and authenticated, the user is redirected back to the public application and is granted access. Traffic over the connection continues to be monitored by DLP policies within Secure Connect. Additionally, out-of-band SaaS DLP policies are enforced on supported platforms.
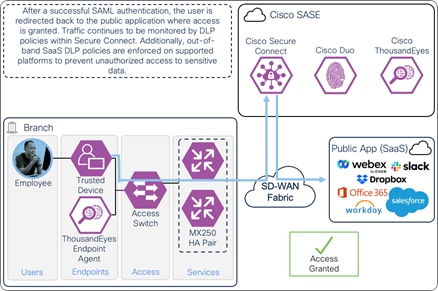
On-Prem Employee (Trusted Device) to Public Application – Access Granted
A ThousandEyes enterprise agent located on the user subnet monitors the digital experience to the Internet resource from the user’s perspective. The agent traverses the same path to the resource using the same DNS, routing, firewall, and web policies. The agent collects data about the path including the devices the traffic traverses to get the application, packet loss, latency, and bandwidth. The agent collects information on the application including page load times, response times, and packet loss. The agent can also test access to network critical resources like DNS as well as perform agent to agent tests to detect issues along a network path. These data points are used to provide insights on why users are experiencing poor performance when their device on at the branch.
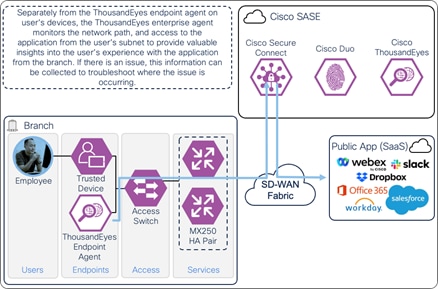
On-Prem Employee (Trusted Device) to Internet – Digital Experience Monitoring with ThousandEyes
In addition to SaaS applications, users may access Internet resources on their device. This could include HTTP/HTTPS based resources like Wikipedia or Netflix. It could also include non-web resources like peer-to-peer traffic.
In this example, an on-prem employee with a trusted device requires access to an Internet resource. The device has been provisioned with Cisco Secure Client which has the AnyConnect VPN and Umbrella Roaming Security modules included. The user opens the client needed to access the resource.

On-Prem Employee (Trusted Device) to Internet – Connection through Secure Connect
The traffic is routed to the SD-WAN edge router which is configured to forward the traffic to Secure Connect over an IPsec or SD-WAN tunnel. In this example, the SD-WAN edge routers are MX250s configured for high availability. The traffic is evaluated by DNS, SWG, CASB/DLP, and Firewall policies. If access to the application is allowed and no malicious activity is detected that traffic is forwarded to the Internet resource through Secure Connect. Traffic over the connection continues to be monitored by DLP policies within Secure Connect.
A ThousandEyes enterprise agent located on the user subnet monitors the digital experience to the Internet resource from the user’s perspective. The agent traverses the same path to the resource using the same DNS, routing, firewall, and web policies. The agent collects data about the path including the devices the traffic traverses to get the application, packet loss, latency, and bandwidth. The agent collects information on the application including page load times, response times, and packet loss. The agent can also test access to network critical resources like DNS as well as perform agent to agent tests to detect issues along a network path. These data points are used to provide insights on why users are experiencing poor performance when their device on at the branch.
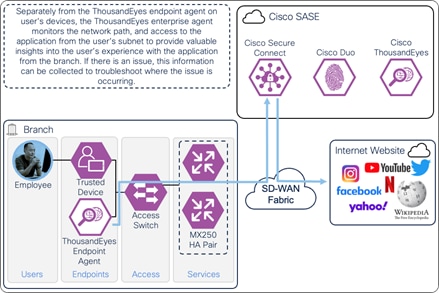
On-Prem Employee (Trusted Device) to Internet – Digital Experience Monitoring with ThousandEyes
Cisco SASE with Secure Connect Deployment
Lee is a hybrid worker who requires access to multiple resources to do their job. Some of these resources are hosted within the organization’s data center, such as the private application WordPress. Most resources are located on the Internet, including the SaaS application Microsoft 365. As a hybrid worker, Lee may work from a branch office or from offsite locations such as their home or coffee shop. Regardless of their location, it is important that Lee accesses these resources in a secure manner without compromising company or customer data.

Lee’s organization would like to migrate from their traditional networking architecture where most network traffic goes through their data center. Analysis of traffic patterns indicate that most of their workforces’ traffic is being backhauled through the data center infrastructure and most of this traffic is destined to the Internet. Help desk is seeing an increase in the number of users complaining about slow performance, especially for applications that have been moved to IaaS environments or for cloud-based SaaS services that have replaced previously on-premises services. The concern is security.
Network traffic is currently secured by on-premises security devices like firewalls and web proxies. On-prem firewalls at each branch enforce L3/L4 policies on traffic traversing different sites. As more sites have been built, the process of updating the firewall policy at each site has become complicated and time consuming due to separate policy management consoles for each appliance. Even worse are the maintenance windows required for software or hardware updates. Some of the organization’s workforce handle sensitive customer credit card information and sending network traffic through the data center allowed the organization to inspect the traffic with DLP policies. The organization is also concerned with loss of visibility – by having traffic go through their data center there was visibility into the applications and services used by the workforce and access to these applications could be controlled. With the move to more cloud-based applications, control to data stored on these applications was already being lost.
The organization would like to move to a SASE design that accomplishes the following goals:
● The ability to enforce DNS, web, firewall, and DLP security policies on Internet traffic without the need to backhaul this traffic through the organization’s data center
● Allow users to access sanctioned SaaS applications like Microsoft 365 directly but still enforce DLP policies on data stored within that application
● Secure access to private applications like WordPress across multiple locations while simplifying management of firewall policies
● Provide secure remote access options for permitted employees to access private applications like WordPress
● Give visibility into applications used by the workforce and provide the ability to prioritize control for those applications based on risk to the organization
● The ability to troubleshoot application performance issues that impact the digital experience for users on and off the network and be proactive with increased visibility into network flows
To meet these goals, the organization will be deploying Cisco SASE.
This deployment section can be followed linearly to accomplish the capabilities outlined in the Cisco SASE with Secure Connect Design section. Required platforms, platform capabilities, and licensing are listed in the Product Overview section. Set up is broken down into the following sections:
● Initial Set Up: Syncing Umbrella to the Secure Connect account and integration. This section will cover some Umbrella based configuration that will be used throughout the guide
● Establish Connections: To secure private, public, and internet resources traffic is sent to the Secure Connect cloud. This section will cover establishing connections to the Secure Connect Cloud from branches, the data center, and remote users
● Private Application Access: Access between locations is denied by default. This section will cover permitting traffic between sites, setting up ZTNA, and providing access to private applications.
● Secure Internet Access: This section will cover setting up and enforcing policies for traffic going to public applications (SaaS) and other Internet resources
● Digital Experience Monitoring: ThousandEyes agents will be setup on user’s managed devices and in different locations of the network to monitor performance to the applications and resources needed by users
This section will fulfill initial prerequisites for Secure Connect as well as the enabling of some optional but highly encouraged features.
Setting up Cisco Meraki and Cisco Umbrella Accounts
Before Secure Connect can be used, it will be necessary to set up and connect your Cisco Meraki and Cisco Umbrella Accounts. There are four potential scenarios with links explaining this process:
● I am a new Cisco Meraki and a new Cisco Umbrella customer
● I am an existing Cisco Meraki customer, but a new Cisco Umbrella customer
● I am an existing Cisco Umbrella customer, but a new Cisco Meraki customer
● I am an existing Cisco Meraki and an existing Cisco Umbrella customer
While these guides also go over the Automatic Key Exchange to link Meraki and Umbrella accounts, in this design guide the manual method is used in order to have the API Keys and Secrets necessary to integrate Umbrella with SecureX. The steps for getting these API keys can be found here.
Once the accounts have been synced, there are additional steps that can be taken to enhance the experience with Secure Connect. While optional, they are recommended:
● Admin User Management – Secure Connect provides the option to allow multiple administrators to manage the system as well as syncing administrative accounts between the Meraki and Umbrella dashboards to provide a unified experience. Several features will require interacting with both dashboards. Syncing accounts allows administrators to login once
● SecureX Sign On Setup – SecureX Sign On (now Security Cloud Sign On) is an authentication method for simplified access into the Secure Connect and Umbrella dashboards, as well as any other Cisco security products
SecureX provides cloud-based unified visibility and SSO capabilities with products in the Cisco security portfolio and 3rd party products. By integrating Umbrella with SecureX, we can use the data to create Dashboards that show high level statistics, utilize data from products within Threat Response to simplify incident analysis, compile an inventory of assets within Device Insights, and much more. The capabilities of SecureX, such as threat response and the dashboard ribbon can be explored further in the Cisco Breach Defense Design guide.
Step 1. After accessing the Umbrella Dashboard, copy the Organization ID within the URL. This is the value from the Umbrella browser URL between /o/ and /#/. This will be used for the Umbrella Organization ID field in SecureX.
![]()
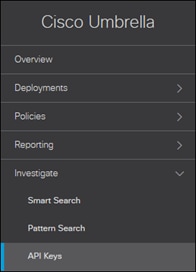
Step 2. In the Umbrella Dashboard, navigate to Investigate > API Keys.
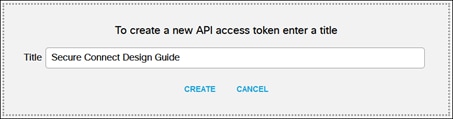
Step 3. Click Create New Token.

Provide an appropriate name for the API Key then click Create.
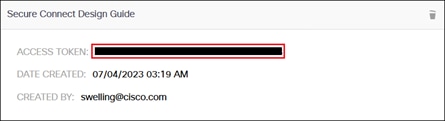
Copy and save the Access Token value for later. This will be used for the Umbrella Investigate API Token in SecureX.
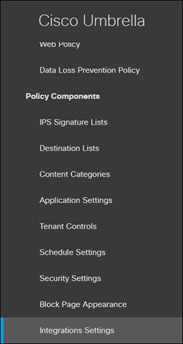
Step 4. In the Umbrella Dashboard, navigate to Policies > Policy Components > Integrations Settings.
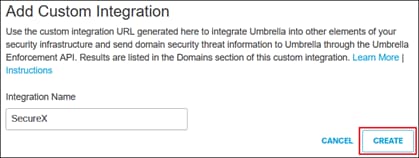
Step 5. Click Add.

Step 6. Provide an appropriate name then click Create.
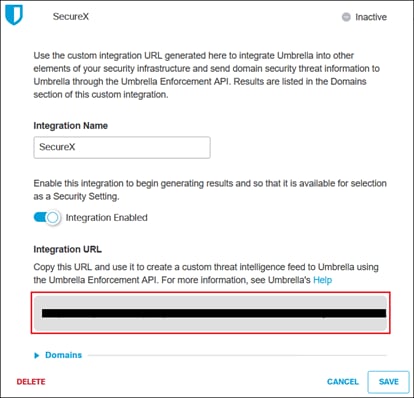
Step 7. Click the newly created integration.
![]()
Click the checkbox next to Enable, copy and save the Integration URL, then click Save. The URL will be used for the Umbrella Enforcement Custom Umbrella Integration URL in SecureX.
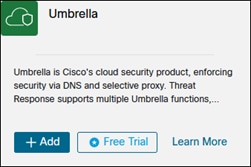
Step 8. In the SecureX Dashboard, navigate to Integration Modules > Available Integration Modules.

Step 9. Find Umbrella from the available integrations then click Add.
Step 10. In the Organization ID field, paste the value obtained in step 1.
Step 11. In the Investigate API Token field, paste the value obtained in step 3.
Step 12. In the Enforcement Custom Umbrella Integration URL field, paste the value obtained in step 7.
Step 13. In the Reporting API Key and API Secret fields, paste the Key and Secret values obtained when connecting your Cisco Meraki and Cisco Umbrella Accounts.
Step 14. In the Management API Key and API Secret fields, paste the Key and Secret values obtained connecting your Cisco Meraki and Cisco Umbrella Accounts.
Step 15. In the Network Devices & Policies API Key and API Secret fields, paste the Key and Secret values obtained connecting your Cisco Meraki and Cisco Umbrella Accounts.
Step 16. Click Save.
SAML will be used for the multiple aspects of the design including:
● Private and Public Application Authentication
● Client-based Remote Access Authentication
● Client-less ZTNA Authentication
While Secure Connect has a built-in SAML IdP that can be used for client-based remote access and clientless ZTNA authentication, this design guide will use Duo SSO to take advantage of SAML/SSO features for public and private application authentication as well. In addition to this, Duo provides additional device posture capabilities to control access to these applications. For more information about setting up a SAML IdP for Secure Connect, including the built in SAML IdP, reference Secure Connect - Identity Provider (IdP) Setup.
Steps for setting up Duo SSO and SAML authentication for Public and Private Applications are out of scope for this design guide, however the Cisco Zero Trust User and Device Guide can be referenced for these. This guide will pick up from the perspective of a completed Duo SSO setup where Duo SSO is configured to authenticate user’s primary credentials against AD and where the public application (Microsoft 365) is configured to use Duo SSO as a SAML IdP for user authentication. For the purposes of validating Secure Connect in this design guide, no Duo device posture features will be used. Only device posture built into Secure Connect will be used and validated.
Step 1. A new protected application will need to be created within Duo for Secure Connect. From the Duo Admin Panel, navigate to Applications.

Step 2. Click Protect an Application.

Step 3. Search for “Cisco Umbrella” and click Protect beside the Cisco Umbrella (End Users) option.

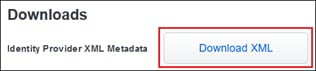
Step 4. Download the Duo SSO Identity Provider XML Metadata. This will be imported into Secure Connect.
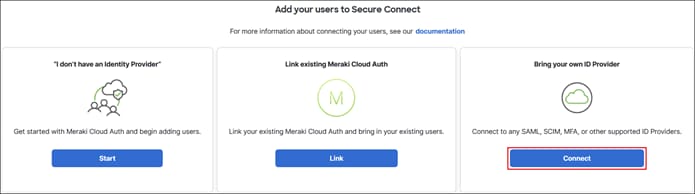
Step 5. From the Secure Connect dashboard, navigate to Secure Connect > Identities & Connections > Users.

Step 6. Click Connect under Bring your own ID Provider.
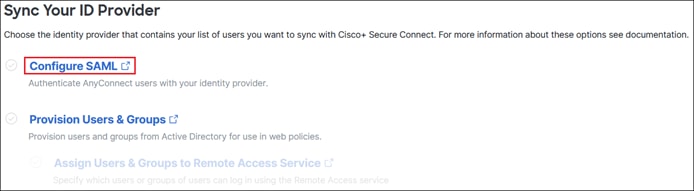
Step 7. Click Configure SAML.
Step 8. Click Add near the top right.

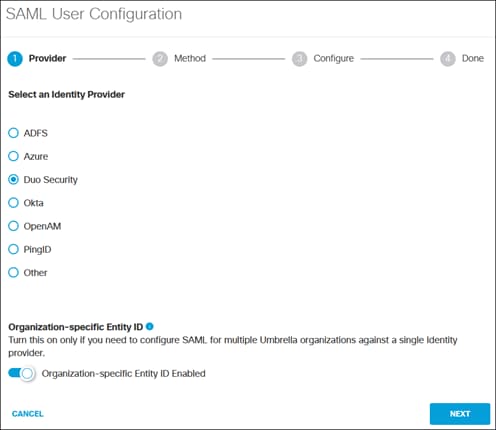
Step 9. In the Provider section, click the option from the SAML provider used. In this design guide, Duo Security is used. Additionally, enable Organization-specific Entity ID. Click Next.
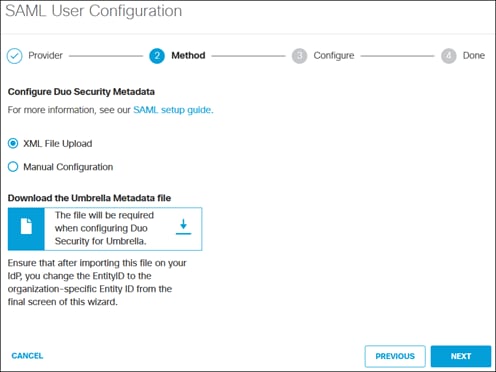
Step 10. Leave the defaults for the Method section. There is an option to upload Duo’s XML metadata or manually type it. Since the XML metadata was downloaded in step 4, the upload method will be used. Additionally, you can download the Umbrella XML metadata file, but it isn’t necessary for configuration in Duo. Click Next.
Step 11. In the Configure section, select the Duo XML metadata file obtained in step 4.

The uploaded XML file will be seen.

Once complete, click Next.
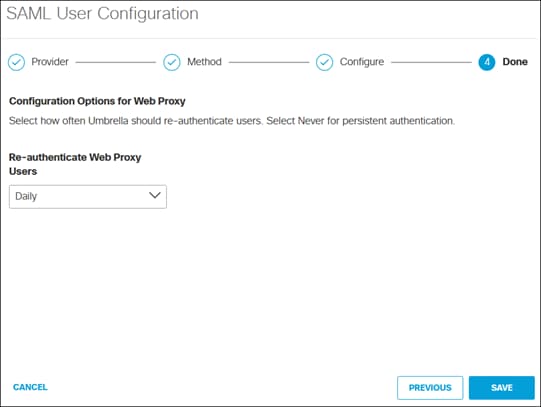
Step 12. In the Done section, specify how often users should be reauthenticated for Secure Connect features using SAML. Click Save.
Step 13. Copy the Organization ID within the Umbrella Entity ID.
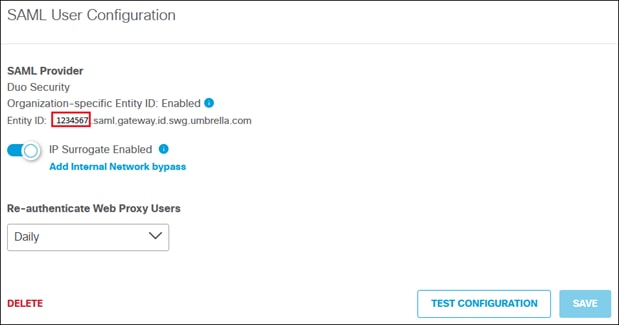
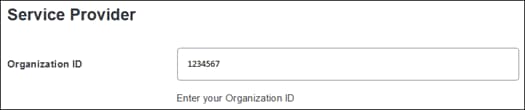
Step 14. Pivot to the Duo Admin Panel where the Secure Connect application was recently created. Paste the Organization ID in the Organization ID field.
Step 15. Select any additional options for the protected Secure Connect Application. In this design guide, no additional device posture features were selected to verify native device posture features within Secure Connect. Click Save.
Step 16. Navigate back to the SAML Configuration page in the Umbrella Dashboard and click Test Configuration to make sure SAML authentication works.
Umbrella uses identities to match users and devices to rules. Identities can be broad (all traffic coming from a site) or granular (individual users). This section will cover the provisioning of AD User and Groups, as well as Internal Networks to identify devices like ThousandEyes that will be used in the network. Later in this design guide, broader identifies will be made available through the establishment of SD-WAN/IPsec tunnels between sites and the Secure Connect Cloud.
AD Users and Group
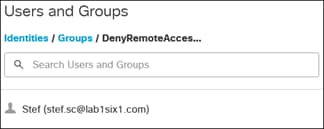
To enable the use of user and group identities for restricting access to resources, the identities must first be imported from an Identity Server. In this design guide, users and groups are imported from Microsoft AD, however other identity server sources are supported including Microsoft Entra ID (formally Azure AD), Okta, G Suite, and other SCIM IdPs. Identities can also be manually imported. These identities will then be used within the DNS, SWG, Firewall and CASB/DLP policies introduced later within this design guide. For more information on user and group identities, reference the Identity Integrations. For validation in this design guide, two AD groups will be imported into Umbrella. Each group will have one user. Lee is a part of the Employees group and Stef is a part of the DenyRemoteAccess group. Later, remote access will be configured to only allow Lee access to this service.
Note: In this design guide, the Identity Support for Roaming Client feature is used to collect the user’s identity. To do this, the Secure Client Umbrella Roaming Security module must be installed on a computer joined to the AD domain. On a domain joined computer, Umbrella can collect information on the user logged in to the managed device and provide that identity for matching rulesets and policies. Otherwise, only the hostname of the device will be collected (known as the Roaming Client identity). Installation of the Umbrella Roaming Security module will be covered in a later section of this guide. Umbrella supports the collection of user identity using the SAML integration feature as well, but this is not supported for roaming clients.
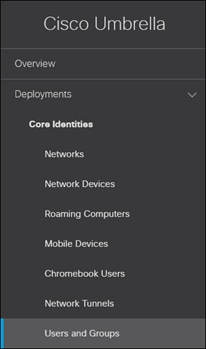
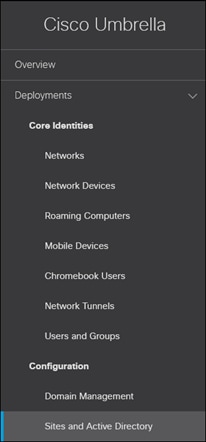
Step 1. From the Umbrella Dashboard, navigate to Deployments > Core Identities > Users and Groups. From the Meraki dashboard, you can go to Secure Connect > Settings > Additional Configurations then go to Deployments > Core Identities > Users and Groups.
Step 2. Expand the dropdown within the Active Directory section and click Sites and Active Directory.

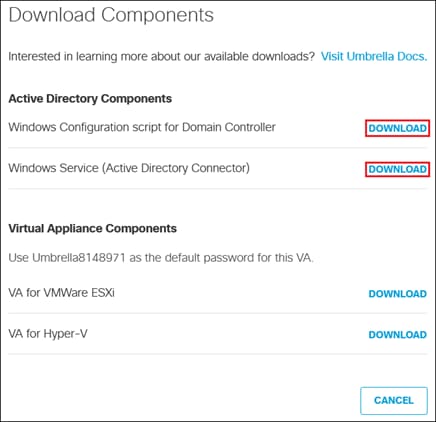
Step 3. Click Download in the top right corner.

Step 4. Download the Windows Configuration script for Domain Controller and Windows Service (Active Directory Connector) files.
Step 5. Transfer both files to the AD server.
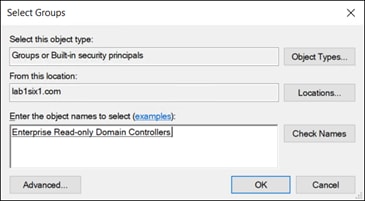
Step 6. Create a service account with the login name OpenDNS_Connector for the purpose of obtaining and updating the user and group identities in Secure Connect. The password for this account should be set to never expire and should have Read and Replicating Directory Changes permissions assigned.
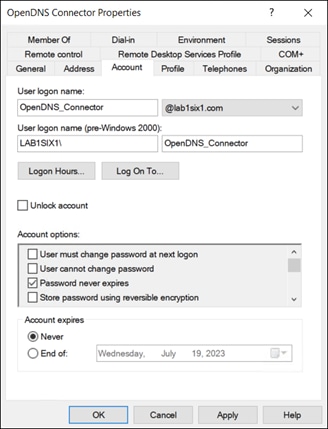
In this design guide, the service account is added to the built-in Enterprise Read-only Domain Controllers group to automatically assign these permissions.
Step 7. Register the AD domain controller using the Windows Configuration Script downloaded in step 4. This can be done with the command cscript [configuration script name]. Enter the character ‘y’ when prompted to start registration.
C:\Users\admin\Desktop>cscript OpenDNS-WindowsConfigurationScript-2023-05-16.wsf
Microsoft (R) Windows Script Host Version 5.812
Copyright (C) Microsoft Corporation. All rights reserved.
The System OS received from system : Microsoft Windows Server 2022 Datacenter
The OS version received from system : 10.0.20348
This is a Windows Server 2016 forest.
Testing configuration...
Full Computer Domain : DC=lab1six1,DC=com
RDC Permissions Set: True
ELR Group Domain : CN=Event Log Readers,CN=Builtin,DC=lab1six1,DC=com
OpenDNS_Connector member of Group DN : CN=Enterprise Read-only Domain Controllers,CN=Users,DC=lab1six1,DC=com
OpenDNS_Connector member of Group DN : CN=Event Log Readers,CN=Builtin,DC=lab1six1,DC=com
***********************************************
Local Platform Configuration
Local OS: Microsoft Windows Server Datacenter
Functional Level: Server 2016 Forest
Local IP: 10.50.4.12
Domain: lab1six1.com (LAB1SIX1)
Label: GL-AD1
Firewall Enabled: True
Remote Admin Enabled: True
AD User Exists: True
RDC Permissions Set: True
Manage Event Log Policy Set: False
Event Log Readers MemberOf: True
***********************************************
Domain Controller is fully configured!
Would you like to register this Domain Controller (y or n)? y
Registering Domain Controller in cloud...
Register Success!
Updating DC status in cloud...
Update success!
Step 8. (Optional) Limit the users and groups that will be added to Secure Connect by creating a file called CiscoUmbrellaADGroups.dat file in the C:\ drive of the AD server where the connector will be installed. In this file, list the AD groups that should be included in distinguished name format.
CN=Employees,OU=Groups,OU=Secure_Connect,DC=lab1six1,DC=com
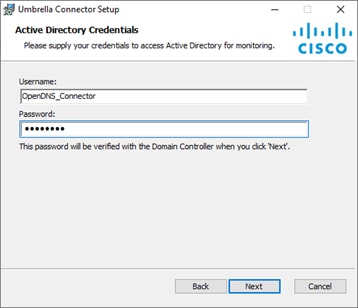
Step 9. Unzip the Windows Server (Active Directory Connector) zip file downloaded in step 4 and Install the Connector by executing the setup.msi. Follow the prompts in the setup wizard, making sure to add the connector account created in step 6 and the password defined for that account. Click Close when finished.
Note: The connector service does not have to be installed on a domain controller. It can be installed on any Windows server that is a member of the domain. In this design guide, it is installed on the domain controller.
Step 10. Once installation is complete, navigate back to the Site and Active Directory page in the Umbrella dashboard and verify that the status of both the Domain Controller and AD Connector is active and green. The domain controller should change from Inactive to Active after some time depending on the number of groups and users that need to be synced.

Step 11. In the Umbrella dashboard, navigate to Deployments > Configuration > Sites and Active Directory.
Step 12. Verify the Active Directory section shows it has synced users and groups and is Enabled.
![]()
Step 13. Click View Users & Groups in the top right.

Step 14. Verify which users and groups have been imported by clicking on the appropriate fields.
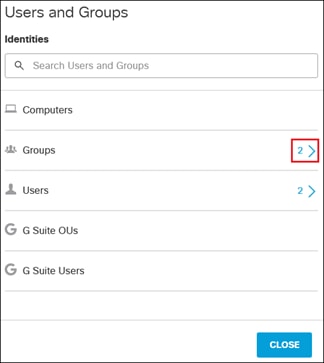
Expanding the Group field shows the Employees and DenyRemoteAccess groups have been successfully imported into Umbrella.
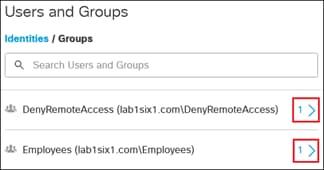
Expanding Employees group shows the users associated with that group.

Expanding DenyRemoteAccess group shows the users associated with that group.
Internal Networks
While user and groups identities can be imported, certain devices cannot be identified the same way. This may include network or IoT devices. To be able to identify these devices within Umbrella, the Internal Network identity can be used to track these devices. Umbrella looks at the device’s IP address and maps it to a preconfigured Internal Network identity. From there, the identity of the device can be added to rules. For more information on Internal Network, reference the Internal Networks Setup Guide.
In this design guide, the Internal Networks identity will be used to identify the ThousandEyes Enterprise agent at the branch site. The agent will be assigned a static IP address so that Umbrella can continue to map it to the preconfigured Internal Network identity. With this Internal Network identity, the ThousandEyes Enterprise agent can be added to the same security policies enforced on user traffic and tests performed by the agent will reflect the same user experience.
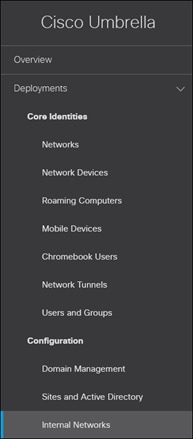
Step 1. From the Umbrella Dashboard, navigate to Deployments > Configuration > Internal Networks.
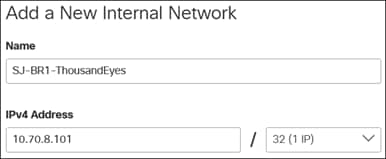
Step 2. Click Add near the top right.

Step 3. Specify a Name for the network, IPv4 Address and subnet mask.
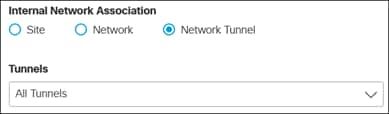
Step 4. Select the Internal Network Association. For this design guide, Network Tunnel is selected and All Tunnels under the Tunnel dropdown menu. Umbrella will be able to identify the ThousandEyes Enterprise Agents assigned a static address and apply the same web ruleset applied to user traffic.
Step 5. Click Save.
Download Umbrella Root Certificate
The Umbrella Root CA certificate needs to be trusted on all the devices whose traffic will be proxied by Umbrella, otherwise these users and devices will see untrusted server warnings when accessing resources on the internet. This includes managed devices and ThousandEyes Enterprise agents in this design guide.
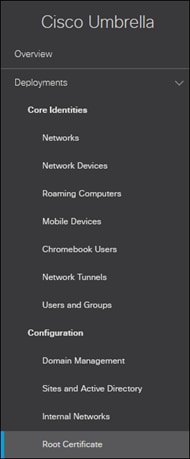
Step 1. From the Umbrella dashboard navigate to Deployments > Configuration > Root Certificate.
Step 2. Expand Cisco Root Certificate Authority.

Step 3. Download the Cisco Umbrella Root CA certificate.
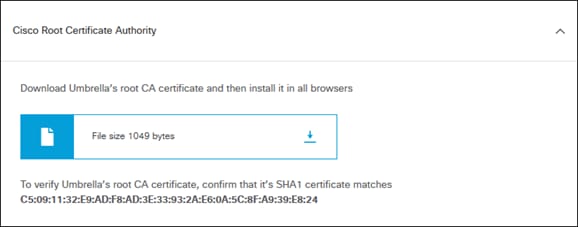
Step 4. The Umbrella Root CA certificate will need to be trusted on the managed devices and ThousandEyes to successfully proxy web traffic without issues. Importing the CA certificate to ThousandEyes Endpoint Agents will be covered in the Digital Experiencing Monitoring section of this design guide. For Windows devices, the Umbrella Root CA certificate will need to be imported into the local machine’s Trusted Root Certification Authorities folder. This can be accomplished through methods such as an MDM or Active Directory GPOs. For information on importing the Umbrella Root CA Certificate using Active Directory GPOs and other methods, reference Install the Cisco Umbrella Root Certificate. Upload the Umbrella Root CA to the user’s machine.
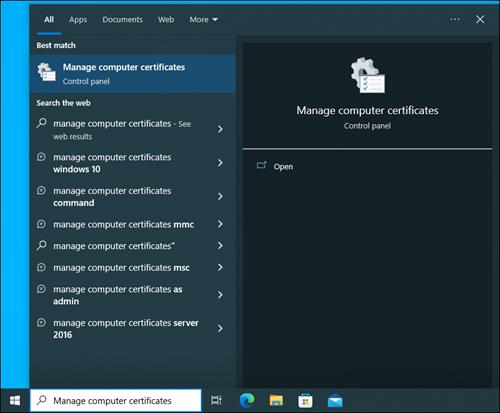
Step 5. Type Manage computer certificates in the Windows search box and click Manage Computer Certificates. Admin privileges will be required.
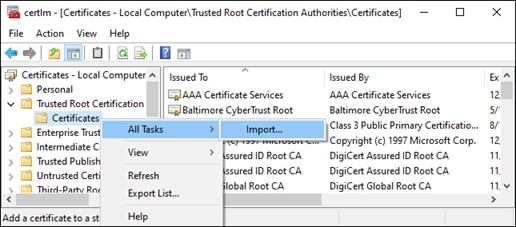
Step 6. In certlm, navigate to Personal > Certificates. Right-click on the Certificate folder and go to All Tasks > Import….
Step 7. Click Next on the Welcome to the Certificate Import Wizard window.
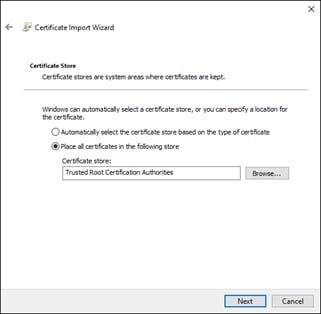
Step 8. Click Browse to locate and select the Umbrella Root CA certificate. Click Next.
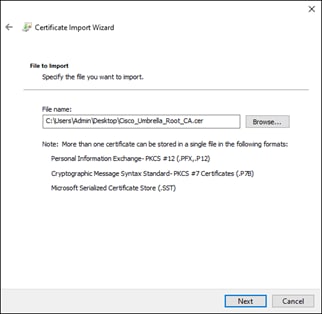
Step 9. Use the default location which should be the Trusted Root Certification Authorities store of the local machine. Click Next.
Step 10. Click Finish on the final page of the wizard.
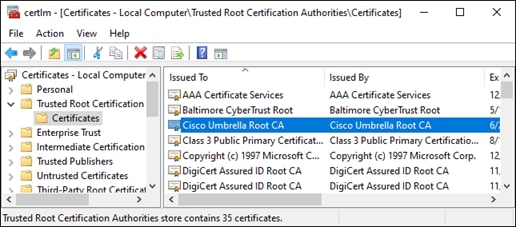
Step 11. Verify the certificate has been imported.
Establish Connections with Secure Connect
After the prerequisites have been completed, it is time to establish connections to Secure Connect. Through these established connections, sites and remote users will be able to communicate with each other and secure outbound Internet traffic.
A branch site with a pair of Meraki MX250s in High Availability will use AutoVPN to connect to the Secure Connect cloud. The hardware installation for these appliances, along with the initial network configuration for internet connectivity can be found in the MX250 Installation Guide. Traffic from the local subnet, 10.70.8.0/22 (Wired_Users), will be sent over the AutoVPN tunnel to Secure Connect for both Secure Internet Access and Private Application Access. It is recommended that branch site connect to the Secure Connect Region closest to them geographically. For more information on AutoVPN establishment to Secure Connect, reference Secure Connect - Meraki SD-WAN Integration (Regions).

Claim Devices
For this design guide, appliances were added to the Meraki dashboard using individual serial numbers after they were installed in the lab. An alternate approach is to claim your devices with an order number.
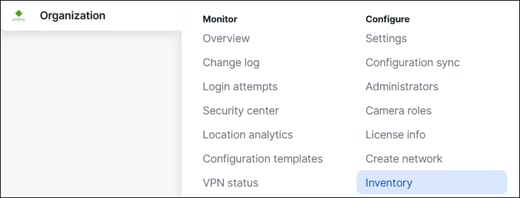
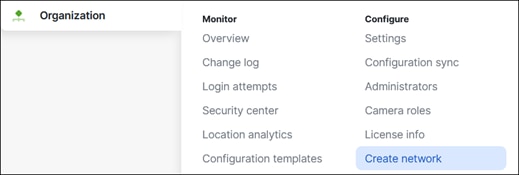
Step 1. In the Meraki Dashboard, navigate to Organization > Configure > Inventory.
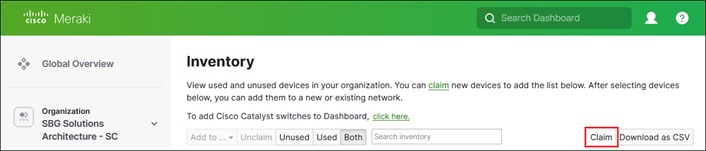
Step 2. Click Claim.
Step 3. Enter all the serial numbers for the devices you wish to add to the Meraki Dashboard.
Note: You can also use an order number to avoid having to add individual serial numbers.
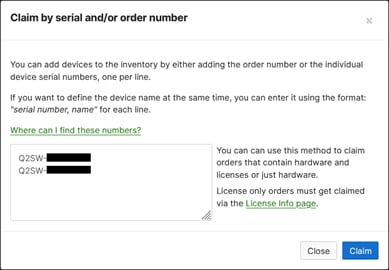
Step 4. Click Claim.
Meraki Branch Network Creation
These claimed devices can now be added to a network. Networks provide a way to logically group and configure Meraki devices within an organization and to separate physically distinct sites within an organization.
Step 1. In the Meraki Dashboard, navigate to Organization > Configure > Create Network.
Step 2. Give a meaningful name to the network and under the Network Type dropdown, click Combined hardware.
Note: A network can contain any number of access points or switches, but only a single security appliance. For this design guide, two security appliances have been deployed at each location, however, they have been configured as a high availability pair. For more information see MX Warm Spare – High Availability Pair.
Step 3. Under Inventory, check the box for any device that should be added to the network.
Step 4. Click Create Network.
Meraki AutoVPN
Now the Meraki MX250s will be configured to connect to the closest Secure Connect Region.
Note: If issues occur establishing the AutoVPN tunnel to Secure Connect, Meraki may need to have MTU set to 1280 and enable MSS clamping enabled by support.
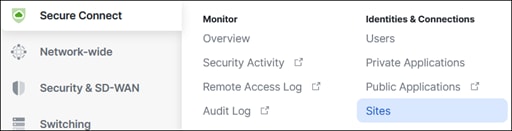
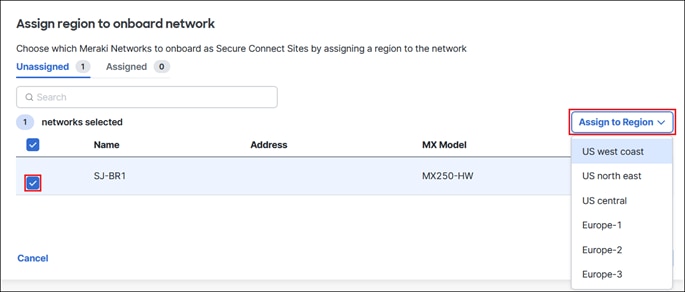
Step 1. In the Meraki Dashboard, navigate to Secure Connect > Identities & Connections > Sites.
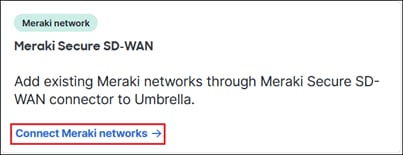
Step 2. Click Connect Meraki networks.
Step 3. Select the unassigned Network for the Meraki site created in the previous section then click Assign to Region. Select the Secure Connect Region the Meraki branch should connect to.
Step 4. The Meraki site will be listed under the Assigned tab. Click Next.
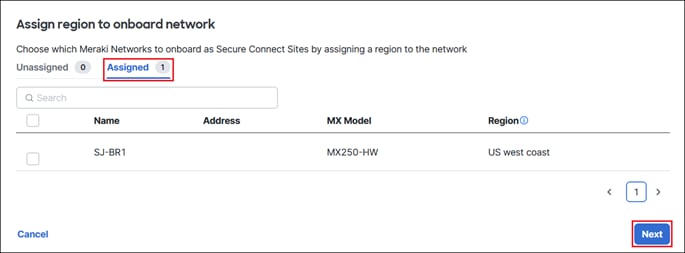
Step 5. After verifying the site will be assigned to the correct Region, click Finish and Save.

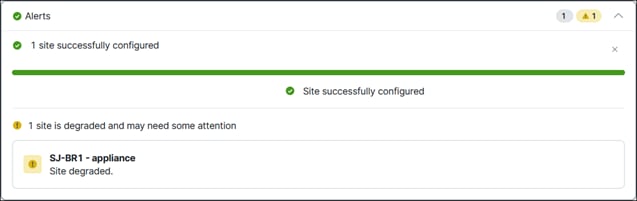
The AutoVPN process will start, and the sites will be provisioned. Do not refresh the page until you see the green checkmark specifying that the site has been successfully configured. Configuration can take several minutes.

Once complete, a green checkmark will be seen. The site may show as degraded and require a few more minutes to resolve.
Step 6. Traffic traversing AutoVPN tunnel to Secure Connect should be restricted to an MTU of 1280 and MSS clamping enabled. Contact Meraki support to adjust these for the AutoVPN tunnel. This will prevent fragments which will be dropped if they traverse the Secure Connect cloud.
Routing
Now that the tunnels have been established between the MX250s and the Secure Connect Region, the site can be configured to forward traffic from certain subnets to Secure Connect for Secure Internet Access and Private Application Access.
Step 1. In the Meraki Dashboard, navigate to Security & SD-WAN > Configure > Site-to-site VPN.
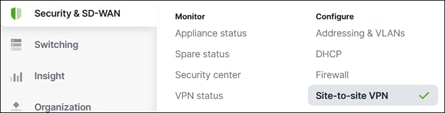
Step 2. Verify Type is set to Spoke and that the Hubs for the Secure Connect Region specified in the previous step should be seen in the Hub section.
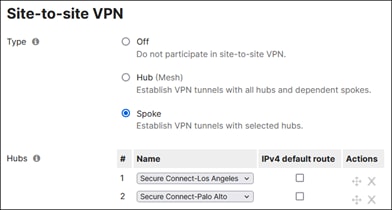
Step 3. Within the Local network sub-section under VPN settings, set the VPN mode to Enabled for subnets whose traffic should be sent over the Secure Connect cloud. If there is an application being hosted in at the site, VPN mode should also be enabled for it as well.
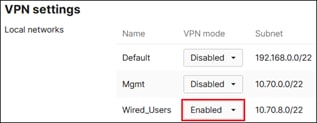
Step 4. All other configurations will continue to use the default value. Click Save.
VPN Full-Tunnel Exclusion
VPN full-tunnel exclusion (also known as Local Internet Breakout) is a feature that allows administrators to configure layer 3/4 and layer 7 rules (for supported applications) to determine exceptions for traffic that would normally go through the AutoVPN to Secure Connect (as well as other VPN tunnels). In the design guide, this feature will be used to exclude ICMP traffic destined to each Secure Connect headend, allowing the branch ThousandEyes Enterprise agent to perform underlay tests. Configuring VPN full-tunnel exclusion to exclude supported application traffic from Secure Connect is out of scope for this design guide. For more information, reference VPN Full-Tunnel Exclusion.
Step 1. In the Meraki dashboard, navigate to Security & SD-WAN > Configure > SD-WAN & traffic shaping.
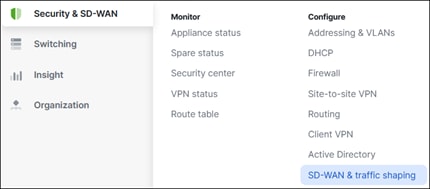
Step 2. Scroll down to Local internet breakout and click Add.

Step 3. In the Custom expressions section, select the Protocol and destination. For the ThousandEyes tests configured later in this design guide, underlay tests will send ICMP packets to each Secure Connect headend. The IP address of the Secure Connect headends used by the branch in this design guide are 146.112.67.8 (LAX1) and 146.112.66.8 (PAO1). IP address information for other Secure Connect headends can be found referencing the Secure Connect Data Center List and Connect to Cisco Umbrella Through Tunnel documents.
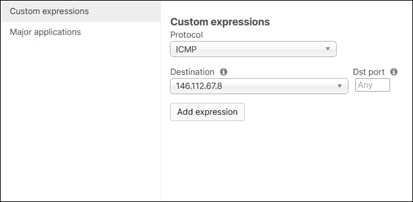
Step 4. Repeat steps 2 and 3 for any additional destinations that should be excluded from the AutoVPN tunnel to Secure Connect.

Step 5. Click Save.
Data Center (Non-MX IPsec VPN)
For non-MX devices, IPsec tunnels can be configured to connect to Secure Connect for connectivity with other sites. In this design guide, the data center will be configured with a pair of Cisco Catalyst 8500s using non-SDWAN IOS-XE software to establish IPsec tunnels with Secure Connect, rather than as Viptela SD-WAN routers. The Catalyst 8500s are configured in an Active/Active high availability setup. The hardware installation for these appliances can be found in the Cisco Catalyst 8500 Series Edge Platforms Hardware Installation Guide. To increase the available throughput to services and applications hosted within the data center, two IPsec tunnels will be configured between each Cat8500 and the Secure Connect headend.
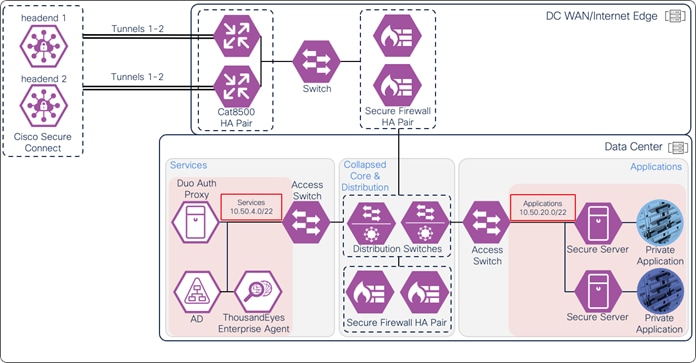 Secure Connect will be configured to forward traffic with a destination of 10.50.4.0/22 (services) or 10.50.20.0/22 (private applications) to the Cat8500s via the Private Access tunnels. The Cat8500 routers will be configured to route traffic destined to services and private application into the data center and ECMP load balance the responses between the tunnels. For validation of secure edge (branch) and secure remote worker (Client-based remote access and ZTNA) capabilities, the following static routes will be added to route traffic over Tunnels 1 and 2:
● Branch site: 10.70.0.0/16
● Client-based Remote Access: 10.80.0.0/16
● Clientless ZTNA: 100.64.0.0/16 and 100.127.0.0/16 (Defined by Secure Connect. Can not be modified)
Internet destined traffic from the data center received by the Cat8500s that needs to be secured by Secure Connect is ECMP load balanced through the same tunnels. To control what traffic will be sent over tunnels 1 and 2 for Secure Internet Access, policy-based routing will be implemented.
Configuring the appropriate routing and switching policies for devices between the edge routers and the private applications and services is out of scope for this design guide, however the Configure Protocol Redistribution for Routers guide can be referenced for redistributing static routes into other routing protocols. In the lab for this design guide, OSPF is used between the edge routers and the data center firewall to propagate the static routes created to route traffic over tunnels 1 and 2. If a tunnel interface goes into down state, the OSPF will stop advertising that route to the data center firewall.
Note: A similar configuration can be used for non-Meraki branch routers as well. More or less tunnels can be configured depending on the throughput requirement of the branch site.
Cat8500 IPsec VPN Establishment
Step 1. In the Meraki Dashboard, navigate to Secure Connect > Identities & Connections > Network Tunnels to redirect to Umbrella.
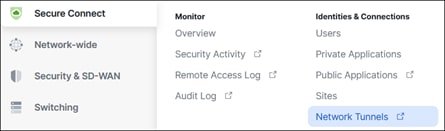
If the browser does not redirect to the Network Tunnels Umbrella page, navigate to Deployments > Core Identities > Network Tunnels.
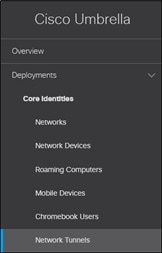
Step 2. Click Add near the top right.

Step 3. Specify a Tunnel Name and Device Type.
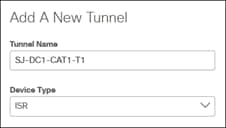
Step 4. Specify a Tunnel ID, Passphrase, the Service Type, and Routing IP addresses and subnets. For private access tunnels, the routes added will be advertised to Meraki MX branches configured with AutoVPN. Non-Meraki tunnels will require the appropriate routing policies configured on the device to route that traffic to Secure Connect. Each tunnel should have a unique Tunnel ID and Passphrase. To create tunnels for accessing the private applications within the data center as well as provide Secure Internet Access for devices in the data center, Service Type option Private Access is specified.
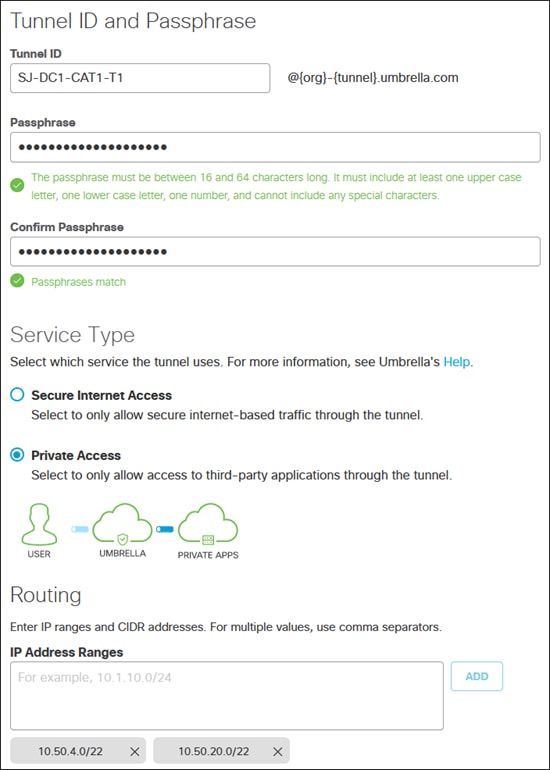
Step 5. Click Save.
Step 6. A window will pop up showing the Tunnel ID and Passphrase. Click Done. Repeat steps 2-5 for additional tunnels.
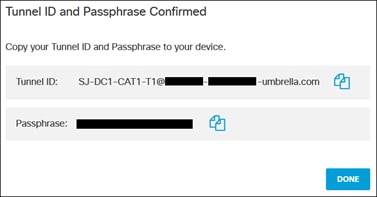
Step 7. Navigate to the VPN device and configure that side of the IPsec tunnel. Multiple device configurations are supported. For more information, see Network Tunnel Configuration. These are examples of configuration used on the primary Cat8500.
To establish multiple tunnels from a single Cat8500 router to the same Secure Connect headend, each tunnel interface must be sourced from a different interface. Since the Cat8500s used in this design guide only use one WAN interface, loopback interfaces are created and applied as tunnels sources to the tunnel interface. PAT overload will be applied to each tunnel’s encrypted traffic before it leaves the router so that it can be routed over the Internet to the Secure Connect headend without issue. Additionally, PAT overload is configured for Internet traffic that will bypass Secure Connect. This is important for tests initiated by the Enterprise ThousandEyes agent hosted in the Services subnet of data center for underlay testing.
Interface Loopback1
ip address 10.50.252.1 255.255.255.255
ip nat inside
interface Loopback2
ip address 10.50.252.2 255.255.255.255
ip nat inside
interface TenGigabitEthernet0/0/0
description WAN Interface
ip address A.B.C.D X.X.X.X
ip nat outside
interface TenGigabitEthernet0/0/1
description Inside Interface
ip address 10.50.254.35 255.255.255.248
ip nat inside
ip access-list standard INTERNET_TRAFFIC
10 permit 10.50.252.0 0.0.0.255
10 permit any
ip nat inside source list INTERNET_TRAFFIC interface TenGigabitEthernet0/0/0 overload
Next, the IPsec configurations must be applied. For a list of supported and recommended IPsec parameters, reference Supported IPsec Parameters. In addition to the IPsec parameters, the unique email local identity (Tunnel ID) and pre-shared keys (Passphrase) obtained in step 6 for each tunnel will be applied to the IKEv2 profiles.
Crypto ikev2 proposal SC-PROPOSAL
encryption aes-gcm-256
prf sha256
group 19 20
crypto ikev2 policy SC-POLICY
proposal SC-PROPOSAL
crypto ikev2 profile SJ-DC1-T1
match identity remote address 146.112.67.8 255.255.255.255
identity local email SJ-DC1-CAT1-T1@XXXX-XXXX-umbrella.com
authentication remote pre-share key XXXXXXXXXXXXXXXX
authentication local pre-share key XXXXXXXXXXXXXXXX
dpd 10 3 periodic
crypto ikev2 profile SJ-DC1-T2
match identity remote address 146.112.67.8 255.255.255.255
identity local email SJ-DC1-CAT1-T2@XXXX-XXXX-umbrella.com
authentication remote pre-share key XXXXXXXXXXXXXXXX
authentication local pre-share key XXXXXXXXXXXXXXXX
dpd 10 3 periodic
crypto ikev2 fragmentation mtu 1300
crypto ipsec transform-set SC-TSET esp-gcm 256
mode tunnel
crypto ipsec profile SJ-DC1-T1
set transform-set SC-TSET
set ikev2-profile SJ-DC1-T1
crypto ipsec profile SJ-DC1-T2
set transform-set SC-TSET
set ikev2-profile SJ-DC1-T2
Now that the loopback interfaces, NAT, and Ipsec configurations have been created, VTIs (Virtual Tunnel Interfaces) can be configured to establish Ipsec tunnels with Secure Connect. Each tunnel interface is assigned a loopback interface for the IP address and tunnel source with the ip unnumbered and tunnel source commands, respectively. The ip tcp adjust-mss and ip mtu commands ensure that traffic traversing the VTI tunnels does not exceed an MTU of 1280 bytes which is required for traffic traversing Secure Connect. Fragmented packets in underlay or overlay are dropped. The IP address of the Secure connect headend is specified with the tunnel destination command. Finally, the tunnel mode and tunnel protection commands allow the tunnel to use the Ipsec configurations created earlier. For available Secure Connect headends, reference Secure Connect Data Center List. The IP addresses for each headend can then be found by referencing Connect to Cisco Umbrella Through Tunnel.
Note: Umbrella supports automatic failover of Ipsec tunnels when a Secure Connect headend is unavailable. It is recommended to establish private access tunnels to a single headend in a Secure Connect region when multiple tunnels are used. During testing, it was observed that if traffic entered the edge router from a private access tunnel connected to Secure Connect headend #1 but exited a private access tunnel connected to Secure Connect headend #2 in the same region, the connection would fail.
Interface Tunnel1
description Secure Connect Tunnel
ip unnumbered lo1
tunnel source lo1
ip tcp adjust-mss 1240
ip mtu 1280
tunnel mode ipsec ipv4
tunnel destination 146.112.67.8
tunnel protection ipsec profile SJ-DC1-T1
interface Tunnel2
description Secure Connect Tunnel
ip unnumbered lo2
tunnel source lo2
ip tcp adjust-mss 1240
ip mtu 1280
tunnel mode ipsec ipv4
tunnel destination 146.112.67.8
tunnel protection ipsec profile SJ-DC1-T2
Finally, routing is configured to forward traffic over the tunnels. To enable ECMP load balancing over the Secure Connect tunnels, static routes for the remote destinations (Branch, Remote Access Clients, and ZTNA users) are added with Tunnel1 and Tunnel2 defined as next-hop interfaces for that traffic. To advertise these specific static routes with the rest of the data center, they are redistributed into OSPF using a route-map with the specific routes being matched in an access-list. The network command is used to establish an OSPF adjacency with the data center firewall.
ip route 10.70.0.0 255.255.0.0 Tunnel1
ip route 10.70.0.0 255.255.0.0 Tunnel2
ip route 10.80.0.0 255.255.0.0 Tunnel1
ip route 10.80.0.0 255.255.0.0 Tunnel2
ip route 100.64.0.0 255.255.0.0 Tunnel1
ip route 100.64.0.0 255.255.0.0 Tunnel2
ip route 100.127.0.0 255.255.0.0 Tunnel1
ip route 100.127.0.0 255.255.0.0 Tunnel2
ip access-list standard PRIVATE-ACCESS-ROUTES
10 permit 10.70.0.0 0.0.255.255
20 permit 10.80.0.0 0.0.255.255
30 permit 100.64.0.0 0.0.255.255
40 permit 100.127.0.0 0.0.255.255
route-map PRIVATE-ACCESS-ROUTE-MAP permit 10
match ip address PRIVATE-ACCESS-ROUTES
router ospf 1
redistribute static route-map PRIVATE-ACCESS-ROUTE-MAP
network 10.50.254.8 0.0.0.7 area 0
To route Internet traffic through the tunnels, an access-list is created to define which traffic should be routed. Deny statements are added for traffic with destinations to RFC 1918 addresses as these cannot be routed over the Internet. After these statements, any host or subnets that should be sent through the Secure Connect tunnels are added. The access-list is matched in a route-map. The route map sets the next-hop IP address for this traffic to a fake IP address (10.255.255.255) and static routes are created to ECMP load balance traffic destined to this fake next-hop IP address to Tunnel1 and Tunnel2. The route-map is then applied to the inside interface of the Cat8500 which connects to the rest of the data center.
Ip access-list extended SECURE-INTERNET-ACCESS-TRAFFIC
10 deny ip any 10.0.0.0 0.255.255.255
20 deny ip any 172.16.0.0 0.15.255.255
30 deny ip any 192.168.0.0 0.0.255.255
40 permit ip [permitted hosts] [permitted destinations]
route-map ROUTE-TO-SECURE-INTERNET-ACCESS permit 10
match ip address SECURE-INTERNET-ACCESS-TRAFFIC
set ip next-hop recursive 10.255.255.255
ip route 10.255.255.255 255.255.255.255 Tunnel1
ip route 10.255.255.255 255.255.255.255 Tunnel2
interface TenGigabitEthernet0/0/1
description Inside Interface
ip address 10.50.254.35 255.255.255.248
ip nat inside
ip policy route-map ROUTE-TO-SECURE-INTERNET-ACCESS
Step 8. Once the configuration on the Cat8500 or other IOS-XE based router is finished, wait a few minutes and verify that the tunnels have been established with the commands show crypto ikev2 session and show crypto ipsec sa. This is an example of the show crypto ikev2 session for Tunnel 1 on the primary Cat8500.
SJ-DC1-C8500-1#show cry ikev2 session
IPv4 Crypto IKEv2 Session
Session-id:13, Status:UP-ACTIVE, IKE count:1, CHILD count:1
Tunnel-id Local Remote fvrf/ivrf Status
1 10.50.252.1/4500 146.112.67.8/4500 none/none READY
Encr: AES-GCM, keysize: 256, PRF: SHA256, Hash: None, DH Grp:20, Auth sign: PSK, Auth verify: PSK
Life/Active Time: 86400/6420 sec
CE id: 1063, Session-id: 13
Local spi: 57E26F3003AB0F17 Remote spi: 3716A36B0A064D79
Child sa:
local selector -> remote_selector
0.0.0.0/0 – 255.255.255.255/65535 -> 0.0.0.0/0 – 255.255.255.255/65535
ESP spi in/out: 0x86C66421/0xC1939AEA
Session-id:14, Status:UP-ACTIVE, IKE count:1, CHILD count:1
Show crypto ipsec sa example from the primary Cat8500:
SJ-DC1-C8500-1#show cry ipsec sa
interface: Tunnel1
Crypto map tag: Tunnel1-head-0, local addr 10.50.252.1
protected vrf: (none)
local ident (addr/mask/prot/port): (0.0.0.0/0.0.0.0/0/0)
remote ident (addr/mask/prot/port): (0.0.0.0/0.0.0.0/0/0)
current_peer 146.112.67.8 port 4500
PERMIT, flags={origin_is_acl,}
#pkts encaps: 0, #pkts encrypt: 0, #pkts digest: 0
#pkts decaps: 0, #pkts decrypt: 0, #pkts verify: 0
#pkts compressed: 0, #pkts decompressed: 0
#pkts not compressed: 0, #pkts compr. Failed: 0
#pkts not decompressed: 0, #pkts decompress failed: 0
#send errors 0, #recv errors 0
local crypto endpt.: 10.50.252.1, remote crypto endpt.: 146.112.67.8
plaintext mtu 1438, path mtu 1500, ip mtu 1500, ip mtu idb TenGigabitEthernet0/0/0
current outbound spi: 0xC1939AEA(3247676138)
PFS (Y/N): N, DH group: none
inbound esp sas:
spi: 0x86C66421(2261148705)
transform: esp-gcm 256 ,
in use settings ={Tunnel UDP-Encaps, }
conn id: 2089, flow_id: HW:89, sibling_flags FFFFFFFF80000048, crypto map: Tunnel1-head-0, initiator : False
sa timing: remaining key lifetime (k/sec): (4608000/1604)
IV size: 8 bytes
replay detection support: Y
Status: ACTIVE(ACTIVE)
inbound ah sas:
inbound pcp sas:
outbound esp sas:
spi: 0xC1939AEA(3247676138)
transform: esp-gcm 256 ,
in use settings ={Tunnel UDP-Encaps, }
conn id: 2090, flow_id: HW:90, sibling_flags FFFFFFFF80000048, crypto map: Tunnel1-head-0, initiator : False
sa timing: remaining key lifetime (k/sec): (4607999/1604)
IV size: 8 bytes
replay detection support: Y
Status: ACTIVE(ACTIVE)
outbound ah sas:
outbound pcp sas:
Step 9. On the Umbrella Dashboard, refresh the Network Tunnel page to verify the tunnel(s) have been established.
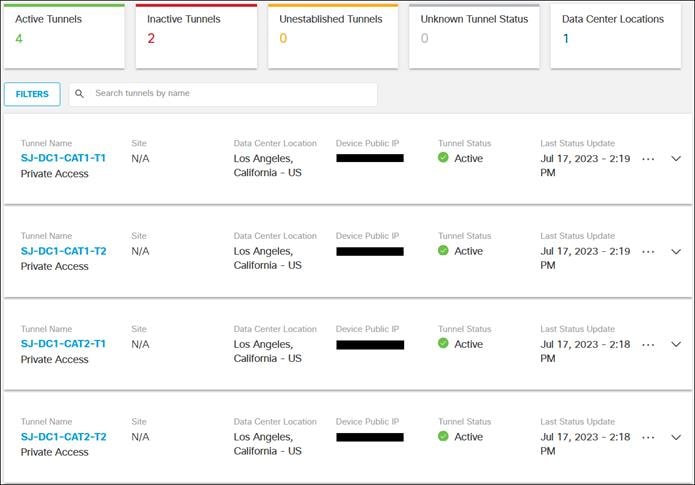
The provisioning of Secure Client on managed devices allows for client-based remote access and the secure forwarding of DNS, web, and non-web traffic to the Secure Connect cloud for evaluation. There are a variety of configurations possible within Secure Client for securing user traffic. For example, the AnyConnect VPN module can be configured to only route traffic to the private application while other traffic is sent directly out to the Internet. The Umbrella Roaming Security module can be configured to disable SWG functionality when it detects the user is on a trusted network.
With Secure Client. Users will be able to access private applications after establishing a DTLS tunnel with Secure Connect through the AnyConnect VPN Secure Client module. While connected, DNS, Web, and Internet traffic are protected by policies defined in Umbrella. While not connected through the DTLS tunnel, DNS and Web traffic are still protected by an HTTPS proxy established to Secure Connect through the Umbrella Roaming Security module.
In this design guide, Secure Client will be configured to route all traffic, except for specific SaaS applications, over the DTLS tunnel when the user connects to Secure Connect with the AnyConnect VPN module. The Umbrella Roaming Security module will be configured to remain enabled on and off trusted networks so that DNS, web, and DLP policies can match on specific AD users’ identities imported into Umbrella earlier. The exception to this is when the user establishes a DTLS tunnel to Secure Connect since all traffic except those to approved SaaS applications will be tunneled to Secure Connect. Additionally, any reports involving the managed device will report both the user’s identity and the device’s hostname.
When connected to Secure Connect through the DTLS tunnel, Secure Client will be assigned an address within the 10.80.0.0/16 subnet depending on the Secure Connect location the user connects to. To access private applications within the data center, the appropriate routes were configured on the Cat8500s in the previous section.
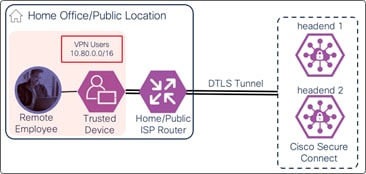
Setup Remote Access Headend
In this section, Secure Connect is configured to accept DTLS tunnel requests from Secure Client users and push configuration needed to assign the appropriate IP address and remote access policy. Configuration is added to enable the AnyConnect VPN module to forward all traffic over the DTLS tunnel (tunnel all) with the exception of the following SaaS applications/services:
● Microsoft 365
● Duo security
● ThousandEyes
The client will use the internal DNS server (10.50.4.12) to resolve internal URLs with the domain lab1six1.com. This will allow the user to access the private application using its FQDN wordpress.lab1six1.com.
Step 1. In the Meraki dashboard, navigate to Secure Connect > Identities & Connections > Remote Access.

Step 2. In the following section, click Configure remote access service. Enable application connectivity and Configure and provision users should show a green checkmark since these steps were done earlier.
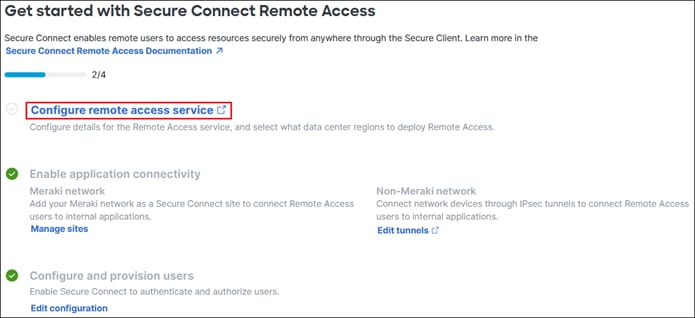
If the browser does not redirect to the Remote Access Umbrella page, navigate to Deployments > Configuration > Remote Access.

Step 3. Click Configure under Remote Access Configuration.
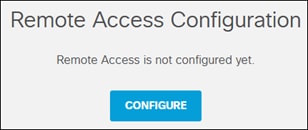
Step 4. In the Network Configuration section, add the DNS server and Default Domain for the internal network. This is the domain suffix that will be appended to hostnames that are not fully qualified. For example, test instead of test.example.com. Additional DNS Names can be added for other domains that will be resolved by the internal DNS server. Click Next.
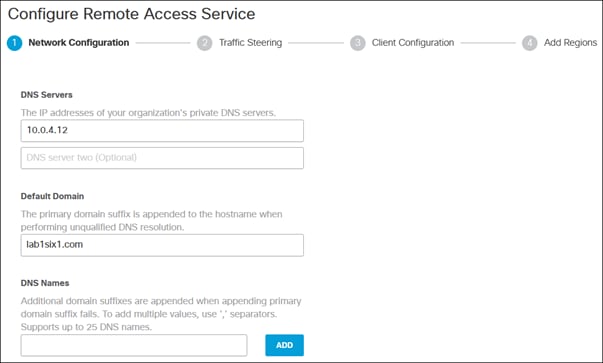
Step 5. In the Traffic Steering section, specific IP addresses and/or domains can be configured to be routed through the tunnel (split include) or routed outside the tunnel (split-exclude). Alternatively, all traffic can be routed over the tunnel. In this design guide, Traffic will be configured to route approved SaaS applications outside the tunnel using their domain. Click the slider next to Traffic Steering to enable Split Tunneling.
Note: Despite enabling the Traffic Steering configuration to add only domains, Secure Connect still considers this a tunnel all configuration for the purposes of disabling the Umbrella DNS and SWG later in this guide. Once an IP address or subnet is entered to the exclusion or inclusion list, the tunnel will be in split tunnel mode.
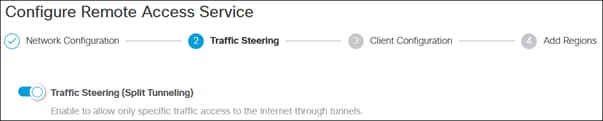
Designate LAN access outside secure tunnel can be enabled to allow users to access local resources within the same subnet as their device. This will remain disabled for the design guide. Tunnel Mode determines if the IP addresses and/or domains added to the list will be routed through the tunnel or routed outside the tunnel. To route specific SaaS application outside the tunnel for this design guide, Steer Traffic Outside the Secure Tunnel is selected from the dropdown menu. Click Add.

The following domains are added to the Destination list:
● Duosecurity.com is used when SAML authentication is initiated
● Thousandeyes.com is used for the ThousandEyes agent that will be installed on managed devices
● Office.com, office.net, sharepoint.com, live,com, and onenote.com are used for Microsoft 365
Click Add when done.
Note: The domains listed and validated for Microsoft 365 in this design guide do not account for all the possible endpoints used for that SaaS service. Microsoft has documented all domains and IP addresses used for Microsoft 365 applications and services. Additionally, some domains can be made more specific. Microsoft has listed optimized domains and IP addresses that account for 70% - 80% of the volume of traffic to the Microsoft 365 service, including the latency sensitive endpoints such as those for Teams media. If there is a need to implement split tunneling in the AnyConnect VPN module for Microsoft 365, reference Implementing VPN split tunneling for Microsoft 365.
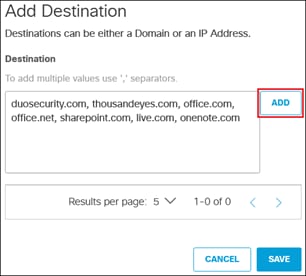
After adding any domains, Add Exceptions can be clicked to make an exception for subdomains. For example, exclude all traffic to example.com and *.example.com but not exception.example.com. Click Save.
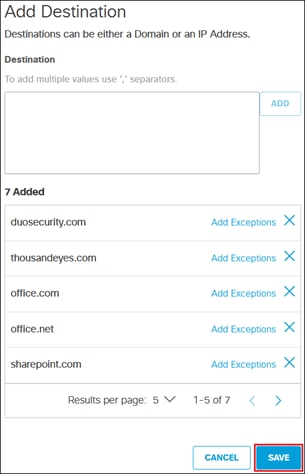
For DNS Mode, Default is used and recommended for most deployments using the Umbrella Roaming Security module. Considerations should be taken before choosing Tunnel All DNS. For more information, reference AnyConnect Roaming Security Module: Tunnel All DNS Compatibility.

Step 6. The Client Configuration section controls VPN client behavior, what the user is allowed to do when interacting with the client, how long the session will last, and if a banner will be seen by the user after login. In this design guide, the default options are used.
Step 7. The Add Regions section allows you to specify the Secure Connect regions that will accept the VPN sessions initiated by users. Is it recommended to choose the region(s) closest to the users that will be connecting.
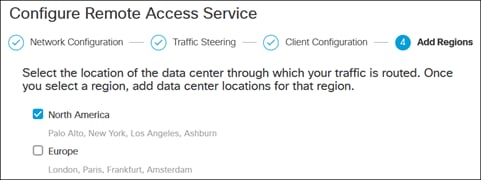
After selecting the region, specify IP address ranges that can be assigned to the client when establishing the VPN. Optionally, you can change the display name seen on the client for those locations.
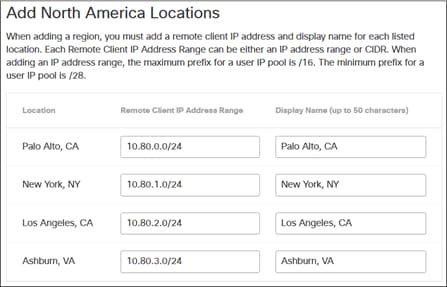
Step 8. Click Provision. After provisioning is complete, the browser will be redirected to the remote access checklist in the Meraki dashboard.
Restrict Remote Access to Specific Users
Some organizations may require restricting which users use remote access. The identity collected from Active Directory will import all AD users and groups unless restricted by the CiscoUmbrellaADGroup.dat file and even then, there may be groups that shouldn’t have remote access.
Step 1. From the Meraki dashboard, navigate to Secure Connect > Identities & Connections > Remote Access.
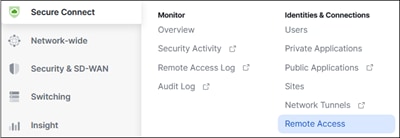
Step 2. Click Edit configuration.
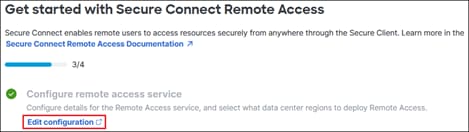
If the browser does not redirect to the Remote Access Umbrella page, navigate to Deployments > Configuration > Remote Access.
Step 3. Click Settings.

Step 4. Click Assign Users & Groups.
![]()
Step 5. Uncheck Select All. Expand the AD User and/or AD Group depending on which identities will be allowed to connect.

Step 6. Check the user or groups allowed.
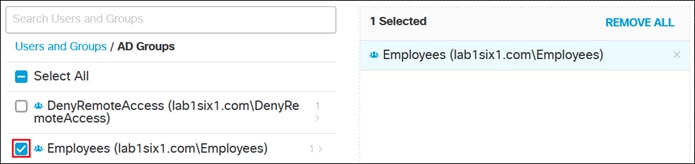
Step 7. Click Save.
Enable Posture
Although the remote access connection to Secure Connect is protected by Duo SSO, users could install Secure Client on their personal device and connect from a device where the appropriate security policies have not been enforced. For example, the firewall could be disabled, or no anti-malware may exist on their personal device. This could inadvertently introduce risk to other managed devices that establish communications with the unsecured device. As an additional security measure, device posture can be enabled to verify the device before a connection is established.
The steps documented in this section will verify that only managed devices can connect by checking if connecting devices have a specific certificate installed within their certificate store. There are many options for creating and signing certificates, and each will work with the certificate posture checks within Secure Connect, however, this guide will cover how to do so using the XCA certificate-signing software. Information on other device posture capabilities supported by Secure Connect can be found here.
Note: While Secure Connect supports configuring endpoint posture for client-based remote access through the Meraki dashboard, it was observed during testing that certificates uploaded this way would cause posture check failures on the client. At the time of writing this guide, it is recommended to continue importing the certificate through the Umbrella dashboard using the steps documented within this section if implementing the certificate posture check.
Step 1. Open XCA and create a new database.
A prompt will ask for a location to store the database and a password to encrypt the private keys within the database.
Step 2. Go to the Certificates tab.
![]()
Step 3. On the right, select New Certificate.
Step 4. Under the Source tab, make sure Create a self-signed certificate is specified under the Signing section.
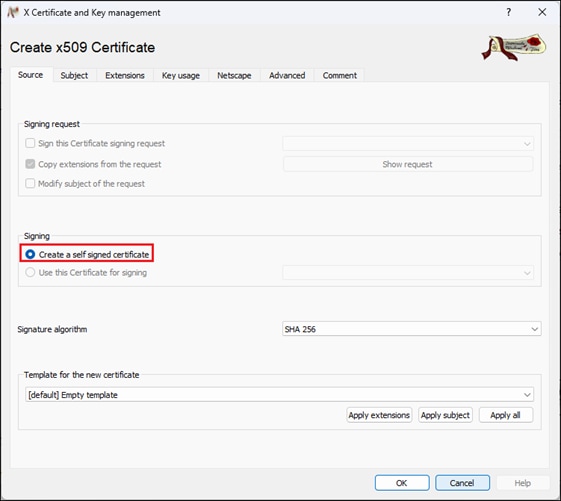
Step 5. Under the Subject tab, fill out the Internal name and Distinguished name fields. Once done, click Generate a new key to create a public/private keypair for the certificate.
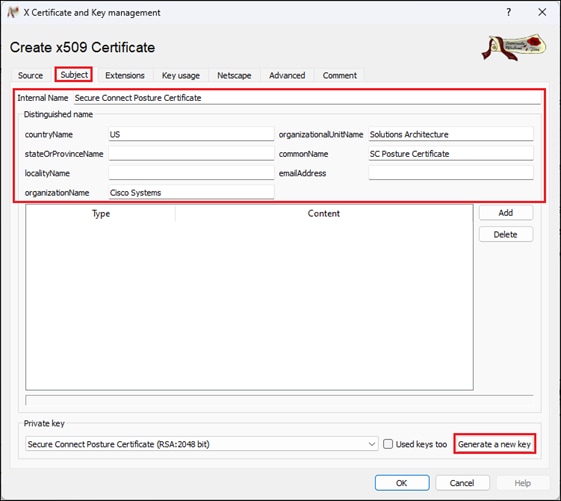
XCA will set the Name field to the Internal name specified earlier. Keytype and Keysize can be modified as needed. Click Create when done.
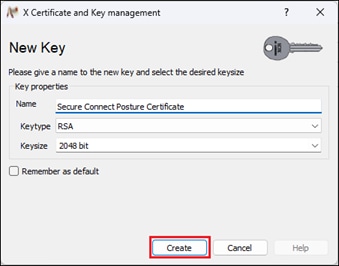
Step 6. Under the Extensions tab, click the dropdown next to Type and select End Entity. Click Ok.
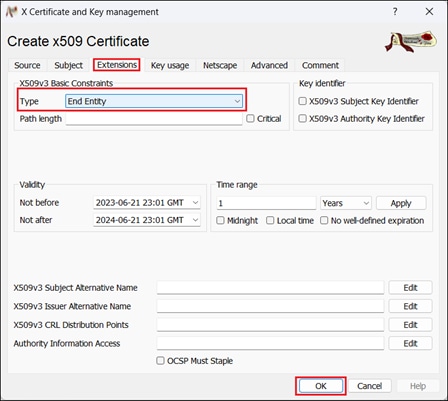
Step 7. Select the certificate then click Export.

Step 8. Export Format should be set to PEM (*.crt). Verify the location the certificate will be exported to then click Ok.
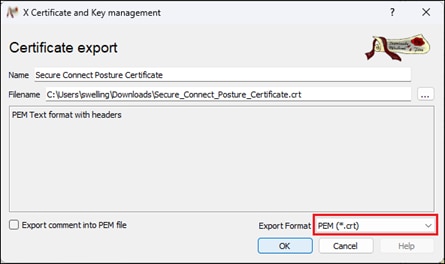
Step 9. Click Export again. This time, export the certificate in PKCS #12 format so that it can be imported on endpoints with the private key.
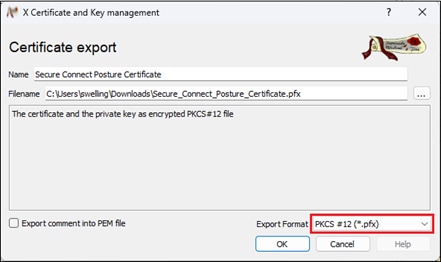
Provide a password to encrypt the PKCS #12 file. Click Ok
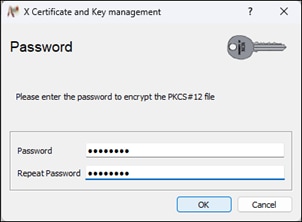
Step 10. Save both files for later. Go back to the Meraki dashboard and navigate to Secure Connect > Identities & Connections > Remote Access.

Step 11. Click Edit configuration.
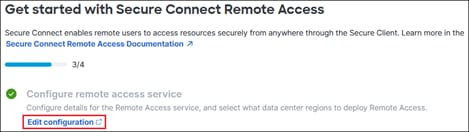
If the browser does not redirect to the Remote Access Umbrella page, navigate to Deployments > Configuration > Remote Access.
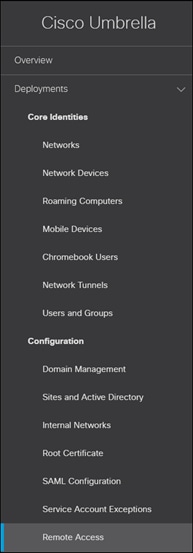
Step 12. Click Settings.
Step 13. Click Endpoint Compliance.
![]()
Step 14. Enable Certificate Requirements then click Add Certificate.
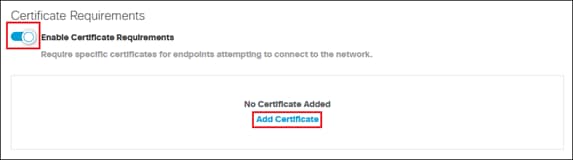
Step 15. A window will pop up to select the certificate. Find and choose the PEM (.crt) certificate exported in step 8.
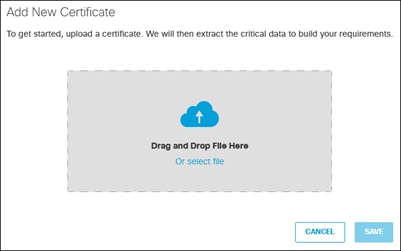
Step 16. Once the certificate has been selected, provide a Certificate Name and select which Requirements to Pass Certificate Check when the user is connecting to Secure Connect. Once done, click Save.

Step 17. Verify the configuration is correct, then click Save at the bottom of the screen.
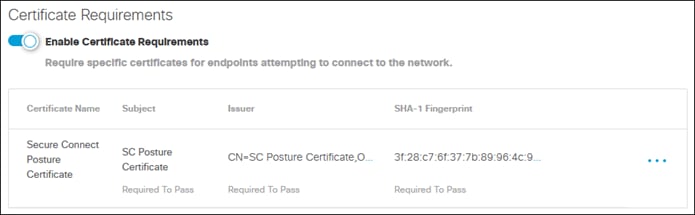
Step 18. To successfully pass endpoint posture, the PKCS12 file will need to be installed on user devices. It is recommended to import the PKCS #12 file to the personal store of the local machine where admin privileges are necessary to remove or export the private key (if configured to do so during import). This can be accomplished through methods such as an MDM. For the lab used in this design guide, the PKCS12 file was installed manually. Upload the PKCS12 exported in step 9 to the user’s machine.
Step 19. Type Manage computer certificates in the Windows search box and click Manage Computer Certificates. Admin privileges will be required.
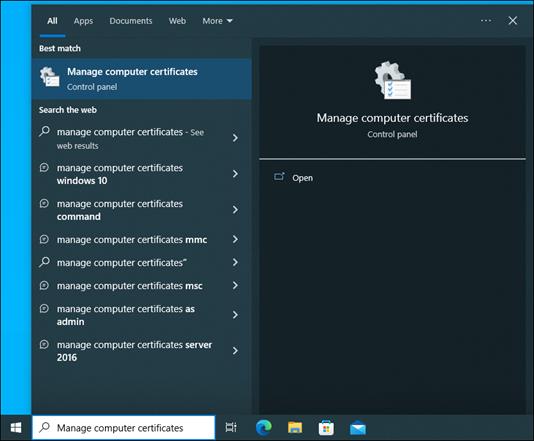
Step 20. In certlm, navigate to Personal > Certificates. Right-click on the Certificate folder and go to All Tasks > Import….
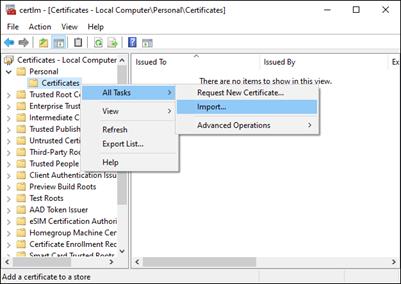
Step 21. Click Next on the Welcome to the Certificate Import Wizard window.
Step 22. Click Browse to locate and select the PKCS#12 file exported in step 9. You will need to expand the dropdown menu on the lower right and select Personal Information Exchange (*.pfx;*.p12) to see it. Select the certificate.
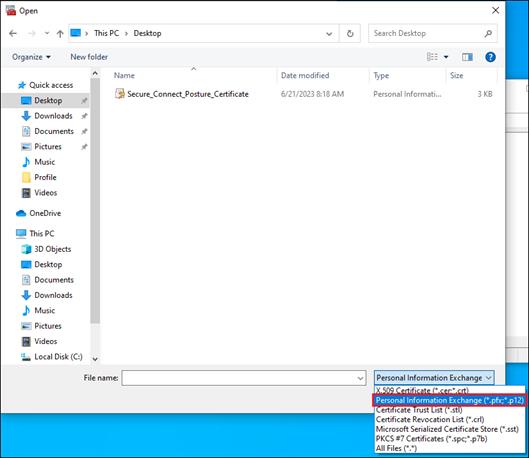
Click Next.
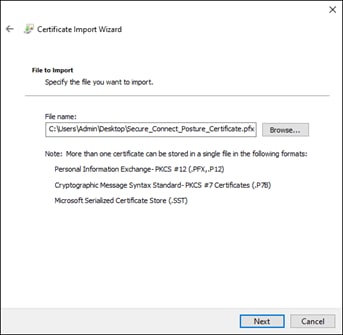
Step 23. Provide the password used to encrypt the private key in step 9. Click Next.
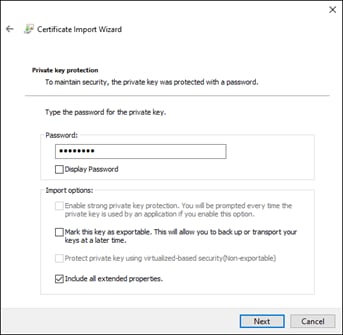
Step 24. Use the default location which should be the Personal store of the local machine. Click Next.
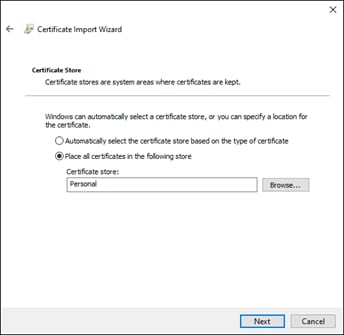
Step 25. Click Finish on the final page of the wizard.
Step 26. Verify the certificate has been imported.

Setup Cloud Management Module
To remotely manage Secure Client for remote users, the SecureX Cloud Management module can be installed on managed devices. The SecureX Cloud Management module will remotely push Secure Client updates and profile changes needed to modify AnyConnect VPN or Umbrella Roaming security module functionality. Currently, only Windows PCs are supported. To manage MacOS computers remotely, an MDM solution can be used.
Step 1. In the SecureX Dashboard, navigate to Insights.

Step 2. In the column to the left, click Secure Client.
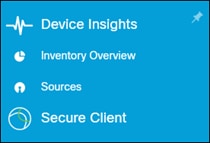
Step 3. Click the Enable button. After clicking Enable, you may need to refresh the page to see the new options in the column.
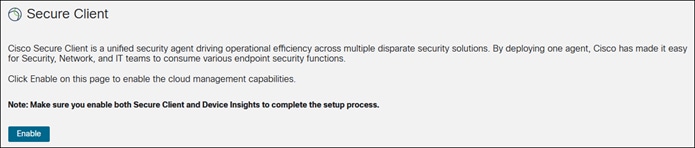
Step 4. Navigate to Secure Client > Profiles > Cloud Management.

Step 5. Click Create New.
![]()
Step 6. Modify the name of the Cloud Management Profile to something appropriate by clicking the Edit Name button. Modify the default configuration as needed. When done, click Save.
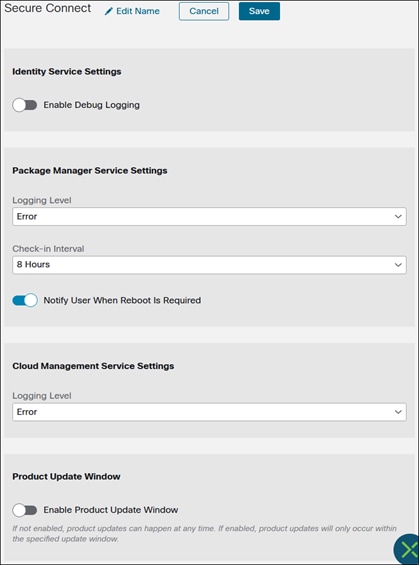
Setting up the AnyConnect VPN Module
While there are many ways of provisioning the AnyConnect VPN module on endpoints, it is recommended to use the SecureX Cloud Management module on Windows PCs. Details of this method and other methods of deployment can be found within the Cisco Zero Trust: User and Device Security Design Guide.
Step 1. In the Meraki dashboard, navigate to Secure Connect > Identities & Connections > Remote Access.
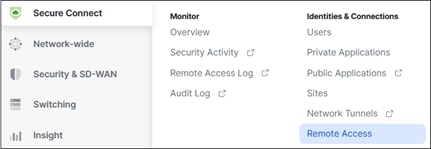
Step 2. Click Deploy Secure Client to Users at the bottom.
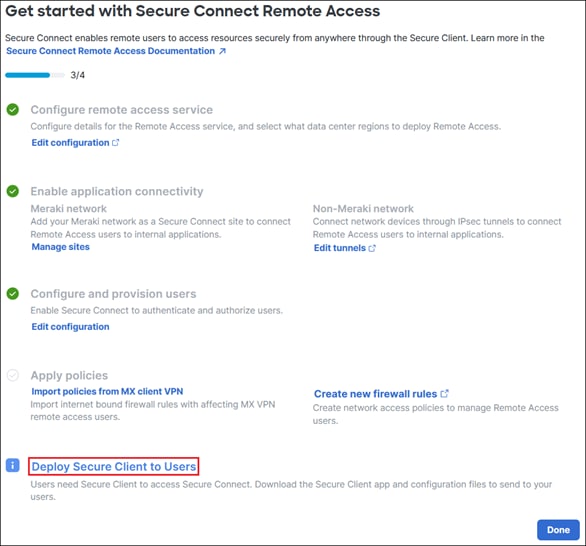
A window will pop up with links for the Secure Client packages. These can be used to install Secure Client and the supported modules on the Windows, MacOS, and Linux operating systems. Additionally, a link to download the AnyConnect VPN module XML profile based on the settings selected during the remote access configuration in Secure Connect is available. The XML profile can also be modified using the Profile Editor found here. Click on the XML document link to download the AnyConnect VPN XML profile.
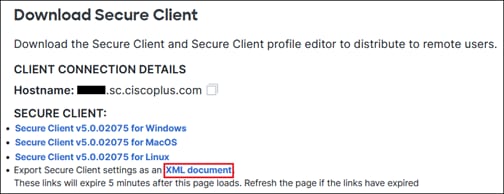
Step 3. Close the pop-up window and click Done on the remote access checklist.
Step 4. In the SecureX Dashboard, navigate to Insights.
Step 5. Go to Secure Client > Profiles > VPN.
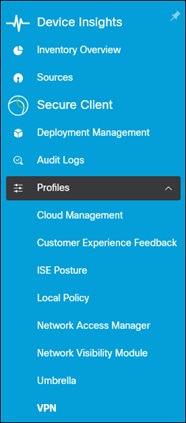
![]()
Step 7. Provide a Name for the VPN Configuration, upload the VPN profile obtained in step 2, then click Upload.
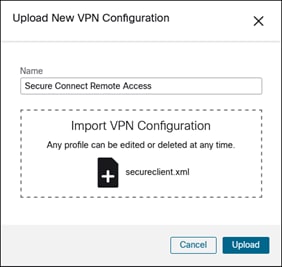
Note: It is not recommended to modify the VPN Configuration after the VPN profile is uploaded. Certain features like Always On are not currently supported at the time of writing this design guide.
Setting up the Umbrella Roaming Security Module
Like the AnyConnect VPN module, the Umbrella Roaming Security module can be deployed on endpoints with the SecureX Cloud management module. Details of this method and other methods of deployment can be found within the Cisco Zero Trust: User and Device Security Design Guide. In this design guide, the Umbrella Roaming Security module will be disabled when the AnyConnect VPN module is in tunnel all (full tunnel) mode. This will allow direct access to the approved SaaS applications whose domains were added in the Traffic steering configuration.
Step 1. In the Meraki dashboard, navigate to Secure Connect > Settings > Additional Configurations.

Step 2. Navigate to Deployments > Core Identities > Roaming Computers.
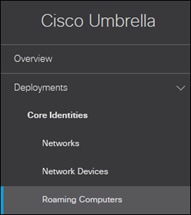
Step 3. Click Settings.

Step 4. Under the General Settings tab, ensure Active Directory is enabled.
Note: To be able to use AD groups and users as identities, the device Umbrella is installed on must be joined to the AD domain and the user must be part of the domain. User information on non-domain and BYOD devices is not reported to the dashboard. The AD connector and script needs to be installed to leverage AD user and group. These steps were done in the Initial Set Up section of this design guide. For more information on identity support for Roaming users, refer to the Umbrella documentation. For more information on identity support for roaming users, refer to Identity Support for the Roaming Client.

Step 5. Click on the Cisco Secure Roaming Client tab. Under the Cisco Secure Roaming Client tab, there are options for determining when the Umbrella agent will disable or enable itself for DNS or SWG features in certain scenarios. For more on these settings, reference Roaming Computer Settings. For this design guide, DNS and SWG will be disabled when the AnyConnect VPN module is in full tunnel mode when connecting to Secure Connect.
Note: Although Traffic Steering was enabled in Secure Connect to add domains for Duo, ThousandEyes, and Microsoft 365 in a previous section of this guide, AnyConnect will still consider this a full tunnel. If any IP addresses were added to the destinations, however, AnyConnect VPN will consider this to be a split tunnel. Therefore, if Traffic Steering is configured with IP addresses, disabling DNS and SWG based on the full-tunnel mode will not work. There are other ways to disable Umbrella DNS and SWG in these situations such as VPN Trusted Network Detection and Umbrella Trusted Network Domains.
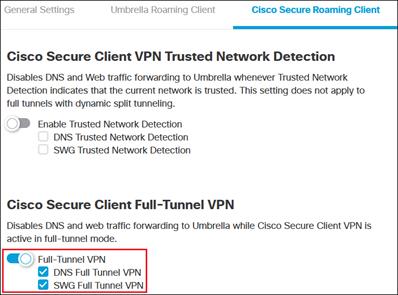
Scroll down and enable Secure Web Gateway so that web traffic is tunneled to Secure Connect through an HTTPS proxy.

Step 6. Click Back to Roaming Computers at the bottom.
Step 7. Click Roaming Client.

Step 8. Under Cisco Secure Client Umbrella Roaming Security Module, click Download Module Profile to obtain the OrgInfo.json file.
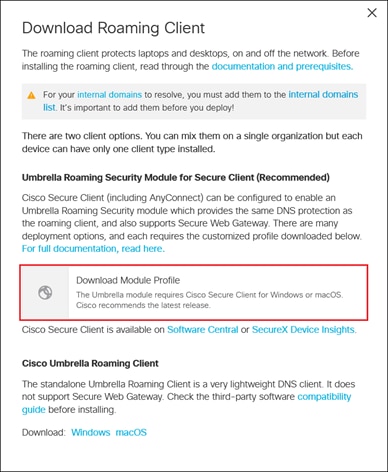
Step 9. In SecureX, navigate to Insights.
![]()
Step 10. Go to Secure Client > Profiles > Umbrella.
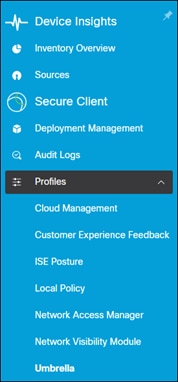
Step 11. Click Upload.
![]()
Step 12. Provide a Name for the Umbrella Configuration, upload the Orginfo downloaded in step 8, then click Upload.
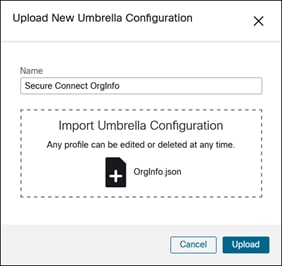
Deployment Setup
With both the VPN and Umbrella profiles configured, a deployment can be made to create an installer for managed Windows devices.
Step 1. From the SecureX dashboard, navigate to Secure Client > Deployment Management.
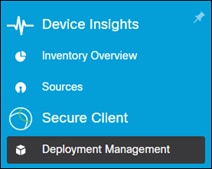
Step 2. Click Create New.
![]()
Step 3. Click Edit Name to provide a name for the Deployment.
![]()
Step 4. In the top left box, choose the Cloud Management module version or leave it as default. In the other section, choose the Cloud Management profile created earlier.
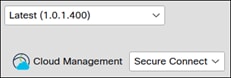
Step 5. In the lower box, choose the version that will be used for the remaining Secure Client modules. Versions with Latest and Recommended beside them will change and can trigger updates on user devices when they do. Once a version has been chosen, you can enable Secure Client modules and apply profiles for modules that use profiles. If a profile isn’t added, the profile will not be deployed when the module is installed and will need to be deployed through some other method before the module can be used.
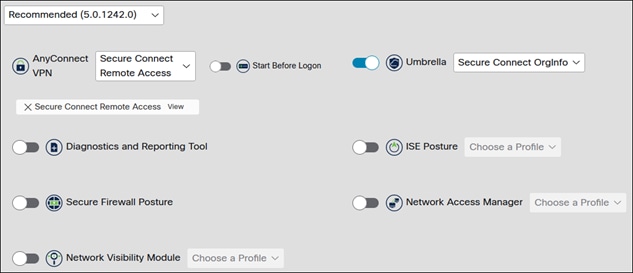
Step 6. When done, click Save.
![]()
Step 7. At this point, the Full Installer or Network Installer can be downloaded and installed on Windows clients through methods such as MDM. All modules which have been enabled in step 5 will be installed on the device with the profiles associated with them.
Private applications are applications or services hosted on an organization’s networks. While the first thing to come to mind may be a Web or file server, services such as DNS and DHCP also count as private applications from a Secure Connect design perspective. By defining the IP address, ports, and protocols needed to access applications and services, we can define firewall and ZTNA policies to restrict access to only what is needed.
In this section, the following private applications will be created to access the following private application and service within the Data Center:
● WordPress (10.50.20.101)
● Internal DNS and DHCP Relay server (10.50.4.12)
After this, the appropriate Firewall policies will be added to allow HTTPS access by branch and permitted client-based remote access users. This will allow users to access WordPress using the FQDN resolved through the internal DNS server. ZTNA policies will be created to access WordPress from untrusted devices that meet the identity and endpoint posture requirements. Access to other applications/services in the data center (i.e., ThousandEyes, Duo Auth Proxy, SSH Access to the WordPress Webserver) will be blocked by the default Firewall rule.
Private Applications are objects within Secure Connect to identify the IP address, protocol, and ports used to access an application on the network. They are then applied within the Firewall and ZTNA policies to allow access to the actual application located within the network. By default, Secure Connect blocks traffic from traversing different sites and so new rules will be added to the Firewall policy to allow the appropriate traffic between these locations.
First, the private application WordPress will be defined. Since WordPress should be accessible by branch and permitted client-based remote access users, a network-based access policy will be created. Additionally, since permitted ZTNA users will also be able to access the application, a browser-based access policy will be added.
For branch users, DNS and DHCP are essential services that must be provided. To demonstrate access to these services between different sites within this design guide, two more private applications are created for DNS (UDP port 53) and DHCP relay (UDP port 67).
Step 1. If you are on the Umbrella Dashboard, click Return to Secure Connect near the top right corner.
![]()
Step 2. From the Meraki Dashboard, navigate to Secure Connect > Identities & Connections > Private Applications.
Step 3. Click Add App.
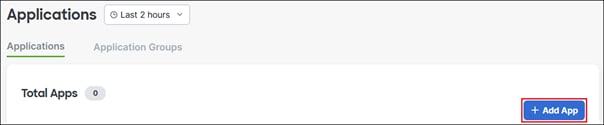
Step 4. Specify a Name for the private application.
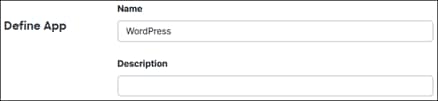
Step 5. Click the checkbox next to Network Based Access to allow branch sites and client-based remote access users to access the application. Add the internal Network IP addresses, Protocol, and Port Ranges necessary to access the application. Access to restricted to TCP 443 for HTTPS access and ICMP for ThousandEyes agent test traffic.
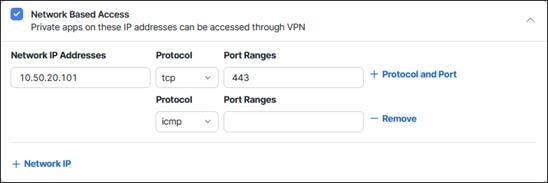
Step 6. Click the checkbox next to Browser Based Access to allow clientless ZTNA users to access the application. Add the internal Network IP address and port necessary to access to access the application. Optionally, you can add a value to the Server Name Indication (SNI) field and/or enable validation of the application certificate. Adding a value to the SNI field will make the proxy use this SNI while connecting to the application. Validating the Application Certificate will make the proxy check the certificate presented by the application web server with public Root CAs.
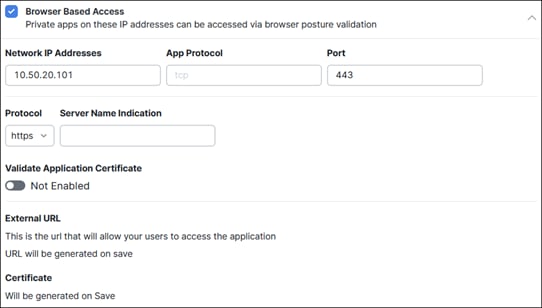
Step 7. (Optional) Add the application to an Application Group. This can simplify policies where multiple applications need to be specified.
Step 8. Click Save.
Step 9. Repeat steps 2-7 for any additional applications that need to be defined. In this design guide, a DNS application will be created to allow branch on-prem users and ThousandEyes agents to resolve the URL for WordPress and any other internal domains.
Internal DNS Private Application Network Based Access settings:
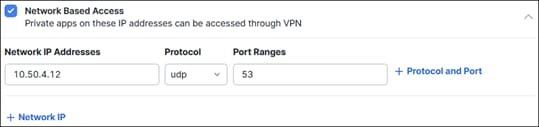
DHCP Delay Private Application Network Based Access settings:

Step 10. For the Application requiring ZTNA access, click the application name. In the popup window, a URL will be available to provide to users for ZTNA access.
Note: This link will not work until additional steps are taken to add a Browser Access Policy in later sections of this design guide.
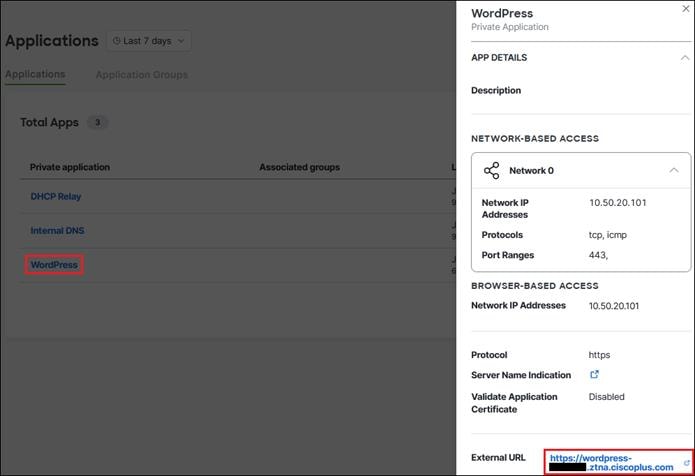
Clientless ZTNA provides a simplified experience for users to access private applications. Users only need to open their browser, type in the external URL for the application, authenticate, and access is provided to that application and only that application. Clientless ZTNA can be used on computers without any additional software needing to be installed. Due to this, ZTNA is excellent for providing access to low-risk applications.
Unlike branch and client-based remote access users, clientless ZTNA users are not provided a private IP address. Once the user successfully authenticates, their session will be reverse proxied by Secure Connect and assigned an address within the 100.64.0.0/16 or 100.127.0.0/16 subnet. For sites hosting private applications, it is important that the appropriate routing policy is applied so that clientless users can access these applications.
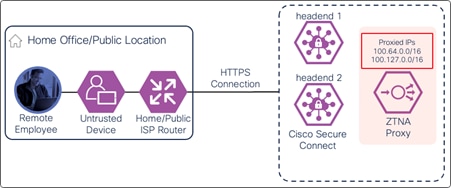
Enable Posture
While ZTNA users are authenticated with SAML first, additional checks can be done to lower the risk of the device accessing the location. This includes Operating System and browser endpoint posture checks to enforce up to date software versions. Out of date software can pose a risk to the application being accessed. Additionally, the location of the device based on the public IP address used to reach the Secure Connect ZTNA proxy can be enforced. For more information on the available checks, reference Endpoint Posture Profile.
In this design guide, a browser and location endpoint posture check will be done.
Step 1. In the Meraki dashboard, navigate to Secure Connect > Policies > Endpoint Posture.

Step 2. Under the Browser-based access tab, click Add Profile.

Step 3. Specify a Profile Name.

Step 4. For the Browsers check, select the browsers allowed to access applications in the Select Browsers dropdown menu. Additional dropdown menus will appear for each browser selected. Under these, select the version the browser should be running.
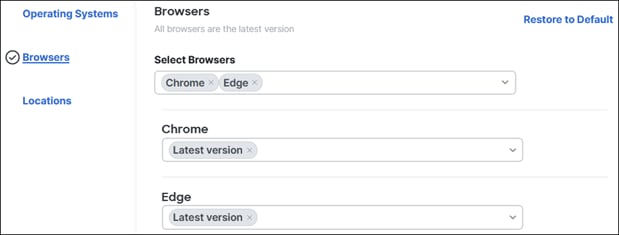
In the Grace Period for latest version section, the amount of allowed before the client will need to upgrade the supported browser can be specified.

Step 5. For the Locations check, clicking the field will present the broader locations. Clicking the arrow to the right will show more specific locations for that location. Multiple locations can be selected.
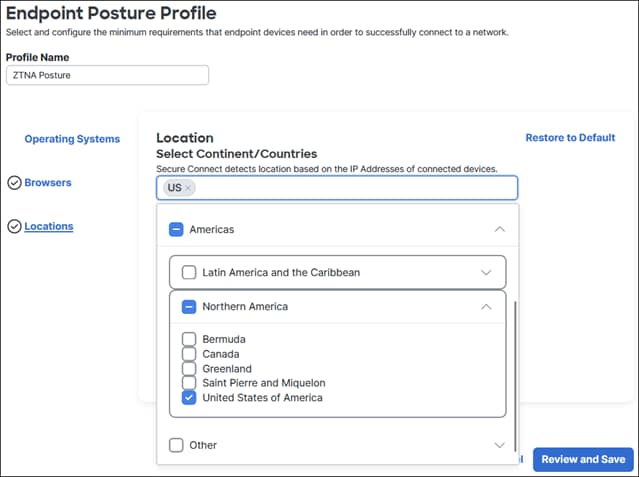
Step 6. Click Review and Save when done.
Step 7. Review the options selected and click Save.

Allow ZTNA Access
Finally, to enable users to access the application through ZTNA, a Browser Access policy must be created. Rules within the policy allow access to applications to be restricted to specific users or groups and compliance to the endpoint posture policy. For more information on creating Browser Access rules, reference Secure Connect - Client-less Remote Access (ZTNA).
Step 1. In the Meraki dashboard, navigate to Secure Connect > Policies > Browser Access.

Step 2. Click Add Rule.
![]()
Step 3. A new rule will appear above the Default rule. The # field determines where in the rule list the created rule will be added. This in combination with the other conditions within the rule can allow for the creation of granular ZTNA based access rules for applications. Click the Name field and enter a unique identifier for the rule.

Step 4. Select the Action field.

Select Allow or Block.

Step 5. Select the Users & Groups field.

Select the Group(s) or User(s) the rule will match on.
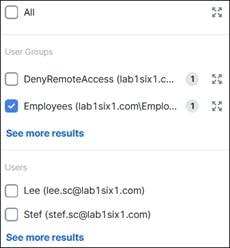
Step 6. Select the Apps & Groups field.

Select the private application the rule will match on. This was created in earlier steps. The Browser Based Access must be filled out before the private application will appear in the list.
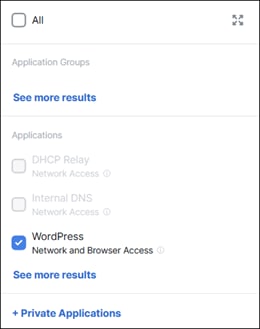
Step 7. (Optional) Select the Endpoint Posture Profile field.

Select the Endpoint Posture Profile that will be applied to users allowed access to the application.
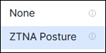
Step 8. Click Save.

Note: Because the Secure Connect ZTNA Proxy did not support “Bring your own domain” at the time of writing this guide, additional configuration was needed on the WordPress application. By default, WordPress will direct the user to the static domain configured in the Settings > General within the WordPress admin dashboard. To prevent this, the following lines were added to the wp-config.php file so that WordPress does not redirect to a different domain:
define('WP_SITEURL', '/');
define('WP_HOME', '/');
Firewall as a Service (Private Application Access)
While the ZTNA policies allow access to the application from the provided URL, the Firewall needs to be configured to allow application access from users and services in the branch and remote access client users. This will also include adding rules for services like DNS and DHCP relay. Firewall as a Service provides firewall services, without the need to deploy, maintain and upgrade physical or virtual appliances at each site. All traffic coming into Secure Connect from sites and client-based remote access sources is evaluated by the Firewall policy where layer 3/4 access policies are be applied.
In this design guide, the rules created will accomplish the following goals:
● Allow Branch and Client-based Remote Access user access to WordPress on TCP port 443 and ICMP
● Only Client-based Remote Access users in the Employee AD group will be allowed access
● Allow Branch and Client-based Remote Access user access to the Internal DNS server on UDP port 53
● Allow Branch users access to DHCP Relay server on UDP port 67
● All other site to site, site to client-based remote user, and client-based remote user to client-based remote user traffic will be blocked by the Default rule
Note: These firewall rules only apply to site to site, site to client-based remote users, and client-based remote user to client-based remote users. Traffic to Internet locations will require an Internet Traffic rule which will be covered later in this design guide.
Step 1. On the Meraki Dashboard, navigate to Secure Connect > Policies > Firewall.
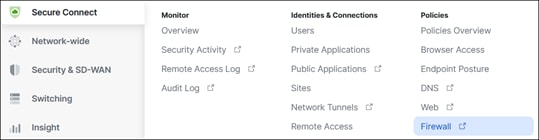
If the browser does not redirect to the Firewall Policy Umbrella page, navigate to Policies > Management > Firewall Policy.
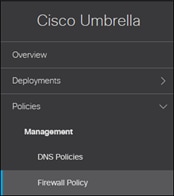
Step 2. Click Add near the top right.
![]()
Step 3. In the Rule Type section, click Private Applications and Networks.
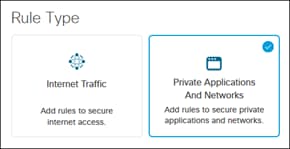
Step 4. In the Rule Details section, specify a Rule Name.
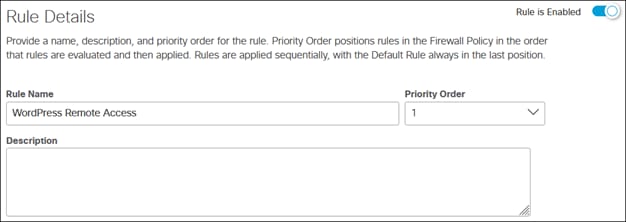
Step 5. In the Rule Action section, click the dropdown and select if it is an Allow or Block rule.
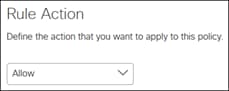
Step 6. In the Rule Criteria section, conditions for the Sources and Destinations can be set for matching this rule.
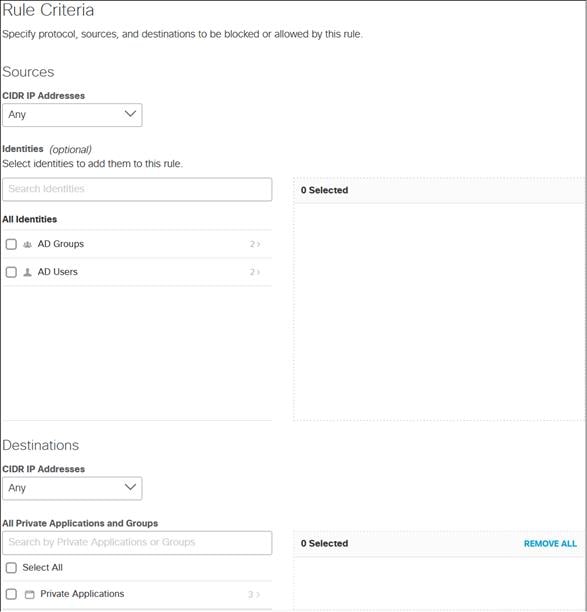
Step 7. Under Sources in the Rule Criteria section, specify the Classless Inter-Domain Routing (CIDR) IP addresses and/or Identity the rule should match for the source.
Note: Identities matches will only apply for Client-Based Remote Access users. Additionally, when the rule is evaluated, both the CIDR IP Address and Identity values will be matched. Because the firewall does not collect identities from branch sites, a rule will not match any traffic from a branch if an Identity is used in the rule.
For specific IP addresses, select Specify IP from the CIDR IP addresses dropdown menu then add the IP addresses. Click Add.
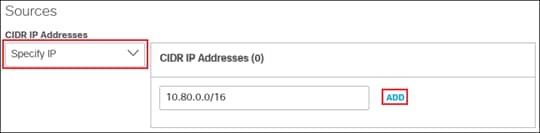
To match an identity, click AD Groups or AD Users to select all groups or users that have been imported into Umbrella. For more specific identities, click on the arrow beside the group or user.
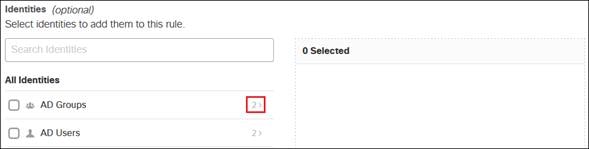
Then select the specific user(s) or group(s).
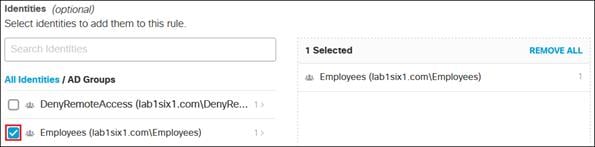
Step 8. Under Destinations in the Rule Criteria section, specify the Classless Inter-Domain Routing (CIDR) IP addresses and/or Private Application/Application Group the rule should match for the destination. If no application is selected and only IP addresses defined, any protocol and port will be allowed or blocked to the destination address(es).
For WordPress, Destinations will be set to Any for CIDR IP Addresses. IP, Protocol, and Port will be restricted to the information in the Private Application object.
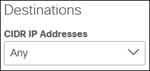
To match a private application, click Private Applications to select all applications that have been created. For more specific Private Applications or Application Groups, click on the arrow.

Then select the specific Application(s) or Application Group(s).
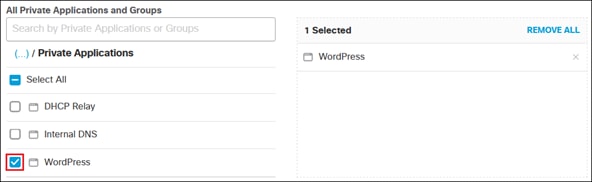
Step 9. (Optional) Specify options for the Rule Schedule, Hit Counter, and Logging sections. In this design guide, options within the Rule Schedule and Hit Counter sections are set to default while Logging is enabled for application visibility and validation purposes.
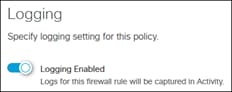
Step 10. Click Save.
Step 11. Repeat steps 2 – 10 for any additional Private Application and Network Rules. In this design guide, three more rules are created to meet the goals of the lab:
WordPress Branch Access
● Rule Action: Allow
● Rule Criteria Sources:
◦ CIDR IP Addresses: 10.70.8.0/22
◦ Identities: None
● Rule Criteria Destination:
◦ CIDR IP Addresses: All
◦ Private Application: WordPress
● Logging: Enabled
DNS Internal
● Rule Action: Allow
● Rule Criteria Sources:
◦ CIDR IP Addresses: All
◦ Identities: None
● Rule Criteria Destination:
◦ CIDR IP Addresses: All
◦ Private Application: Internal DNS
● Logging: Enabled
DHCP Relay
● Rule Action: Allow
● Rule Criteria Sources:
◦ CIDR IP Addresses: 10.70.8.0/22
◦ Identities: None
● Rule Criteria Destination:
◦ CIDR IP Addresses: All
◦ Private Application: DHCP Relay
● Logging: Enabled
Step 12. Verify that the firewall rules have been created.
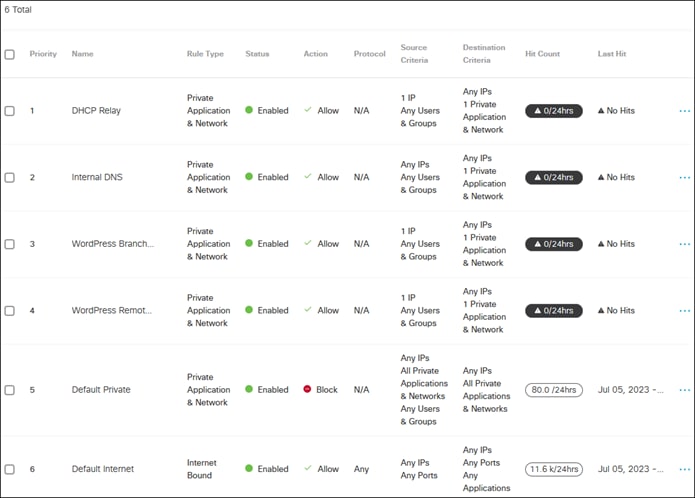
With more traffic needing to access public applications and other internet destinations, applying security for DNS, web, and non-web traffic is a must. To secure access to public applications and Internet resources for both on-premises branch users and remote access users, SSE policies will be created and enforced. In this design guide, we will create policies that accomplish the following goals for both remote and on-premises users:
● Enforce DNS layer security, blocking malicious traffic before any additional communication can be made
● Create a Web policy that:
◦ Block all social media applications except for LinkedIn
◦ Exclude the SaaS services Microsoft 365, Duo Security, and ThousandEyes from decryption and additional inspection in the Web policy
◦ Inspect downloads for malware
◦ Block the download of .bat files
● A Firewall Policy to block P2P traffic
◦ Application visibility to see unapproved application usage and enforce granular controls on those applications
● DLP policies to block credit card information from being exposed
Domain name system (DNS) resolution is typically the first step when connecting to a service on the Internet. DNS-layer security blocks name resolution requests to malicious domains before a connection is even established — stopping threats over any port or protocol before they reach the network or devices.
Step 1. In the Meraki dashboard, navigate to Secure Connect > Policies > DNS.

If the browser does not redirect to the DNS Policies Umbrella page, navigate to Policies > Management > DNS Policies.
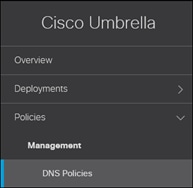
Step 2. Click Add near the top right.
Note: The default policy in Umbrella (bottom of the list) is the catch-all for identities that have not been defined in other DNS policies. While a new policy will be created that covers all AD Groups, ensure that this policy is defined and enforced for all connections that have not yet been defined.

Step 3. When using DNS and Web policies together, it is recommended to use DNS for Security Category Blocking Features while the Web policy handles filtering and inspections. Uncheck all protection except the Security Category Blocking. Click Next.

Step 4. Specify the identities this policy will apply to. Top-level groups like “AD Groups” and “Roaming Computers” are special because they dynamically inherit new identities. It is recommended to utilize these top-level identities and create more granular control using firewall and web policies. Because users and groups were imported in the Initial Set Up section of this design guide and can be determined on or off the network through multiple methods (Remote Access authentication and Identity Support for the Umbrella Roaming Security module), AD Groups is used. Click Next.
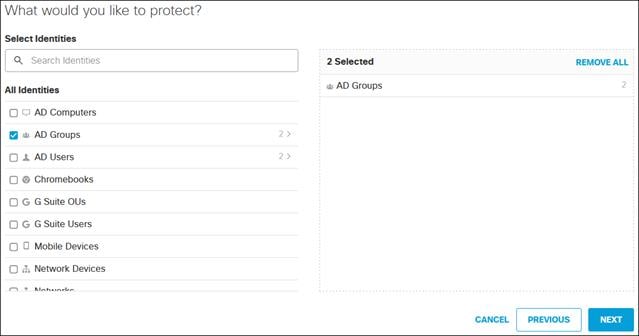
Step 5. In the Security Setting section, select one of the built in settings such as Centralized Default Settings or create a new one by clicking Add New Setting in the Select Setting dropdown. These settings can also be modified by going to Policies > Policy Components > Security Settings.
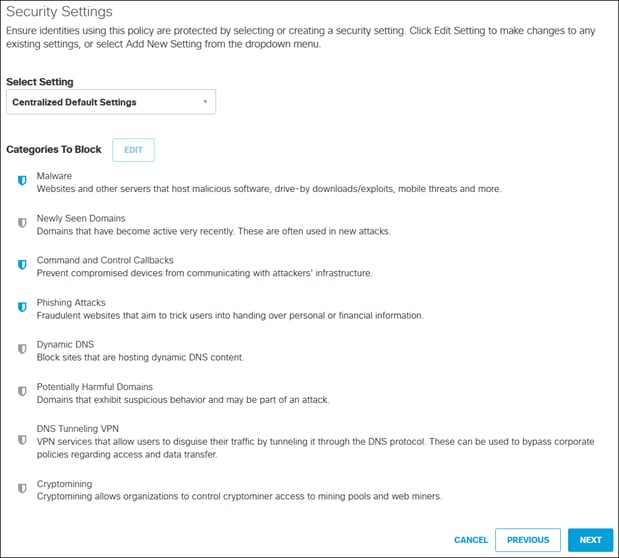
In this design guide, a custom Security Setting will be created by clicking Add New Settings in the Select Settings dropdown.
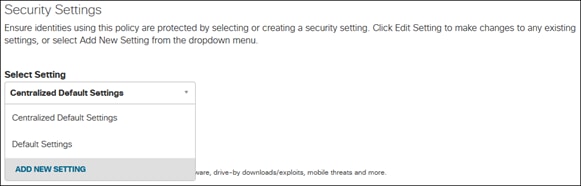
A new Security Setting will be created from scratch. Click Create.
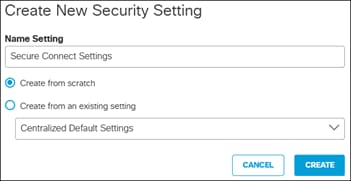
For maximum DNS protection, all categories are enabled. Click Save.
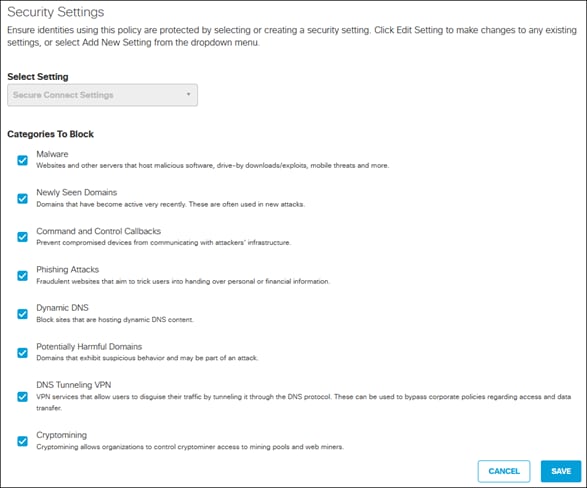
With the new Security Setting selected, review then click Next.
Step 6. In the Set Block Page Settings, use the default options unless a custom block page is desired. For more information on creating a custom block page, refer to Customize Block and Warn Pages. Click Next.
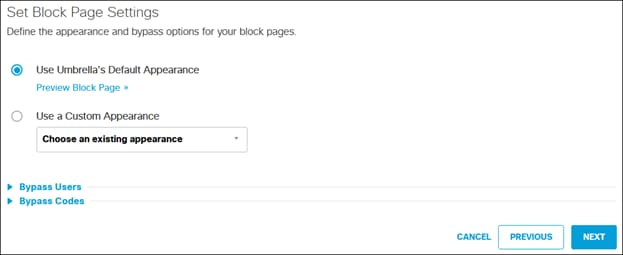
Step 7. Set a Policy Name and verify the settings. Click Save.
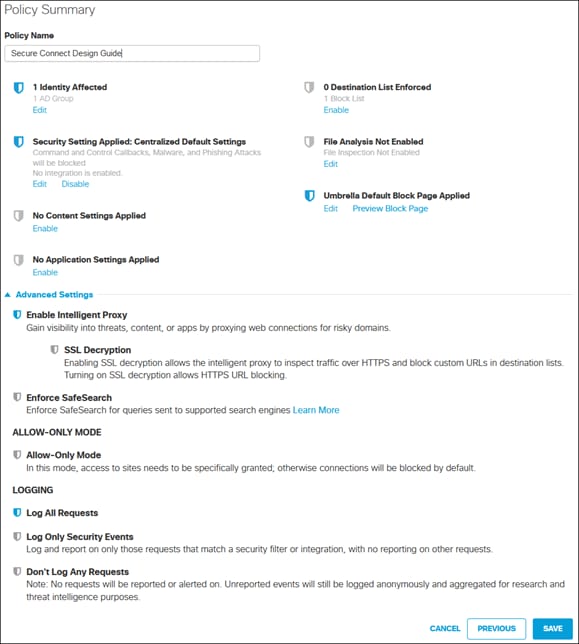
The Umbrella Web policy provides URL-layer visibility, security, and enforcement to your organization's web traffic. Secure Connect is integrated with Umbrella’s SWG to provide security functions such as malware detection, file sandboxing and dynamic threat intelligence, SSL decryption, app and content filtering. In this section, we will first create exceptions for services that should not be decrypted by HTTPS Inspection then, in the Umbrella Web Policy, create Rulesets to enforce security and visibility into web traffic.
Enable Microsoft 365 Compatibility
Microsoft recommends that Microsoft 365 traffic not be sent through proxies or VPNs for the best performance. Configuration within the Secure Connect remote access policy was added to bypass Microsoft 365 domains.
From the Umbrella perspective, the Microsoft 365 Compatibility feature exempts Microsoft 365-related domains marked as Optimize and Allow in Microsoft's endpoint categories to bypass inspection and policy enforcement, allowing those domains to pass through the Umbrella infrastructure unaltered. The domains are excluded from HTTPS decryption and content filtering. Microsoft 365 traffic will still appear in Umbrella reporting because traffic is logged at the host/domain level.
Step 1. From the Umbrella dashboard, navigate to Policies > Management > Web Policy.
Step 2. Click Global Settings in the top right.
![]()
Step 3. Enable Microsoft 365 Compatibility.

Step 4. Click Save.
Create a Decryption List for Approved Sites
In addition to the Microsoft 365 exclusions, other categories of websites, applications, or domains can be considered for bypassing HTTPS inspection. Popular exceptions include Finance and Health related categories. Other exceptions that should be considered include latency sensitive, encrypted real-time traffic like WebEx or low risk, approved SaaS applications like ThousandEyes.
Step 1. From the Umbrella dashboard, navigate to Policies > Policy Components > Selective Decryption Lists.
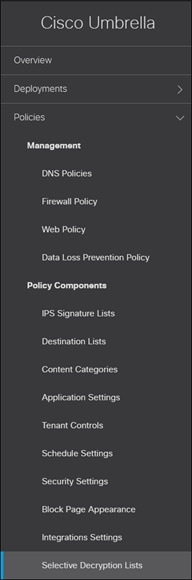
Step 2. Click Add in the top right.

Step 3. Provide a List Name for the Selective Decryption List. Click Add beside Domains.
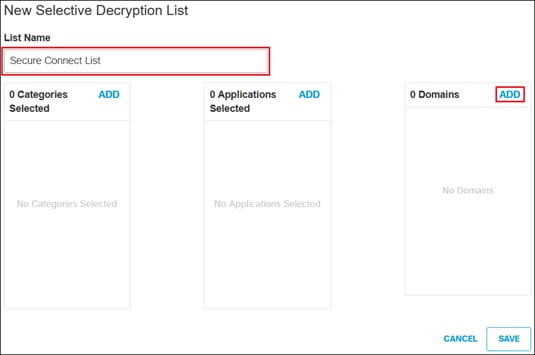
Step 4. Add the domain that should not be decrypted. Click Add.
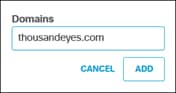
Step 5. Repeat for any additional domains. Click Save.
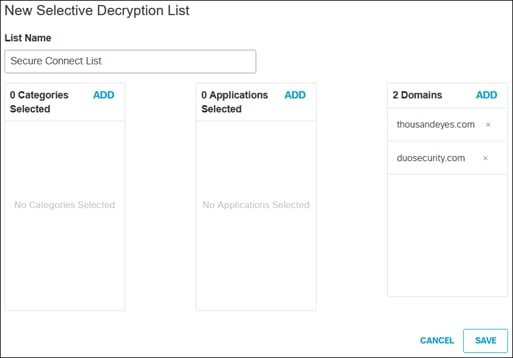
Create a Web Ruleset
There is only one Web policy, which is made up of rulesets and rules that set various security, permission, and access controls for your identities. With the Web ruleset, policies can be enforced on HTTP/HTTPS traffic traversing Secure Connect.
Step 1. From the Meraki dashboard, navigate to Secure Connect > Policies > Web.
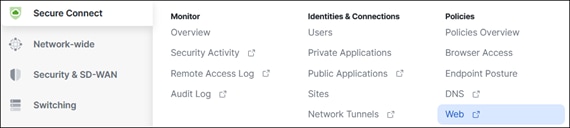
If the browser does not redirect to the Web Policy Umbrella page, navigate to Policies > Management > Web Policy.
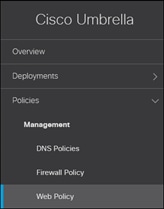
Step 2. Click Add near the top right.
Note: The default policy in Umbrella (bottom of the list) is the catch-all for identities that have not been defined in other rulesets. While a new policy will be created that covers all AD Groups and the branch ThousandEyes agent, ensure that this policy is defined and enforced for all connections that have not yet been defined.

Step 3. Expand the newly created ruleset.
Step 4. Next to Ruleset Name, click Edit.
![]()
Specify a name for the Ruleset then click Save.
![]()
Step 5. Next to Ruleset Identities, click Edit to choose the identity this ruleset will apply to.
![]()
For this design guide, the AD Group identity, and Internal Network identity SJ-BR1-ThousandEyes are chosen. This allows the branch ThousandEyes agent to go through the same security policy as users and provides visibility and insights into the user experience through Secure Connect.
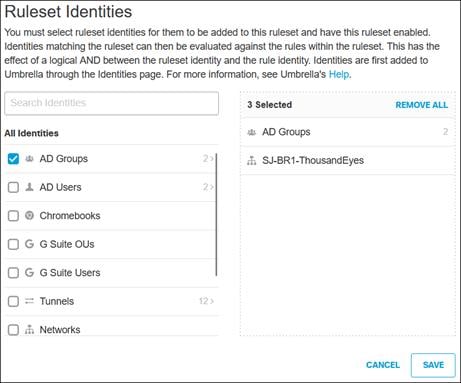
Step 6. Next to File Analysis, click Edit.
![]()
Enable File Inspection. Threat Grid Malware Analysis is out of scope for this design guide. For more information, reference Manage File Analysis. Click Save.
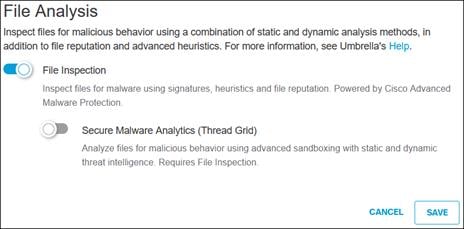
Step 7. Next to File Type Control, click Edit.
![]()
Choose the file types to block when a user or device matches this ruleset. In this design guide, for validation purposes batch files will be blocked. For more information, reference Manage File Type Control. Click Save.
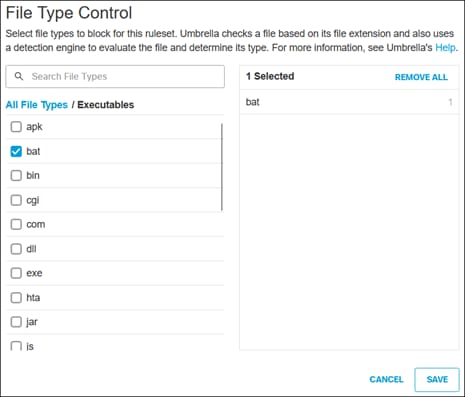
Step 8. Next to HTTPS Inspection, click Edit.
![]()
Click Enable HTTPS Inspection. Selective Decryption Lists can be selected here so that HTTPS traffic to specific Categories, Applications or Domains are exempted from decryption. Click Save.
Note: A root certificate is required in any circumstances where Umbrella must proxy, and decrypt HTTPS traffic intended for a website. The Umbrella Root CA certificate was trusted on the managed in the Initial Set Up section of this guide, however for steps on deploying the Umbrella Root CA certificate using Active Directory GPOs and other methods, reference Install the Cisco Umbrella Root Certificate.
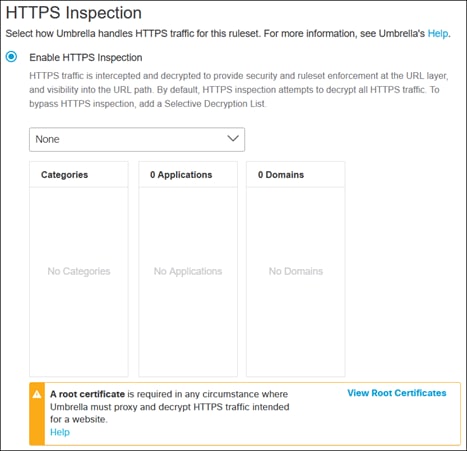
Step 9. The SAML feature is used to obtain the individual user identity of from on-prem users for Web policies. This design guide uses the identity support for the roaming client feature to collect user identity, however for environments where AD is not used or installing the Umbrella Roaming Security module on AD joined device is not possible or desired, the SAML feature can be used instead. As an additional step to enabling SAML, the Tunnels identity must be added to the in the Ruleset identities (in step 5). Additionally, because any unidentified web traffic is redirected to the SAML IdP to provide a username and password for identification, any web traffic from network devices that cannot enter credentials (and MFA) for SAML (like ThousandEyes Enterprise agents) that flows through Secure Connect must be configured to bypass the ruleset or identified with an Internal Network identity. Otherwise, web traffic from those devices will effectively be blocked. In this design guide, SAML will be kept as the default value of Disabled.
![]()
Step 10. Scroll back to the top of the ruleset and click Add Rule. These steps will go over the creation of a rule within a ruleset. Rules are used to enforce security policy for web traffic. In this design guide, a rule will be created with the condition: If the user is a part of the AD Group with the organization and going to a Social Networking site (such as Facebook), block this web traffic.

Step 11. Specify a Rule Name.

Step 12. Select a Rule Action.

For Secure Connect, there are three available options: Allow, Warn, and Block.
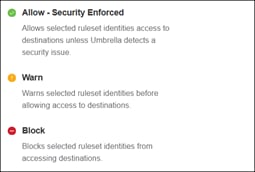
Step 13. Select the Identity that must be matched for this rule by clicking Add Identity.

Select the identity. In this design guide, the Inherit Ruleset Identities option is chosen.
Note: Identities can be added to more than one rule, however, because rules are only evaluated until a match is made, it is recommended to add the same identities to as few rules as possible and avoid possible access errors. For example, identities being unintentionally granted access to or blocked from destinations.

Step 14. Select the Destinations that must be matched for this rule by clicking Add Destination.

Select the Application, Content, or Destination that will be allowed or block when matching the rule. Application Settings and Content Categories provide built in options provided by Umbrella. Destination Lists are custom domains or URLs created by admins. Destination Lists can be created by going to Policies > Policy Components > Destination Lists. For more information on Destination Lists, reference Manage Destination Lists.
In this design guide, Social Networking sites will be blocked. Applications Settings are selected by clicking the arrow to the right.
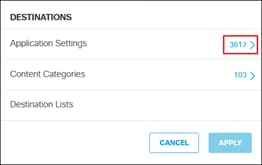
Social Networking is then selected from the available Application Settings. Click Apply when the destinations have been selected.
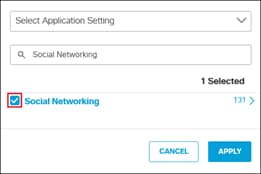
Step 15. Rule Configurations will not be used in this design guide, however for more information on enforcing rules during a specific time of day, reference Add Rules to a Ruleset.
Step 16. Click Save.

Step 17. Rules within Rulesets are enforced on the first match. To allow specific social media sites, such as LinkedIn, an Allow rule with a high priority can be created above the Social Media Block rule created in steps 10-16.
Note: An alternate approach is to modify the Application Settings for a web policy. This would allow a user to remove LinkedIn from the Social Media category for a given policy. For more information, see Manage Application Settings.
Steps 10-16 are done again with the following options:
● Rule Name: LinkedIn
● Rule Action: Allow
● Identities: Inherit Ruleset Identities
● Destinations: LinkedIn
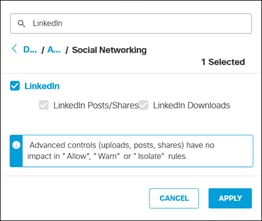
The finished rule is placed above the Social Media Block rule by default and saved.

Step 18. By default, rules are disabled after creation and will appear greyed out. To enable the rule click … then click the slider next to Enable Rule.
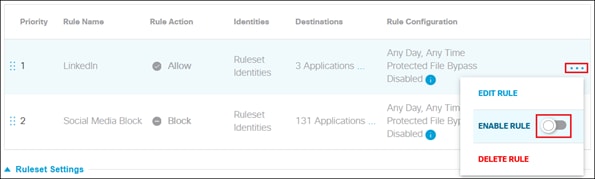
A prompt will appear to confirm the update to the rule status. Click Update.
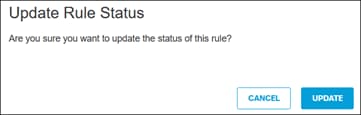
Step 19. Navigate to the bottom of the Ruleset and click Close.

Firewall as a Service (Secure Internet Access)
Firewall rules were created earlier to restrict L3/L4 access to applications and services within the data center. For Internet Access, different rules need to be defined. These rules can be used to restrict L3/L4 or layer 7 access to Internet resources. By default, all non-web Internet traffic is allowed. In this section, a policy will be created to block P2P traffic. Another rule will be created to block QUIC, which will be necessary for the DLP policy to work for ChatGPT later in this design guide.
Step 1. From the Meraki dashboard, navigate to Secure Connect > Policies > Firewall.
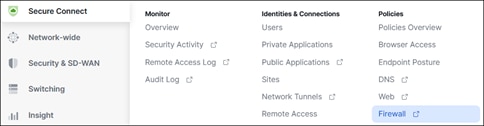
If the browser does not redirect to the Firewall Policy Umbrella page, navigate to Policies > Management > Firewall Policy.
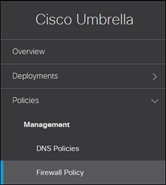
Step 2. Click Add at the top right.
![]()
Step 3. Under Rule Type, select Internet Traffic.
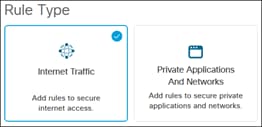
Step 4. Under Rule Details, specify the Rule Name.
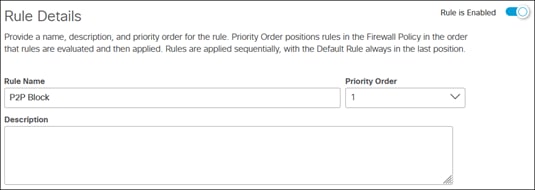
Step 5. Under Rule Action, select Allow or Block.
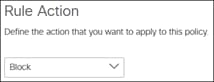
Step 6. Under Rule Criteria, the Protocol, Sources (Tunnel, IP addresses, Port), and Destination (IP addresses, Port, Application) are specified. These are used to determine the conditions which the rule is triggered.
In this design guide, any P2P traffic from any source will be blocked. Specify Application is selected in the dropdown under Applications then the + to the right is clicked.
![]()
From the available Applications, P2P is selected. Click Close when finished.
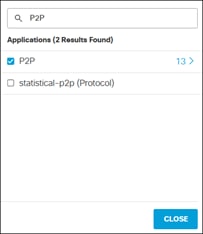
In the design guide, the Rule Criteria looks like the following when completed.
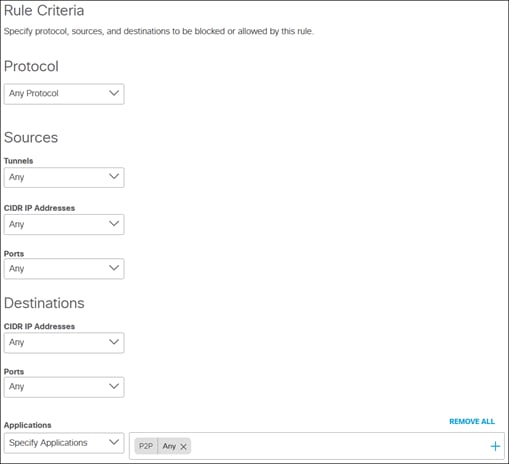
Step 7. Rule Schedule will not be used in this design guide, however for more information on enforcing rules during a specific date, reference Add Firewall Rule. Hit Counter will use the default value.
Step 8. Under Logging, logging is enabled for application visibility and verification within the design guide.
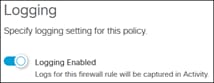
Step 9. Click Save.
Steps 2-9 are repeated for the block QUIC traffic with the following configuration:
Block QUIC:
● Rule Action: Block
● Rule Criteria:
◦ Protocol: Any
◦ Sources: Any Tunnel, Any CIDR IP Addresses, Any Ports
◦ Destinations: Any CIDR IP Addresses, Any Ports, Applications: QUIC
● Logging: Enable
Intrusion Prevention System (IPS)
The Intrusion Prevention System (IPS), based on SNORT 3 technology, uses signature-based detection to examine network traffic flows and take automated actions to catch and drop dangerous packets before they reach their target. An IPS capability is only as effective as the cyber-attack dictionaries. Secure Connect IPS uses an extensive database of signatures (40,000+ and growing) from the Cisco Talos Intelligence Group.
Step 1. From the Umbrella dashboard, navigate to Policies > Management > Firewall Policy.
Step 2. Click IPS Settings in the top right.
![]()
Step 3. Under Setting, click the slider to On.
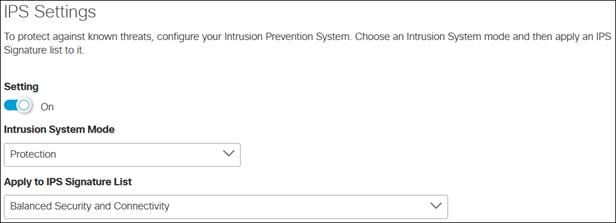
Step 4. Under Intrusion System Mode, expand the dropdown menu and choose either Detection or Protection.
● Detection: Will not block traffic, only alert on rules
● Protection: Will block based on IPS detection
This design guide is configured with Protection.
Step 5. Under Apply to IPS Signature List, expand the dropdown menu and choose the level of protection required:
● Connectivity Over Security: places emphasis on network connectivity and throughput at the possible expense of security
● Balanced Security and Connectivity: attempts to balance network connectivity and security to keep users secure while being less obtrusive toward normal traffic. Note: This design guide is configured using Balanced Security and Connectivity
● Security Over Connectivity: results in traffic to be inspected more deeply and more rules are evaluated
● Maximum Detection: places all emphasis on security, such that network connectivity and throughput are compromised. Only select this setting when total protection is required
This design guide is configured with Balanced Security and Connectivity. You can also create Custom Signature List by going to Policies > Policy Components > IPS Signature Lists. For more information, reference Add a Custom Signature List.
Step 6. Click Save.
Cloud access security brokers help control and secure the use of SaaS applications. The value of CASBs stems from their capability to give insight into cloud application usage across cloud platforms and to identify unsanctioned use. CASBs use auto discovery to expose shadow IT, detecting and reporting on the cloud applications that are in use across the network. A vital ability of CASB is DLP - the capability to detect and provide alerts when abnormal user activity occurs to help stop both internal and external threats.
This section will explore the application visibility and control aspect of CASB. Although included as part of CASB, DLP warrants its own mention and will be covered in the next section.
Step 1. From the Meraki dashboard, navigate to Secure Connect > Identities & Connections > Public Applications.
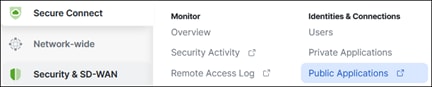
If the browser does not redirect to the App Discovery Umbrella page, navigate to Reporting > Core Reports > App Discovery then click Unreviewed apps at the top.
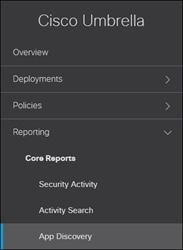
App Discovery will show recent unreviewed applications that have been discovered since logged traffic has been sent through Secure Connect. Using application discovery, you can determine how applications are used within the network.
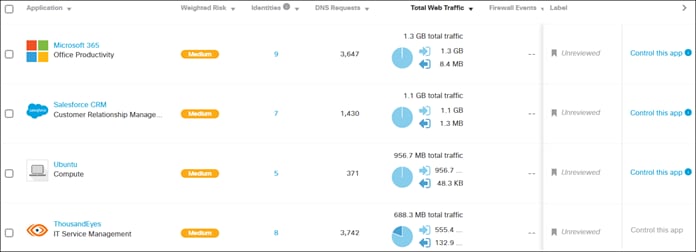
Step 2. Search for an application that you want to control. If you do not see the application and the application has been accessed through Umbrella, it is possible that either logging is not applied for rules that handle that traffic or if the application was recently accessed, up to 24 hours must pass before it is seen in App Discovery. In this design guide, Dropbox will be discovered and controlled. Prior to these steps, uploads were done from Dropbox before any controls were put in place.
Note: Control is not supported for all applications. To determine which applications can be controlled, select All Controllable Apps when searching for apps in step 4.
Step 3. To locate Dropbox, select the category Cloud Storage is selected on the left or type Dropbox in the search box at the top.
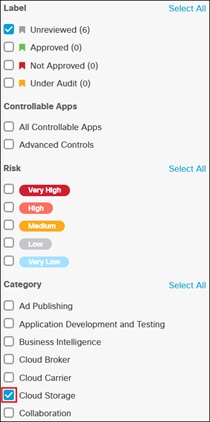
If the Cloud Storage category was selected, Dropbox can be seen along with other Cloud storage solutions.
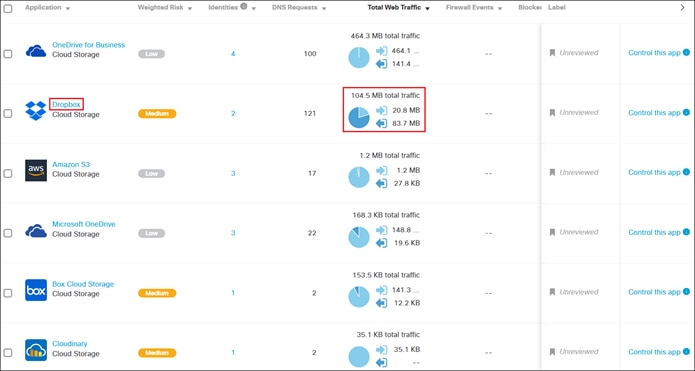
Hovering over the pie chart in Dropbox, it can be observed that only 20% of traffic was inbound while 80% was outbound since detected by App Discovery. As this is not an approved SaaS application for the organization, we would like to stop any uploads to Dropbox.

Step 4. Click the application name. Additional information will be provided about the application Risk Details provides Umbrella’s calculated risk of the application in your network based on several factors.
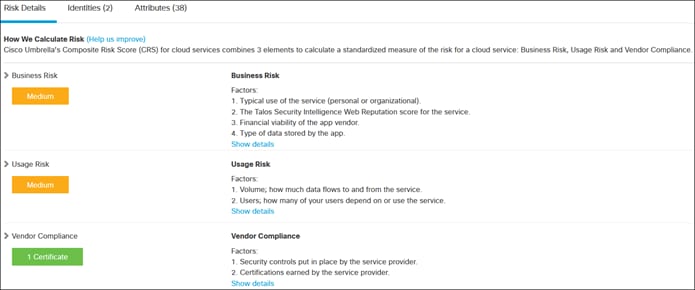
The Identities tab shows which identities have been logged accessed the application since discovery. Note that the collection of user identities is limited by the overall configuration of Umbrella in your environment. In the example below, DESKTOP-84HO4BR is shown instead of the user because of the Umbrella Roaming Security module was installed on a device not joined to the AD domain. For more information about these fields, reference View App Details.
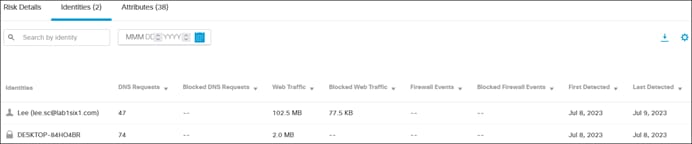
Step 5. Click Control this app in the top left.
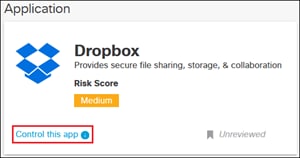
Step 6. Click the Web Application Settings tab then click Add Web Application Settings List. Web Application Settings lists provide more convenient ways to control access to Applications. This is because after it has been implemented in multiple rules, adding or removing an application from that list will change all rules with the Application Settings list in it. There is no need to add or remove the application from each individual rule.
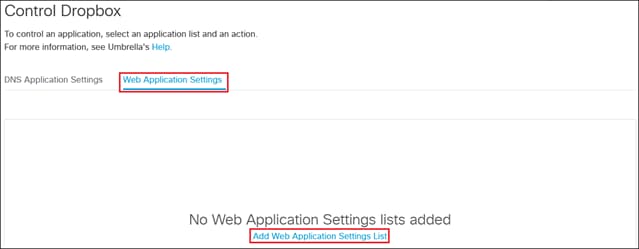
Step 7. Click Add near the top right.
![]()
Step 8. Provide a Name for the Application Setting when set the list to apply to the Web Policy.
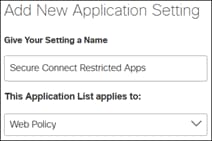
Step 9. No applications will be added here. Click Save.
Step 10. Pivot to App Discovery by navigating to Reporting > Core Reports > App Discovery.
Then click unreviewed apps. Search for the application again.

Step 11. Click Control this app again. Click Web Application Settings. The Application Setting created will be visible. Click the checkbox next to the created Application Setting. In the Application/Activities section, click the dropdown menu then select Application or Activity you want to control.
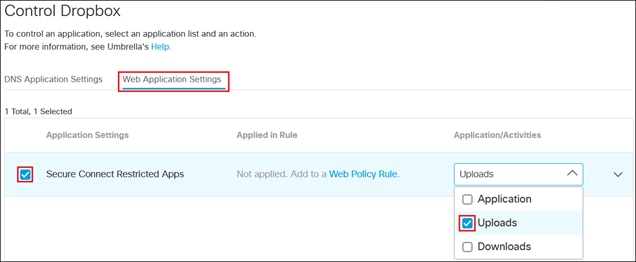
Step 12. Click Save.
Step 13. Go to the Web policy by navigating to Policies > Management > Web Policy.

Step 14. Click Add Rule.
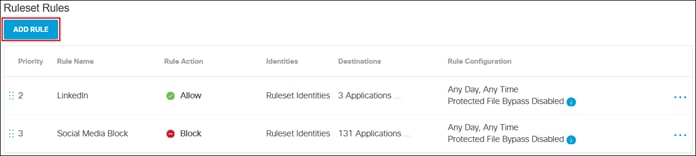
Step 15. Specify a Rule Name.

Step 16. Select a Rule Action.

For Secure Connect, there are three options: Allow, Warn, and Block.
Note: Advanced CASB controls such as uploads, posts, and shares have no impact in Allow or Warn rules.

Step 17. Select the Identity that must be matched for this rule by clicking Add Identity.

Select the identity. In this design guide, the Inherit Ruleset Identities option is chosen.
Note: Identities can be added to more than one rule, however, because rules are only evaluated until a match is made, it is recommended to add the same identities to as few rules as possible and avoid possible access errors. For example, identities being unintentionally granted access to or blocked from destinations.
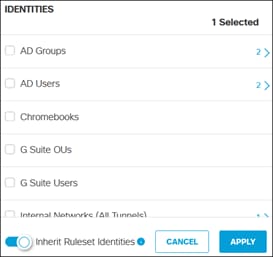
Step 18. Select the Destinations that must be matched for this rule by clicking Add Destination.

Click the arrow next to Application Settings.
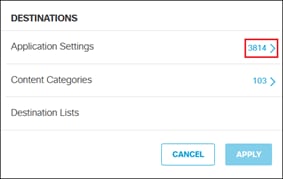
Expand the dropdown menu at the top and select the Application Setting list created earlier.
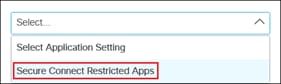
Verify Dropbox uploads have already been selected by searching for Dropbox. Click Apply.
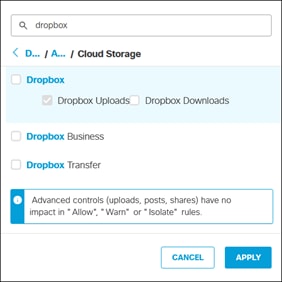
Step 19. Rule Configurations will not be used in this design guide, however for more information on enforcing rules during a specific time of day, reference Add Rules to a Ruleset.
Step 20. Click Save.

Step 21. Enable the created rule.
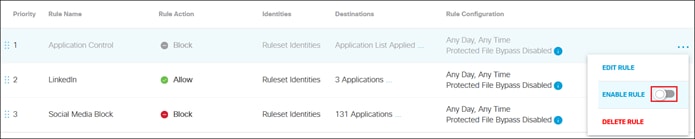
A prompt will appear to confirm the update to the rule status. Click Update.

Step 22. Navigate to the bottom of the Ruleset and click Close.

As more companies move critical enterprise data to cloud-based services, company data becomes more vulnerable to both malicious exfiltration and unintentional misuse by inexperienced users. DLP helps to protect sensitive data uploaded to the web. It discovers and protects sensitive data stored and shared in sanctioned SaaS applications. Umbrella multimode cloud DLP functionality analyzes outbound web traffic inline and out-of-band to provide unified control over sensitive data leaving an organization.
In this section, we will create inline DLP policies to prevent the intentional or unintentional loss of sensitive credit data. first create exceptions for services that should not be decrypted by HTTPS Inspection then, in the Umbrella Web Policy, create Rulesets to enforce security and visibility into web traffic
Inline DLP
Inline DLP enforcement inspects data in real time with HTTPS inspection via SWG. As a prerequisite, HTTPS inspection must be enabled in a Web ruleset with the same identities added to the DLP policy. This allows Umbrella to check for any potential DLP incidents in decrypted data for those identities. For more information on Inline DLP policies, reference Add a Real Time Rule to the Data Loss Prevention Policy.
Note: For DLP validations conducted later in the design guide with ChatGPT, an additional prerequisite for the policy to take effect was blocking QUIC in the Umbrella Firewall. For more information on disabling QUIC, reference Symptoms of QUIC enabled on Google Chrome.
Step 1. From the Meraki dashboard, navigate to Secure Connect > Policies > Data Loss Prevention.
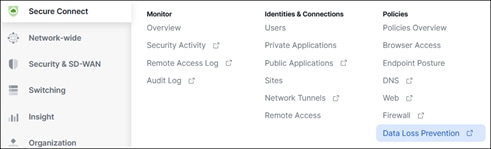
If the browser does not redirect to the Data Loss Prevention Policy Umbrella page, navigate to Policies > Management > Data Loss Prevention Policy.
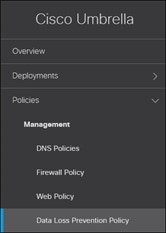
Step 2. Expand the Add Rule dropdown menu and select Real Time Rule.

Step 3. Under Add New Real Time Rule, specify a Rule Name and the Severity of the rule based on the risk involved or importance.
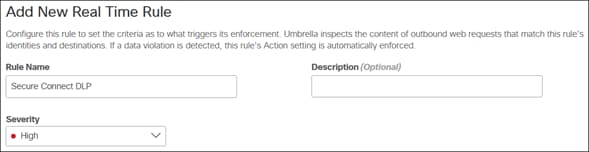
Step 4. Under Data Classifications, select where in uploaded files the rule will search for the data classifications chosen. Additionally, select any built-in or custom Data Classifications that will apply to this rule. Custom Data Classifications can be made by going to Policies > Policy Components > Data Classification. For more information, reference Manage Data Classifications.
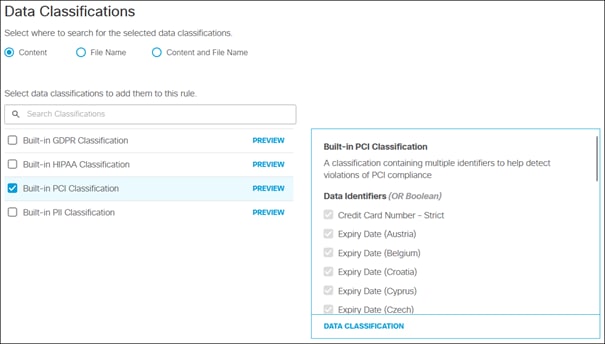
Step 5. File labels will not be used in this design guide. These are used to search for any of the configured file label names in the value of the files’ document properties. For more information on this, reference Add a Real Time Rule to the Data Loss Prevention Policy.
Step 6. Under Identities, select the identities that the rule will apply to.
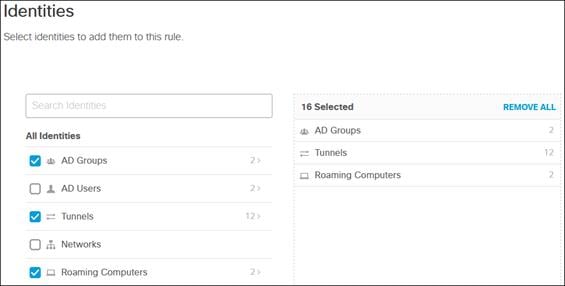
Step 7. Under Destinations, select the destinations the rule will monitor for violations to the DLP policy. You can specify All Destinations or select specific Applications and custom Destination Lists. Optionally, you can also exclude specific Destination Lists and Applications.
Note: If blocking traffic, not all destinations are supported. The level of support for each application can be found at Supported Applications.
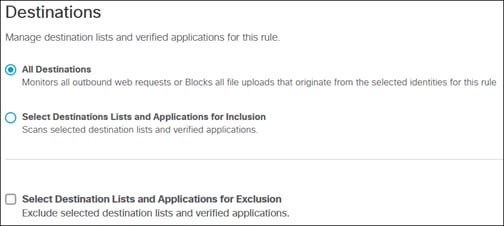
Step 8. Under Action, expand the dropdown menu and choose either Monitor or Block.
● Monitor: Will not block traffic, only alert on rules
● Block: Will block based on DLP rule violation detection
In this design guide, the DLP rule is set to Block.

After choosing Block, a window will popup reminding that the Block action is only applicable to certain destinations. Click Back to Rule.

Step 9. Click Save.
SaaS API DLP
SaaS API DLP policies inspect data out-of-band at rest without going through SWG but with near real-time enforcement. In this design guide, these policies will be used to secure data at rest stored in the Microsoft 365 service OneDrive. For more information on SaaS API DLP, reference Add a SaaS API Rule to the Data Loss Prevention Policy.
Step 1. From the Umbrella dashboard, navigate to Policies > Management > Data Loss Prevention Policy.
Step 2. Expand the Add Rule dropdown menu and select SaaS API Rule.
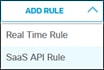
Step 3. SaaS API Rules require a platform such as Microsoft 365 or Google Drive to be authorized before continuing. Click Go to Authentication Page. The Authentication page can also be found by navigating to Admin > Authentication.

Step 4. From the Authentication page, expand the platform that will be authorized. Click Authorize New Tenant for the DLP section. Some platforms only support Cloud Malware or DLP authorization with Umbrella while some support both.
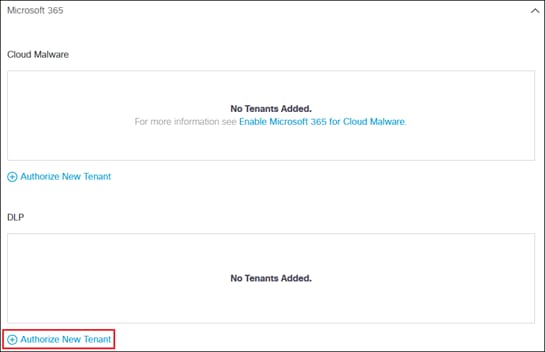
Step 5. Follow the prompts for authorization. For Microsoft 365, confirmation of the prerequisites must be done before proceeding. Click Next.
Note: An additional requirement for DLP enforcement is enabling Auditing within the Microsoft 365 tenant. Without auditing, Umbrella will not be able to trigger out of band DLP rules. For more information, reference the prerequisites for Enable SaaS API Data Loss Protection for Microsoft 365 Tenants.
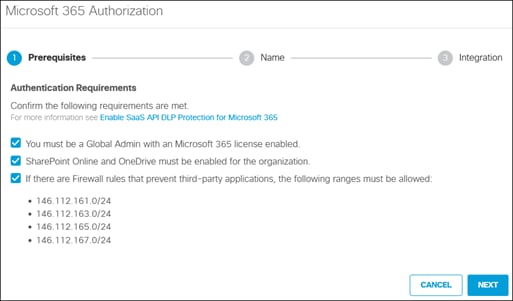
Step 6. Specify a Tenant Name which will be visible on Umbrella. Click Next.
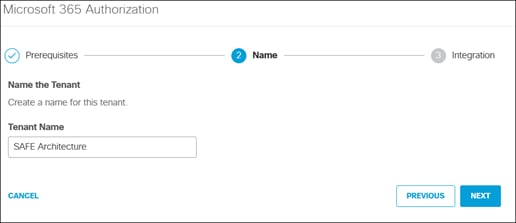
Step 7. Click Next once more to begin integration with Microsoft 365 for DLP.
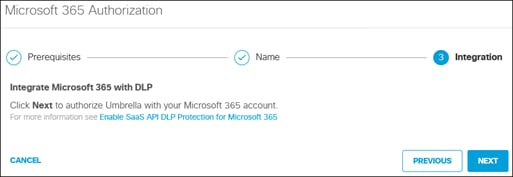
Step 8. The browser will redirect to Microsoft 365 where you will be asked to login then accept Umbrella gaining access to specific permissions needed to monitor Microsoft 365 for DLP policy violations. If you agree, click Accept.
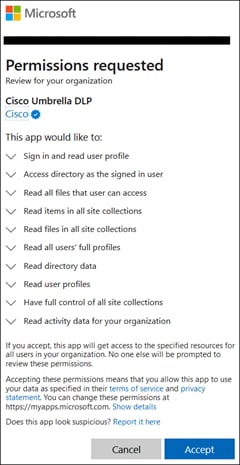
Step 9. The browser will redirect back to Umbrella. Click Done to complete the process.
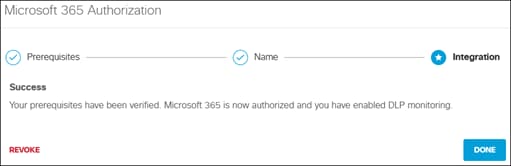
The DLP section of the platform should now show Status as Authorized with the Tenant Name given in step 6.
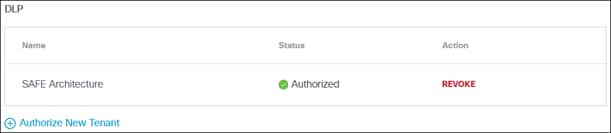
Step 10. Navigate back to Policies > Management > Data Loss Prevention Policy in the Umbrella Dashboard. Expand the Add Rule dropdown menu and select SaaS API Rule again.
Step 11. Under Add New Real Time Rule, specify a Rule Name and the Severity of the rule based on the risk involved or importance.
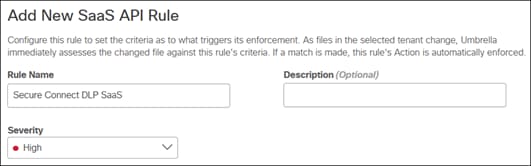
Step 12. Under Data Classifications, select where in uploaded files the rule will search for the data classifications chosen. Additionally, select any built-in or custom Data Classifications that will apply to this rule. Custom Data Classifications can be made by going to Policies > Policy Components > Data Classification. For more information, reference Manage Data Classifications.
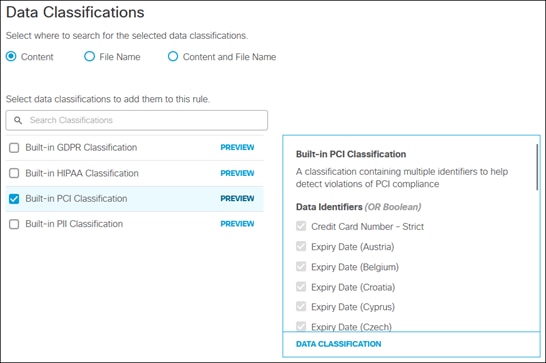
Step 13. File labels will not be used in this design guide. These are used to search for any of the configured file label names in the value of the files’ document properties. For more information on this, reference Add a SaaS API Rule to the Data Loss Prevention Policy.
Step 14. Under Platform, select the SaaS platform that will be monitored by the DLP rule. The platform must be authorized to appear here.
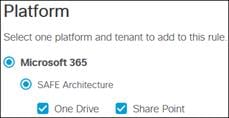
Step 15. Under File Owners, specify which files will be processed based on their file owner.

Step 16. (Optional) Select an additional file sharing exposure condition that can be met for the DLP rule to trigger a violation. Shared publicly and Shared with external users will be used in this design guide.
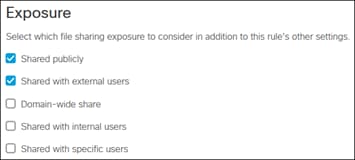
Step 17. Under Action, specify Monitor, Quarantine, or Revoke Access.
● Monitor: Detects and logs a DLP event for every modified file violating this rule’s criteria
● Quarantine: Isolates a file that violates the rule criteria to the quarantine folder
● Revoke Access: Removes public link, all external or internal users, and any share permission within the entire organization. This action also removes the file owner and transfers the ownership to the selected user
If Revoke Access is selected, additional options will be selectable based on the platform. Revoke Access with the Remove public like option will be used in this design guide.
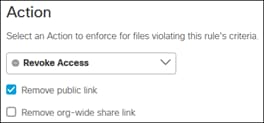
Step 18. Click Save.
Digital experience from a SASE perspective is how end users experience any application, from wherever they’re sitting whether that is from their home office or an on-premises branch site. Digital Experience Monitoring is a Gartner IT category that emerged in 2019 to address user experience, human or machine, across every dependency, whether network or service, inside or outside your organization. DEM is used to ensure the reachability and availability of business-critical SaaS, internally hosted applications, and cloud-based services over any network, including the Internet and the corporate network.
In this section, ThousandEyes Enterprise agents will be deployed at the branch and data center, and a ThousandEyes endpoint agent will be deployed on the managed device. After this, tests will be created to monitor access to the private and public applications used by the workforce over Secure Connect tunnels (the overlay) and see how the security policies enforced by Umbrella affect the user experience. Additionally, tests will be created to probe the Secure Connect headend directly(the underlay) from the branch and data center. This will inform us if there are any issues tunneling traffic from either site to Secure Connect over the Internet.
Enterprise Agents monitor from within corporate networks to show the performance between offices and data centers, as well as internal and SaaS apps. Enterprise Agents should be placed where you want to run your test. In this design guide, the agent will be used to monitor applications accessed by users, so the agent should be placed at locations where there will be a significant concentration of users. In this design guide, there will be a single ThousandEyes agent at the branch on the same network as users. While there are no users at the data center, it is important to monitor the tunnel established with Secure Connect. Another Enterprise agent is deployed within the data center for underlay testing. For more information on Enterprise Agents, reference Getting Started with Cloud and Enterprise Agents.
Step 1. From the ThousandEyes dashboard, navigate to Cloud & Enterprise Agents > Agent Settings.
Step 2. Click Add New Enterprise Agent.

Step 3. Copy the Access Group Token.
Step 4. There are multiple ways to deploy the Enterprise Agent in networks. Reference Installing Enterprise Agents for step by step instructions for installing the ThousandEyes Enterprise agent in your environment. For the lab in this design guide, an enterprise agent was installed in the branch and data center using a virtual appliance (OVA).
Step 5. Once installation is complete, the ThousandEyes Virtual Appliance will either automatically obtain a DHCP IP address or require a manual configuration before the web interface is available. Once the appliance has been configured with an IP address, navigate to the web interface and login with the username admin and the password welcome.
Step 6. The web interface password will need to be changed. Enter welcome in the Current Password field and the new password in the New Password and Repeat Password fields. Click Change Password.
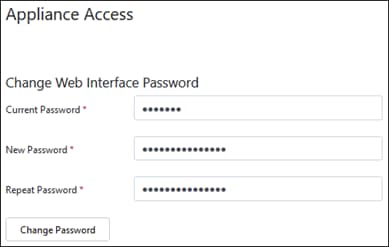
Step 7. (Optional) An SSH Key can be added to access the virtual appliance via SSH in the SSH Access section.
Step 8. Click Continue.
Step 9. Paste the Access Group Token copied in step 3 in the Access Group Token field. BrowserBot is a component that manages page load and transaction tests. While these tests will not be done in this design guide, the defaults for BrowserBot and Enable Crash Reports are used. For more information on BrowserBot, reference What is BrowserBot. Click Continue.
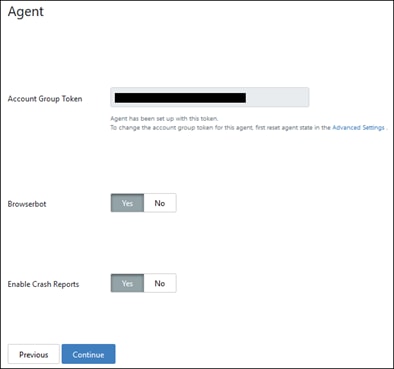
Step 10. On the Review page, the Appliance Status and Diagnostics should immediately run. Click Complete.
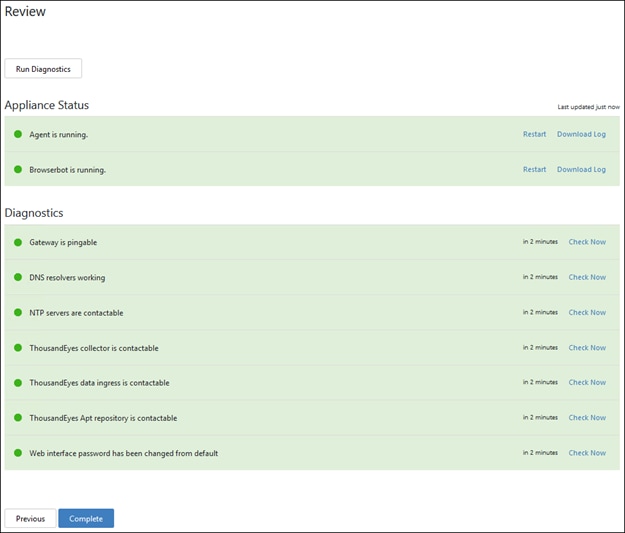
Step 11. Navigate to Network in the left column.

Step 12. Specify a Hostname for the Virtual Appliance.
![]()
Step 13. Provide the IPv4 information for the Virtual Appliance. Because the ThousandEyes Virtual Appliances in the design guide will be identified by their IP address in Umbrella, both are configured Manually with static IP addresses.
Note: If you set a static IP address, ensure your DHCP server is configured to exclude the IP given to the ThousandEyes agent.

Step 14. Specify the IPv6 information if this is being used. In this design guide IPv6 is disabled.
Step 15. Specify DNS information.
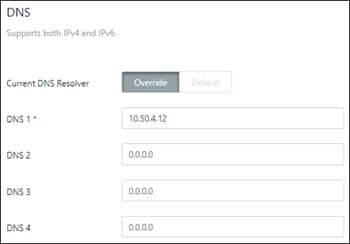
Step 16. In the Web Proxy section, keep the default value of None.
Step 17. In the CA Certificate section, click Import File or copy and paste the PEM format Umbrella Root CA certificate obtained in earlier steps by going to Deployments > Configuration > Root Certificate in the Umbrella dashboard.
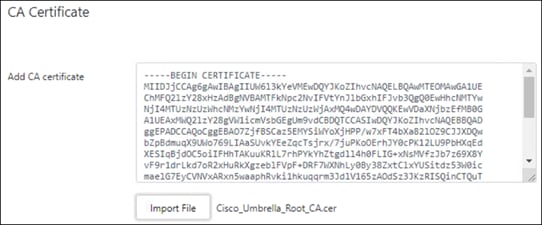
Step 18. In the Apt Proxy section, keep Use Apt Proxy unchecked.
Step 19. Click Save Changes.
Step 20. Navigate back to Cloud & Enterprise Agents > Agent Settings in the ThousandEyes dashboard and confirm the Virtual Appliances are visible in the Enterprise Agents tab.
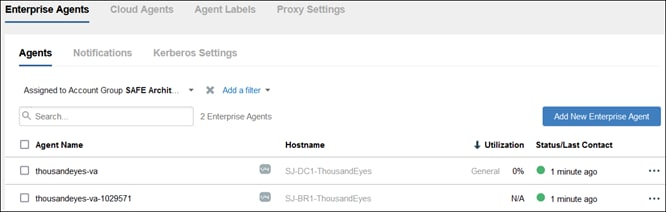
Step 21. Optionally, the Agent Name for the ThousandEyes Virtual Appliances can be changed so they are easier to identity in views and tests. Click on the Agent name and in the pop-up, window modify the Agent Name field.
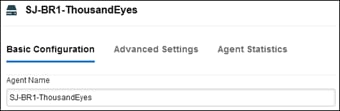
Step 22. Click Save Changes.
Enterprise and Cloud Agent Tests
With the Enterprise agents set up, we can begin setting up tests. Running tests from only Enterprise Agents will only provide a view of cloud-based applications and internet resources from the location the agent is located. While this is valuable, additional visibility from agents not located at on-premises can provide even better insights into the applications that are being tested. Cloud Agents are globally distributed vantage points, managed and maintained by the ThousandEyes Operations team. They are deployed in tier 2 and tier 3 Internet Service Providers, Internet exchange points, and cloud providers such as AWS, Google, Azure, and Alibaba. These vantage points can run all network, DNS, web, transaction, and voice layer tests available within the ThousandEyes platform, and are available for use by all ThousandEyes customers on a unit consumption basis.
A few different tests will be created to the applications and services used within this design guide to monitor any issues that arise.
Network Tests (Underlay)
For users to access applications securely, their traffic is tunneled to a Secure Connect headend. Monitoring the underlay of the Secure Connect tunnel can let us know if the digital experience is impacted by issues getting to the headend over the Internet connection from the site.
Step 1. From the ThousandEyes dashboard, navigate to Cloud & Enterprise Agents > Test Settings.
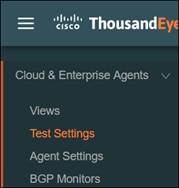
Step 2. In the Tests tab, click Add New Test.
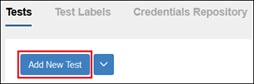
Step 3. Select Network Layer and Agent to Server Test Type. Specify a Test Name to identify the test.
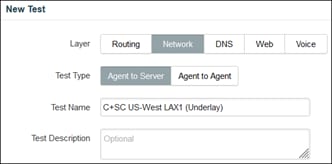
Step 4. In the Basic Configuration tab, specify the IP address of the Secure Connect headends in the Target field. IP address information for secure connect headends can be found referencing the Secure Connect Data Center List and Connect to Cisco Umbrella Through Tunnel documents. For Protocol, select ICMP. Interval is left as 2 minutes and Alerts are disabled. In production environments, using the default Alerts is not recommended as there can be multiple false alerts. Alerts should instead be tailored to your environment. For more information on the creation of alerts, reference Getting Started with Alerts. Expand the Agents dropdown menu to select agents the tests will be executed from.
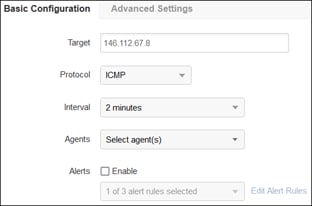
Step 5. A popup window will appear where agents can be selected. Click the Enterprise label and select the virtual appliances installed in the locations that will be establishing a connection with that Secure Connect headend. In this design guide, both the branch and data center connect to the US-West Secure Connect region so agents in both networks are added. Exit the window.
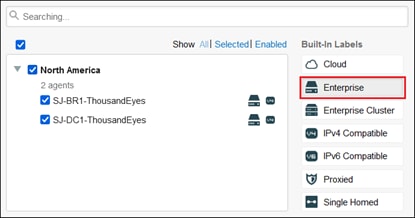
Step 6. Click Test Now to verify the completed configuration then click Create New Test.
Note: To test the underlay, the ICMP traffic from the agents must not go over the Secure Connect tunnels. Additionally, ICMP responses must not be blocked to get the best Path Visualization in ThousandEyes. In earlier steps, the branch Meraki MX250s were configured with a Local Internet breakout rule to route ICMP packets destined to the Secure Connect headend out the local WAN. The data center Cat8500s were configured with policy-based routing to send specific traffic over the Secure Internet Access VTIs (Since overlay is not tested from the data center ThousandEyes agent, all traffic from that agent is routed out the local WAN). Ensure the appropriate routing policies are implemented.
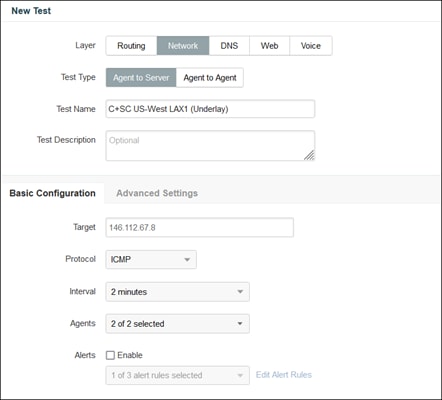
Step 7. Repeat steps 2-6 for any additional Secure Connect headend.
HTTP Server Tests (Overlay)
A few tests will be created to test access to business-critical applications. These tests collect data on the initial start of a session (DNS) with an HTTP server and work up to the application layer (HTTP) for the application. At the time of writing this design guide, Secure Connect will block ThousandEyes traces and features like Path Visualization will not show the complete path.
Step 1. From the ThousandEyes dashboard, navigate to Cloud & Enterprise Agents > Test Settings.
Step 2. Click Add New Test. Select Web Layer and HTTP Server Test Type. Specify a Test Name to identify the test.
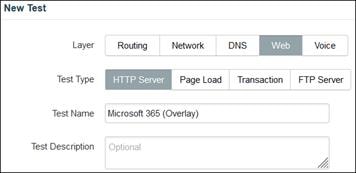
Step 3. In the Basic Configuration tab, specify the URL for the HTTP Server that will be tested. Interval is left as 2 minutes and Alerts are disabled. In production environments, using the default Alerts is not recommended as there can be multiple false alerts. Alerts should instead be tailored to your environment. For more information on the creation of alerts, reference Getting Started with Alerts. Expand the Agents dropdown menu to select agents the tests will be executed from.
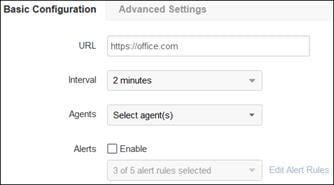
Step 4. Click the Enterprise label and select the virtual appliance installed in the branch.

Step 5. Click the Enterprise label again to unselect it, then click the Cloud label. Select some Cloud Agent connections for latency comparisons with the branch. Exit the window.
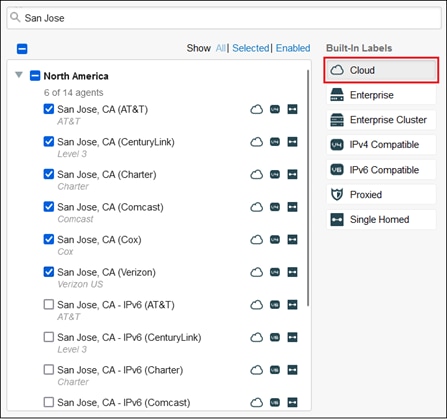
Step 6. Click the Advanced Settings tab.
![]()
Step 7. Scroll down and click the checkbox next to Verify Content. In the textbox, enter a POSIX Extended Regular Expression to match a value in the returned response from the tested HTTP server. Because user and ThousandEyes test traffic will be proxied through Umbrella, if Umbrella blocks traffic to the HTTP server, it will return an HTTP status code 200 with a blocked content page. Without additional verification that the response isn’t coming from the Salesforce HTTP server, the test will show a success. In the design guide, for the Microsoft 365 test, the value www.office.com is used.
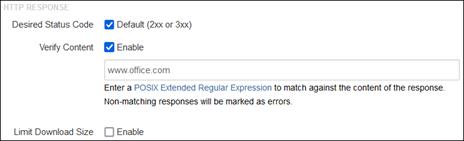
Step 8. Click Test Now to verify the completed configuration then Create New Test.
Step 9. Repeat steps 2-8 for any additional domains that will be monitored. In the design guide, the following additional web tests are created for validation purposes:
● https://facebook.com – Verifies that the social media site Facebook continues to be blocked by Umbrella based on the Web policy
● https://linkedin.com – Verifies that only social media site LinkedIn is allowed based on the rule order within the Umbrella Web policy
● https://wordpress.lab1six1.com – Tracks reachability and performance to the private application WordPress. Only the SJ-BR1-ThousandEyes Enterprise agent is set to monitor WordPress since this URL is only accessible internally.
DNS Tests
DNS is fundamental for most successful user connections to applications. In the case of a DNS outage, users won’t be able to access applications within or outside the network. Tests will be created to test the internal DNS server’s resolution of external domains and external DNS server’s ability to do the same.
Step 1. From the ThousandEyes dashboard, navigate to Cloud & Enterprise Agents > Test Settings.
Step 2. Click Add New Test. Select DNS Layer and DNS Server Test Type. Specify a Test Name to identify the test.
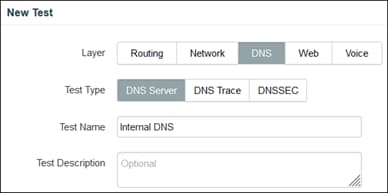
Step 3. In the Basic Configuration tab, specify the internal domain that will be tested. Interval is left as 2 minutes. In the DNS Servers field, specify the internal DNS servers that will forward external domains to Umbrella DNS servers. Alerts are disabled. In production environments, using the default Alerts is not recommended as there can be multiple false alerts. Alerts should instead be tailored to your environment. For more information on the creation of alerts, reference Getting Started with Alerts. Expand the Agents dropdown menu to select agents the tests will be executed from.
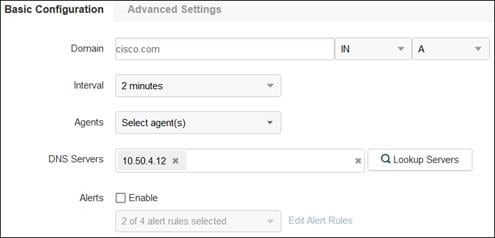
Step 4. Click the Enterprise label and select the virtual appliances in the branch and data center. Exit the window.
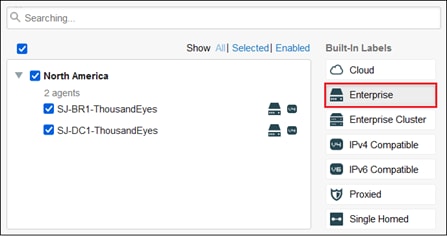
Step 5. Click Test Now to verify the completed configuration then Create New Test.
Step 6. Create another DNS Server test but for the DNS servers used for forwarding to external domains. This time choose the Cloud Agent(s) in a similar location as the site. In this design guide, Umbrella DNS servers are used as forwarding servers. This allows us to check the availability of Umbrella DNS outside the local network in case external domain resolution is failing.
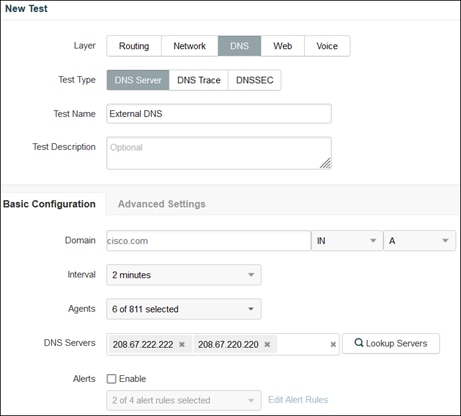
Step 7. Click Test Now to verify the completed configuration then Create New Test.
The Endpoint Agent is a lightweight service installed on an end user's laptop or desktop that monitors applications through a browser plug-in. Because Endpoint Agent goes where the user goes, you can use it to troubleshoot performance issues related to Wi-Fi, bandwidth capacity, ISP routing, VPN gateways, and SaaS availability. In this design guide, the agent will be deployed to the managed device that will be used for testing and validation. After conducting validations, information from the agent will be reviewed to see the digital experience from the perspective of the user executing the validations. For more information on Endpoint Agents, reference Getting Started with Endpoint Agents.
Step 1. From the ThousandEyes dashboard, navigate to Agent Settings.
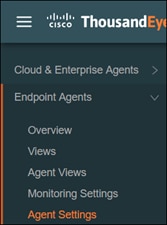
Step 2. In the Endpoint Agent tab, click Add New Endpoint Agent.

Step 3. For step by step instructions for installing the Endpoint Agent, reference Installing Endpoint Agents. In the design guide, the browser extensions for Internet Explorer, Google Chrome, and Microsoft Edge are enabled as well so that Browser sessions tests can be executed.
Note: While the browser extensions were opted-in during the installer-based installation of the ThousandEyes endpoint agent in the lab, ThousandEyes does not recommend installing the Google Chrome and Microsoft Edge browser extensions via the installer as it might conflict with the existing Group Policy settings. The Install the Endpoint Agent Browser Extension article can be referenced for alternate methods to install the browser extension.
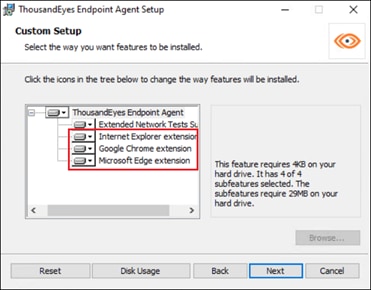
Step 4. When complete, navigate back to Endpoint Agents > Agent Settings in the ThousandEyes dashboard and confirm the Endpoint Agent is visible in the Endpoint Agents tab.

Now that the endpoint agent is installed on the managed device, tests can be sourced directly from the user’s perspective. We can gain insight into any application performance issues not just at the branch but wherever the user is located when they are working remotely.
Browser Session Tests
Browser session tests collect information when a user browses webpages in the monitored domain. Information collected from these tests provides a detailed view into the user’s digital experience and can be used to quickly troubleshoot performance issues. More information on the information collected through these tests can be found by referencing Endpoint Agent Browser Sessions View.
Step 1. From the ThousandEyes dashboard, navigate to Endpoint Agents > Monitoring Settings.
Step 2. Click the Browser Sessions tab, then click Add New Monitored Domain Set.

Step 3. Provide a Name for the Domain Set then add the domains that will be monitored in the Monitored Domains field.
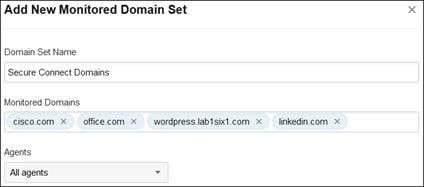
Step 4. Click Add New Monitoring Domain Set.
Scheduled HTTP Tests
Adding the domain for Facebook to the Browser session list won’t show any information because it is blocked by Umbrella, however we can still get data to confirm that the content filtering rule is still working. To test if the ThousandEyes Endpoint agent also experiences a failure accessing Facebook, a scheduled test will be created for it. These are similar to the Enterprise agent HTTP server tests.
Step 1. From the ThousandEyes dashboard, navigate to Endpoint Agents > Monitoring Settings.
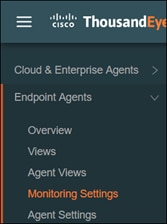
Step 2. In the Scheduled Tests tab, click Add New Test.

Step 3. In the Type section, select Web and HTTP Server. Provide a Test Name for the Scheduled Test.
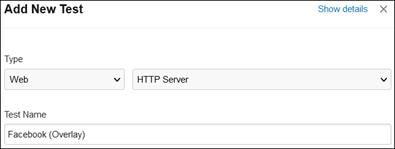
Step 4. In the Basic Configuration tab, specify the URL for the HTTP Server that will be tested. Protocol, Probing Mode, Interval are left as their default values. Alerts are disabled. In production environments, using the default Alerts is not recommended as there can be multiple false alerts. Alerts should instead be tailored to your environment. For more information on the creation of alerts, reference Getting Started with Alerts .
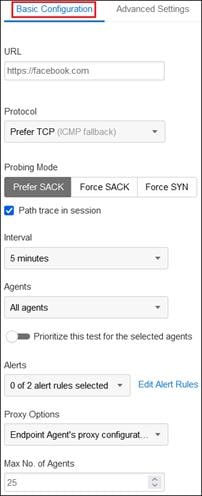
Step 5. Unlike Enterprise agents which are expected to run test consistently, endpoint agents are not due to users shutting down their computer or not having Internet access during travel. To account for this, the Agents and Max No. of Agents fields allow you to set specific agents to run sets from and the maximum number of agents to run the test at the same time to account for this. Endpoints that are available to do the tests will execute the tests. These are kept at their default values.
Step 6. Click the Advanced Setting tab.
![]()
Step 7. Scroll down and click the checkbox next to Verify Content. In the textbox, enter a POSIX Extended Regular Expression is added to match a value in the returned response from the HTTP server. Because user and ThousandEyes test traffic will be proxied through Umbrella, if Umbrella blocks traffic to the HTTP server, it will return an HTTP status code 200 with a blocked content page. Without additional verification that the response isn’t coming from the HTTP server, the test will show a success. In the design guide, for the Facebook test, the value www.facebook.com is used.

Step 8. Click Test Now to verify the completed configuration then Create New Test.
Cisco SASE with Secure Connect Validation Tests
Now that the Secure Connect Design has been completed, we will conduct tests against the completed setup to ensure that it meets each SAFE capability requirement.
Secure Remote Worker Validations
Private Application Access (Clientless ZTNA) – Remote Worker
Validation Test #1: Verify Private Application can be reached from Secure Connect ZTNA Proxy
Step 1. While off the protected network, on an unmanaged device navigate to the ZTNA URL from Chrome or Edge.
Step 2. The browser should redirect to Duo SSO where the permitted user can provide their username and password.
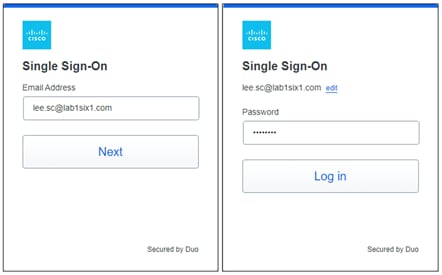
Step 3. Duo SSO will verify the user with a Duo Push. On the mobile device, approve the Duo Push.
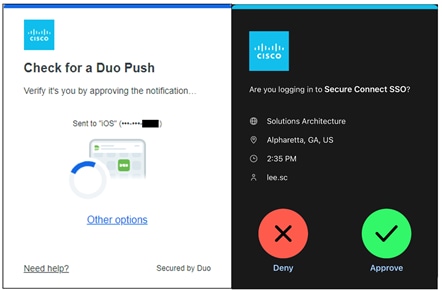
Step 4. Duo will check if the computer is trusted for SSO purposes.
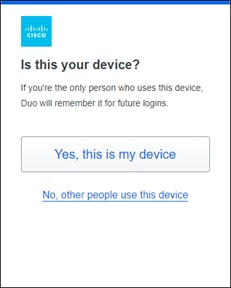
Step 5. ZTNA proxies the internal Application successfully.
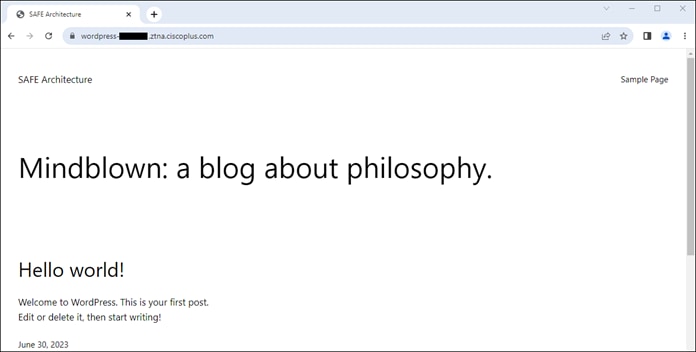
Step 6. Verify the successful connection in Secure Connect by navigating to Secure Connect > Policies > Browser Access.

Step 7. In the allow rule, hover over the # value above Last 24 hours. Click View details in the box that pops up.
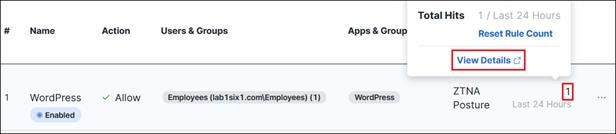
Step 8. Secure Connect will redirect to the Umbrella dashboard (Reporting > Core Reports > Activity Search).
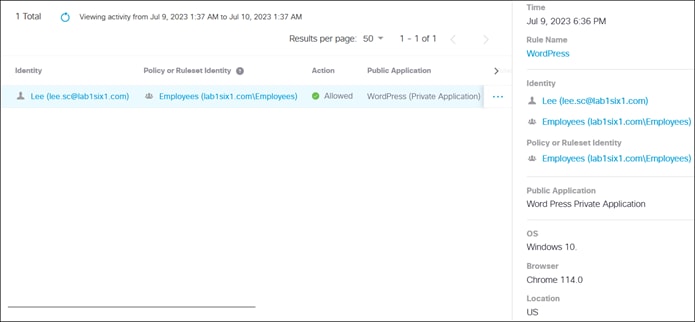
Validation Test #2: Verify ZTNA restricts access based on user identity
Step 1. While off the protected network, on an unmanaged device navigate to the ZTNA URL from Chrome or Edge.
Step 2. The browser should redirect to Duo SSO where the restricted user can provide their username and password.

Step 3. Duo SSO will verify the user with a Duo Push. On the mobile device, approve the Duo Push.
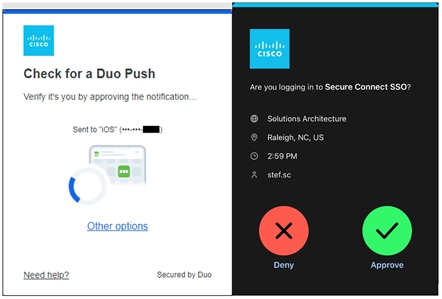
Step 4. Secure Connect lets the user know they are not permitted to access the application.
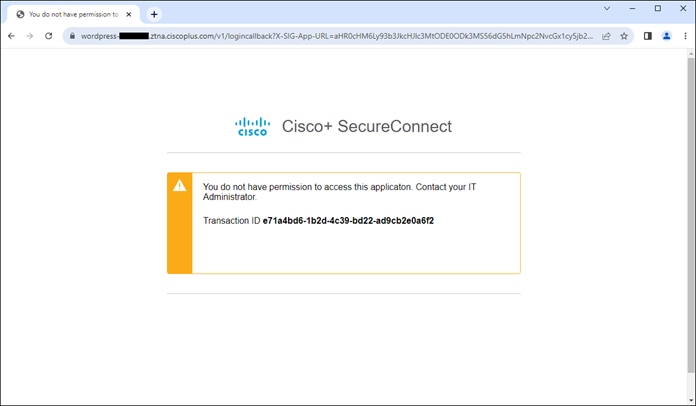
Step 5. From the Umbrella dashboard, navigate to Reporting > Core Reports > Activity Search.
Step 6. Click the Filter button on the top left, if necessary, then in the Response section on the left, click Blocked. On the top right, select Browser Based Access. Verify the block entries for the attempted access have been logged.
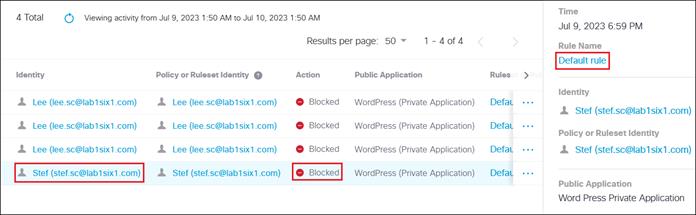
Validation Test #3: Verify ZTNA restricts access based on browser
Step 1. In the endpoint posture policy configured in this design guide, the latest versions of Chrome and Edge were permitted. Firefox was not a permitted browser. While off the protected network, on an unmanaged device navigate to the ZTNA URL using the Firefox browser.
Step 2. Authenticate in Duo SSO with the permitted user credentials and approve the Duo Push.
Step 3. Secure Connect lets the user know they are not permitted to access the application with Firefox.
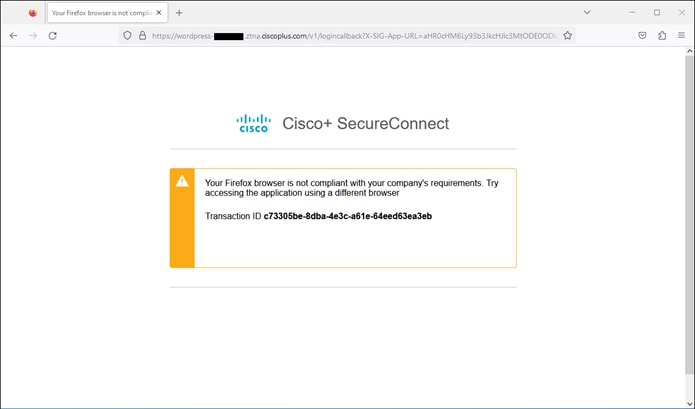
Step 4. From the Umbrella dashboard, navigate to Reporting > Core Reports > Activity Search.
Step 5. Click the Filter button on the top left, if necessary, then in the Response section on the left, click Blocked. On the top right, select Browser Based Access. Verify the block entries for the attempted access have been logged.
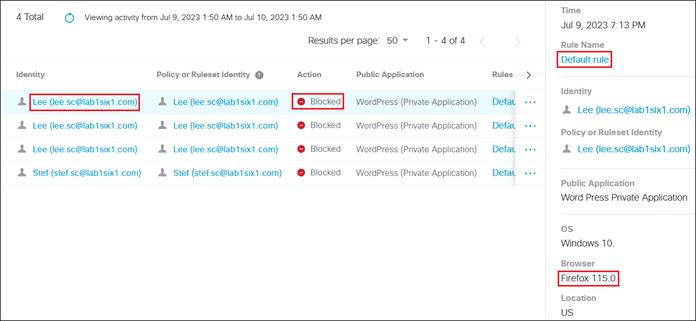
Validation Test #4: Verify ZTNA restricts access based on location
Step 1. In the endpoint posture policy configured in this design guide, access to the application is restricted to devices in the United States. While off the protected network, on an unmanaged device navigate to the ZTNA URL from Chrome or Edge while the device is not in the US. To simulate this, a remote access VPN connection is established to a VPN headend in another country.
Step 2. Authenticate in Duo SSO with the permitted user credentials and approve the Duo Push.
Step 3. Secure Connect lets the user know they are not permitted to access the application.
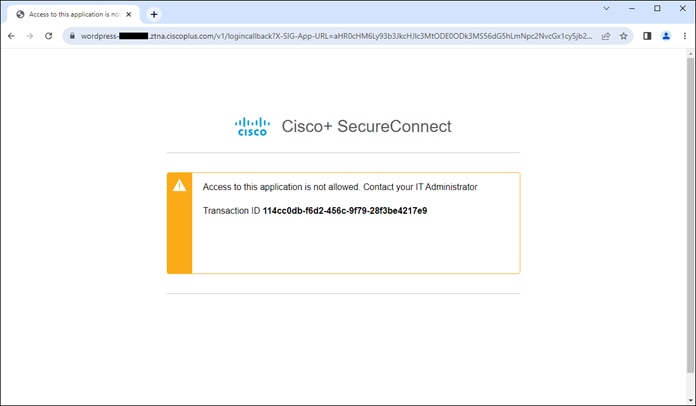
Step 4. From the Umbrella dashboard, navigate to Reporting > Core Reports > Activity Search.
Step 5. Click the Filter button on the top left, if necessary, then in the Response section on the left, click Blocked. On the top right, select Browser Based Access. Verify the block entries for the attempted access have been logged.
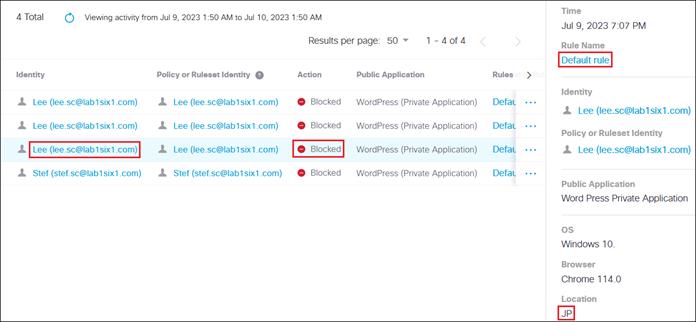
Private Application Access (Client-Based Remote Access) – Remote Worker
Validation Test #1: Verify Secure Client successfully installed on managed device with SecureX Cloud Management module
Step 1. On the managed device, open the Windows search box and type Cisco Secure Client. Click the Cisco Secure Client application.
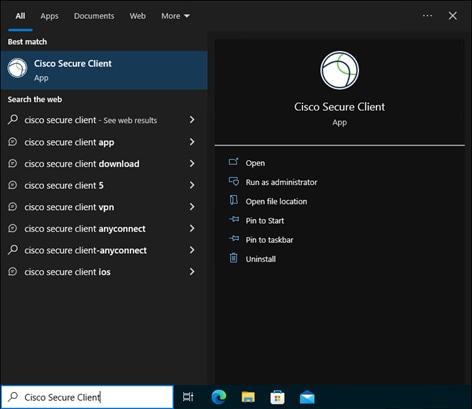
Step 2. Verify both the AnyConnect VPN module and Umbrella Roaming Security modules are installed. Umbrella Roaming should be active.
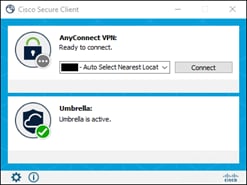
Validation Test #2: Verify User can connect to Secure Connect with AnyConnect VPN module and access Private Application
Step 1. Click Connect on the AnyConnect VPN module. An embedded windows for SAML authentication with Duo SSO should pop up. Enter the permitted user’s email. Click Next.
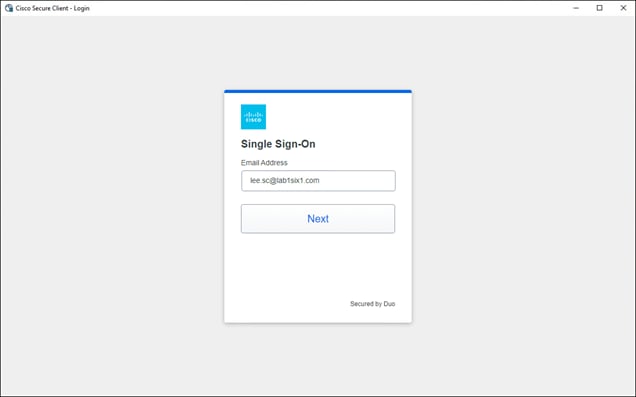
Step 2. Enter the user’s password then click Log in.
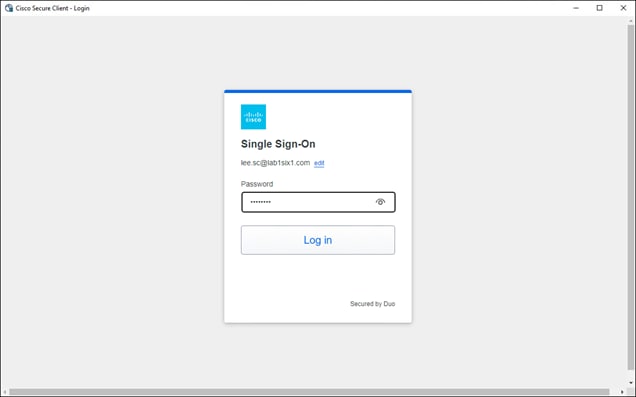
Step 3. Duo SSO will send a Duo Push for MFA.
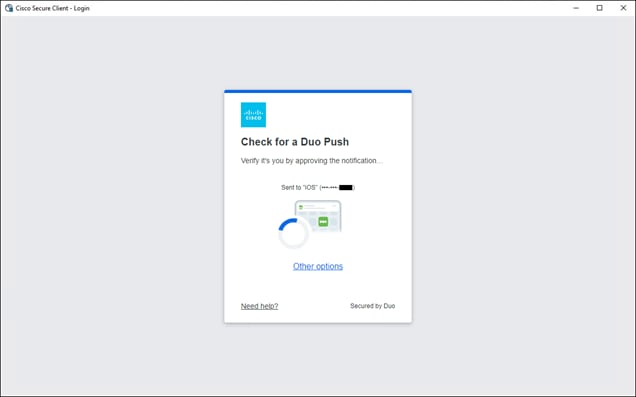
Step 4. On the user’s mobile device, approve the Duo push.
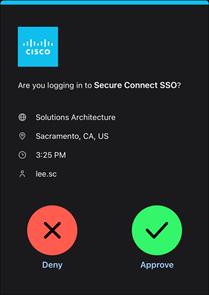
Step 5. The embedded window should close, and the AnyConnect VPN show it is connected. Click the gear in the bottom right of the Secure Client.
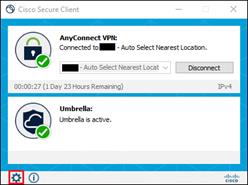
Step 6. Click the AnyConnect VPN tab. Navigate to the Statistics tab verify the remote access configuration. Because the tunnel is in tunnel all mode and the domain for the private application is not excluded, traffic to private application used in this design guide should traverse the DTLS tunnel and go to Secure Connect.
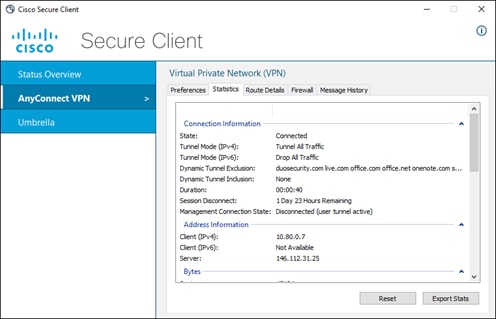
Step 7. In any browser on the managed device, navigate to the application. In this case, the address is https://wordpress.lab1six1.com.
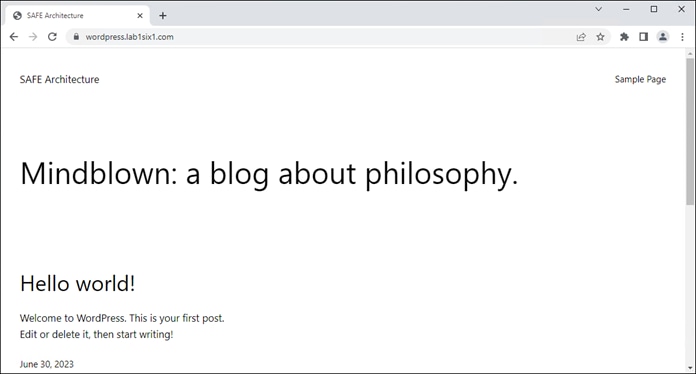
Step 8. From the Meraki dashboard, navigate to Secure Connect > Identities & Connections > Users.

Step 9. Verify the permitted user Lee is shown as online.
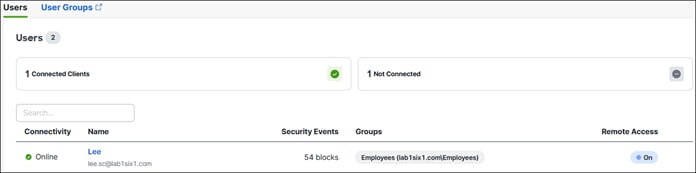
Step 10. Navigate to Secure Connect > Monitor > Remote Access Log.
Step 11. Validate that the successful VPN connection was logged.

Validation Test #3: Verify FWaaS restricts access to network
Step 1. While connected to Secure Connect with the AnyConnect VPN module, use Putty or another SSH client to attempt an SSH session to the private application.
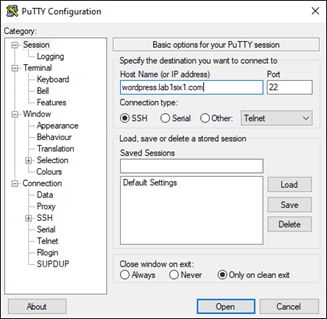
Step 2. The SSH client should fail to connect.

Step 3. From the Umbrella dashboard, navigate to Reporting > Core Reports > Activity Search.
Step 4. Click the Filter button on the top left, if necessary, then in the Response section on the left, click Blocked. On the top right, select Firewall. Search parameters for the IP addresses of the devices can be added to further limit the number of results. Verify the block entries have been logged.
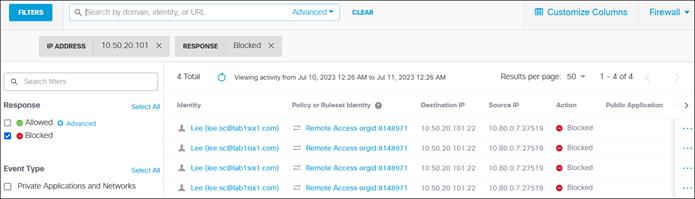
Validation Test #4: Verify Client-based remote access restricts user identity
Step 1. From the managed device, while on an untrusted network open Secure Client and click Connect within the AnyConnect VPN module. Enter the credentials for a restricted user then verify the Duo Push.

Step 2. A pop up should appear notifying that posture has failed. Click Open Browser.
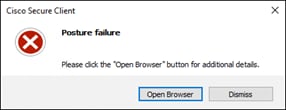
Step 3. Umbrella confirms that the reason for failure is lack of permissions to access the service.
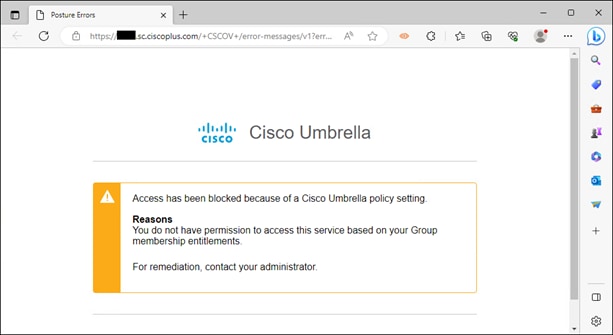
Validation Test #5: Verify Client-based remote access restricts access based on device certificate
Step 1. On a managed device where the device certificate was installed previously, open the Windows search box and type “certlm.msc”. Click Run as administrator. Alternatively, jump to step 3 if the device does not have the device certificate installed already.
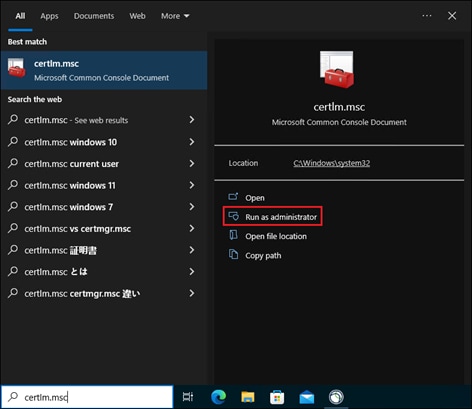
Step 2. Enter admin credentials if necessary. Navigate to the location the device certificate is stored (Personal > Certificates). Right click the certificate and select Delete.

Step 3. While on an untrusted network open Secure Client and click Connect within the AnyConnect VPN module. Enter the credentials for a permitted user then verify the Duo Push.
Step 4. A pop up should appear notifying that posture has failed. Click Open Browser.

Step 5. Umbrella confirms that the reason for failure is the device certificate not being on the device.

Validation Test #6: Verify Private Application Digital Experience for users over Secure Connect
Step 1. From the ThousandEyes dashboard, navigate to Endpoint Agents > Overview.

Step 2. If there were any recent browser sessions, they will be visible here. Click View all visited sites.

Step 3. Click Add a filter and choose the domain for the private application. Click one of the bars in the time chart. These are times browser activity for the monitored domain was collected. By default, ThousandEyes will show the last 24 hours, but the time can be changed by clicking 24h, 7d, 14d, or moving the sliders shown in the lower part of the diagram.
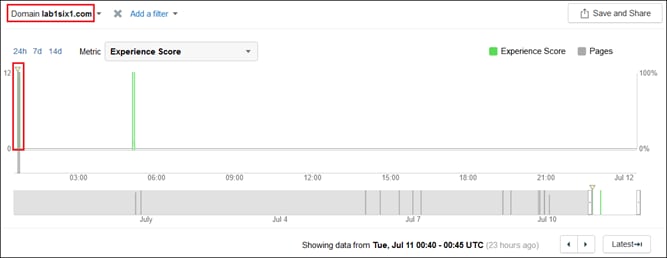
Step 4. At the bottom of the page, should be the calculated user experience score at that specific point of time based on page load time. Click the FQDN of the private application.
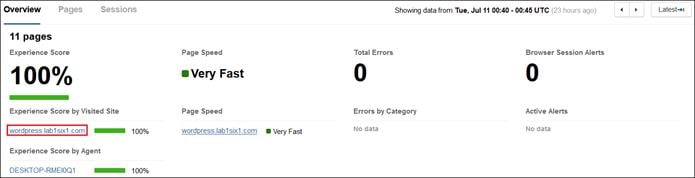
Step 5. In the pop-up window, a graphical representation of the traffic path should appear. The data confirms traffic traversed a VPN before arriving to the application. In the lower right corner are Loss, Latency, and page load times that can be used to troubleshoot performance issues.
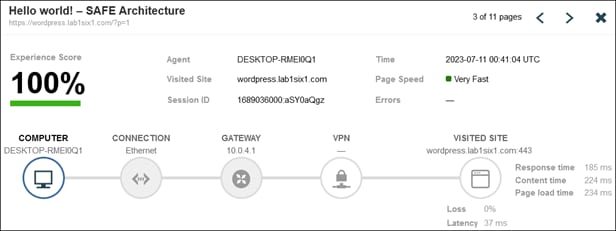
Step 6. In the Computer Info tab is data from the computer.
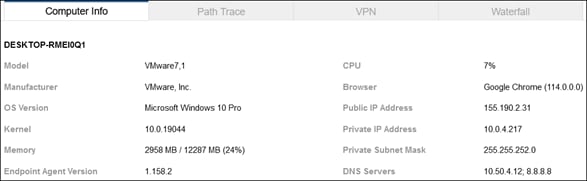
Step 7. The Path Trace tab shows the results of a trace. At the time of writing this design guide, these traces are blocked through Secure Connect and so this data will be limited for any overlay tests.

Step 8. The VPN tab provides information on the VPN interface.

Step 9. The Waterfall tab provides information on the objects received from the web server.
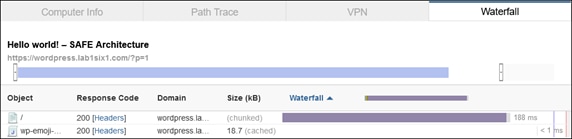
Secure Internet Access – Remote Worker
Validation Test #1: Verify Secure Connect successfully installed on managed device and DNS security enabled
Step 1. Open Secure Client and click the gear in the lower right.
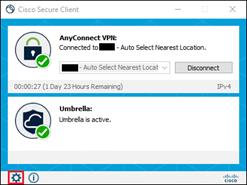
Step 2. Click the AnyConnect VPN section and navigate to the Statistics tab. Confirm the remote access configuration created in Secure Connect is applied. The tunnel should have dynamic split exclusions for the added domains and be in full tunnel (Tunnel All) because no IP addresses were added to the Secure Connect Traffic Steering configuration.

Step 3. Click the Umbrella section and confirm DNS and Web Protection is enabled. Additionally, confirm the username of the user logged in is collected by the module.

Step 4. In any browser, navigate to https://welcome.umbrella.com to confirm the device is using Umbrella DNS.

Validation Test #2: Verify Content Filtering is being applied
Step 1. In any browser, navigate to https://facebook.com. An Umbrella block page should be returned.

Step 2. In any browser, navigate to https://linkedin.com. Access to the site should be granted.

Step 3. From the Umbrella dashboard, navigate to Reporting > Core Reports > Activity Search.
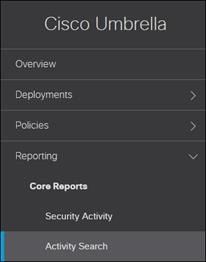
Step 4. Click the Filter button on the top left, if necessary, then in the Response section on the left, click Blocked. On the top right, select Web. Search parameters for the user can be added to further limit the number of results. Verify the block entry for Facebook has been logged.
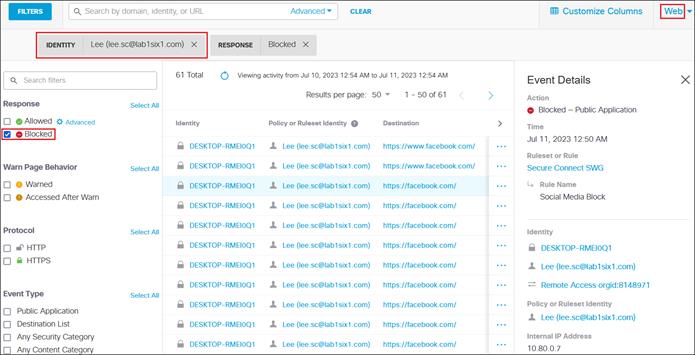
Step 5. Change the value in the Response section to Allowed. Additionally, the linkedin.com domain can be added to the search field. Verify the allow entry for LinkedIn has been logged.
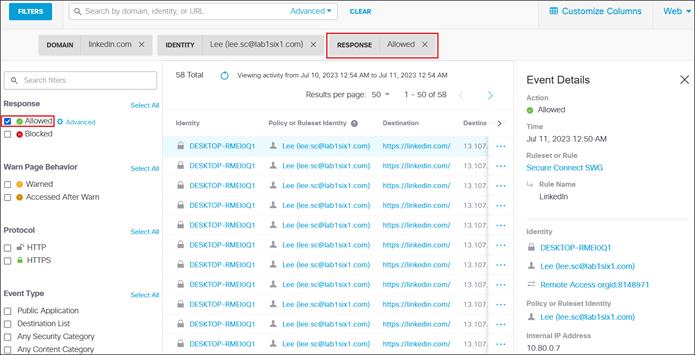
Validation Test #3: Verify Malware detected and prevented from download
Step 1. From the managed device, navigate to https://www.eicar.org/download-anti-malware-testfile/ and select one of the available eicar test files to attempt a download.
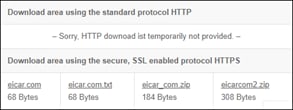
An Umbrella block page should be returned.
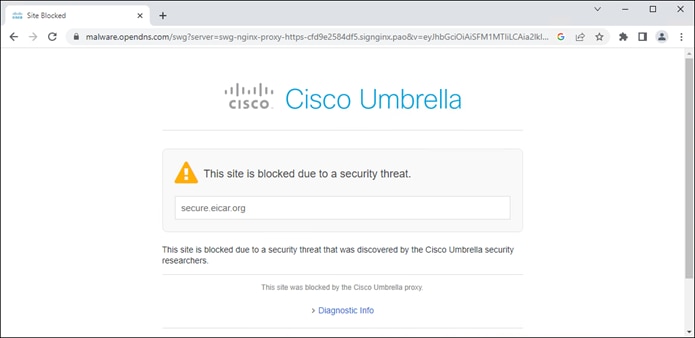
Step 2. From the Umbrella dashboard, navigate to Reporting > Core Reports > Activity Search.
Step 3. Click the Filter button on the top left, if necessary, then in the Response section on the left, click Blocked. On the top right, select Web. Search parameters for the user can be added to further limit the number of results. Verify the block entries for attempted malware download have been logged.

Step 4. Navigate to Reporting > Core Reports > Security Activity.
The security incident should also be logged here.

Validation Test #4: Verify FWaaS policy is being applied
Step 1. Download and install the qBittorrent application on the managed device.
Step 2. Navigate to https://ubuntu.com/download/alternative-downloads and scroll down to the BitTorrent section. Select an OS version to torrent.

Step 3. Open the torrent file.
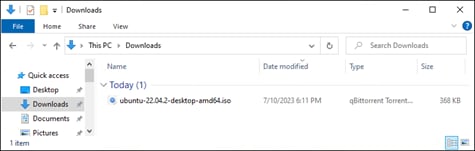
Step 4. Click Ok in the qBittorrent application.
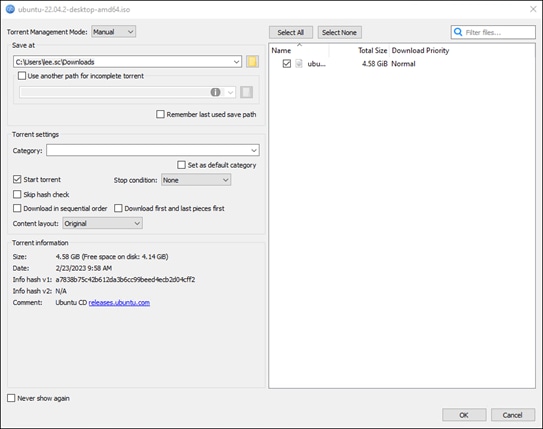
Step 5. qBittorrent will attempt to download the file from a P2P network but stay in the stalled status.

Step 6. From the Umbrella dashboard, navigate to Reporting > Core Reports > Activity Search.
Step 7. Click the Filter button on the top left, if necessary, then in the Response section on the left, click Blocked. On the top right, select Firewall. Search parameters for the user can be added to further limit the number of results. Verify the block entries for P2P activity have been logged.
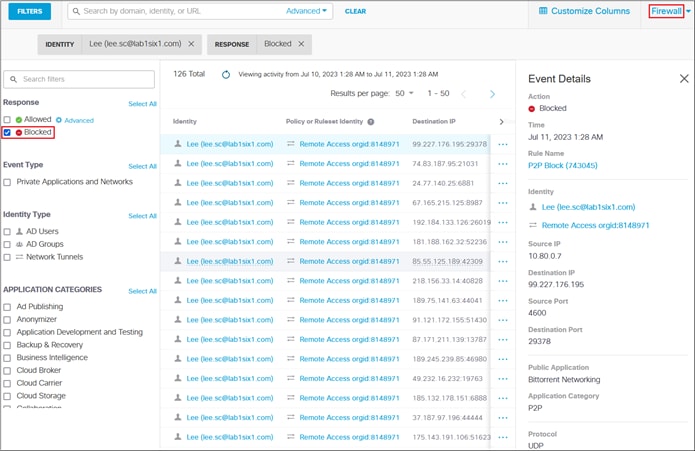
Validation Test #5: Verify IPS is triggered
Step 1. From any browser on the managed device, navigate to http://ips.demo.umbrella.com:8081/eicartest.txt. The connection should be reset.

Step 2. From the Umbrella dashboard, navigate to Reporting > Core Reports > Activity Search.
Step 3. On the top right, select IPS. Verify the block entries for the IPS activity have been logged.
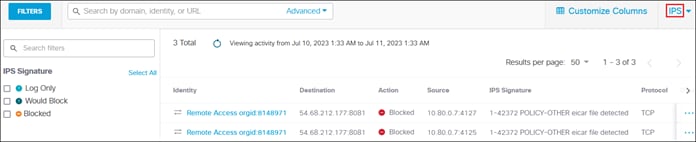
Validation Test #6: Verify CASB application control and file control
Step 1. Prior to logging into Dropbox with the managed device, log into Dropbox from a separate device not going through Secure Connect. Upload a non-batch test file. Upload a batch file with some code inside. For example:
@ECHO OFF
ECHO Hello! This batch file should have been blocked but wasn't. Verify the Umbrella Web Policy!
PAUSE
Step 2. On the managed device, create a file to simulate sensitive data. For example, a txt file called Sample Customer Data.
Step 3. From any browser on the managed device, navigate to https://dropbox.com and log in. Attempt to upload the created file to Dropbox.
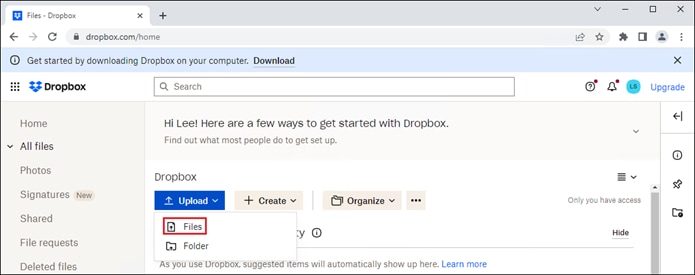
Select the test file created on the managed device.

Dropbox should report an error from the user’s perspective.
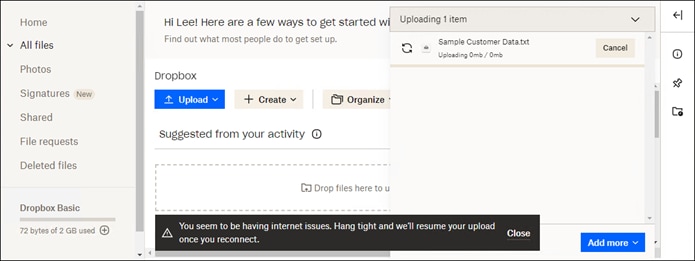
Step 4. From the Umbrella dashboard, navigate to Reporting > Core Reports > Activity Search.
Step 5. Click the Filter button on the top left, if necessary, then in the Response section on the left, click Blocked. On the top right, select Web. Search parameters for the user can be added to further limit the number of results. Verify the block entries for attempted Dropbox upload have been logged.
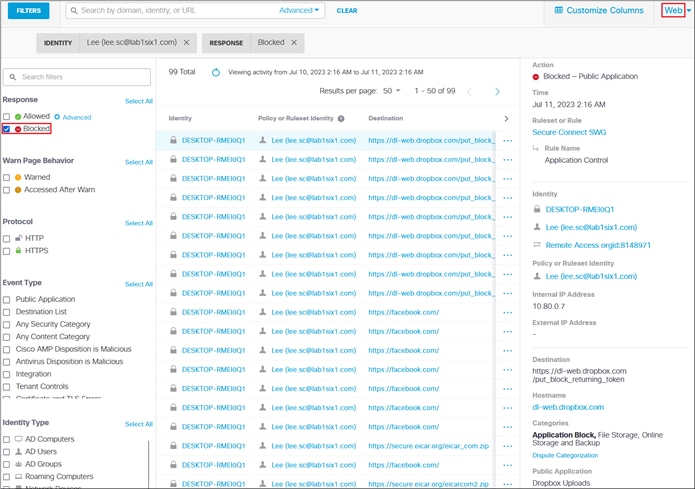
Step 6. The user should still be able to download files, however they should not be able to download batch files based on the file inspection configuration in the Web policy. Attempt to download a non-batch file and verify it completes.

Step 7. Attempt to download the batch file.
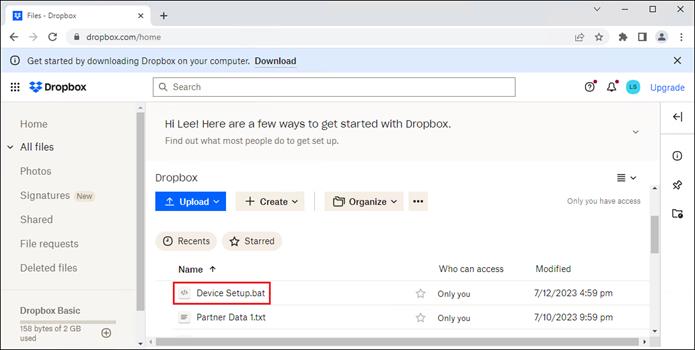
The download should fail.
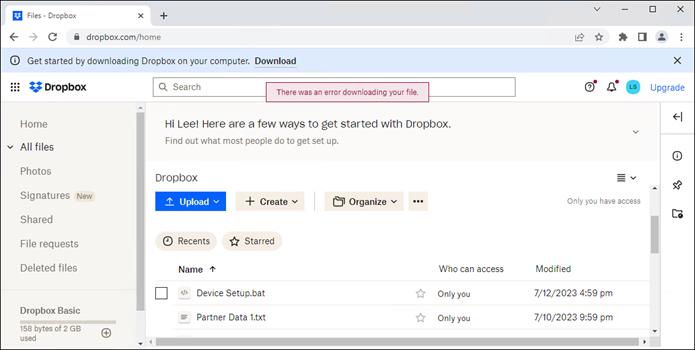
Step 8. Pivot to Reporting > Core Reports > Activity Search in the Umbrella dashboard and verify the block was logged.
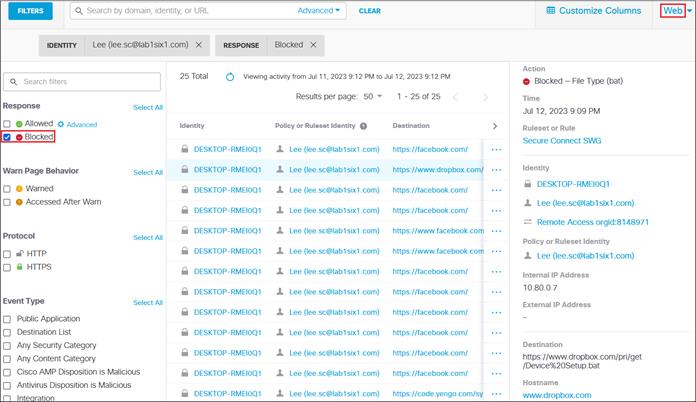
Validation Test #7: Verify Real-time DLP policy prevents potential data loss event
Step 1. From any browser on the managed device, navigate to https://openai.com/chatgpt and log in. Attempt to send a query containing test sensitive information.

ChatGPT should report an error from the user’s perspective.
Note: An additional prerequisite for the DLP policy to take effect was blocking QUIC in the Umbrella Firewall. For more information on disabling QUIC, reference Symptoms of QUIC enabled on Google Chrome.
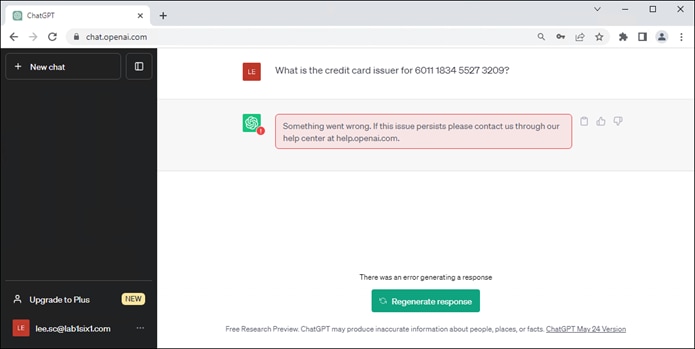
Step 2. From the Umbrella dashboard, navigate to Reporting > Additional Reports > Data Loss Prevention.
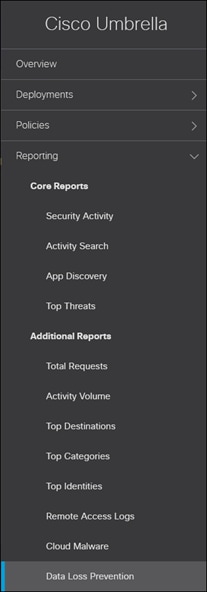
Step 3. Verify that a Real Time DLP has been logged for the attempted DLP event.

Validation Test #8: Verify SaaS Application protected by SAML and MFA
Step 1. From any browser on the managed device, navigate to https://office.com and log in.
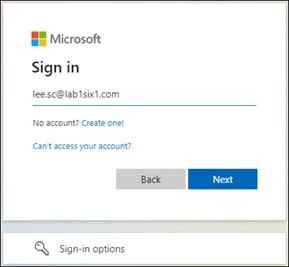
Step 2. Entering the user’s credentials should redirect the user to Duo SSO.

Step 3. Enter the primary credentials for the user.
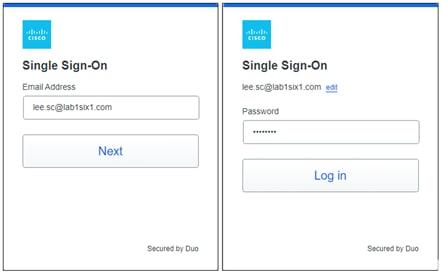
A Duo push should be sent to the user. Approve the Duo push.
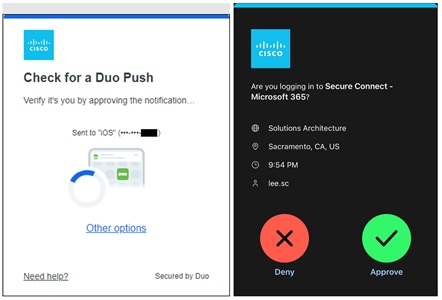
Step 4. Access to the site should be granted.
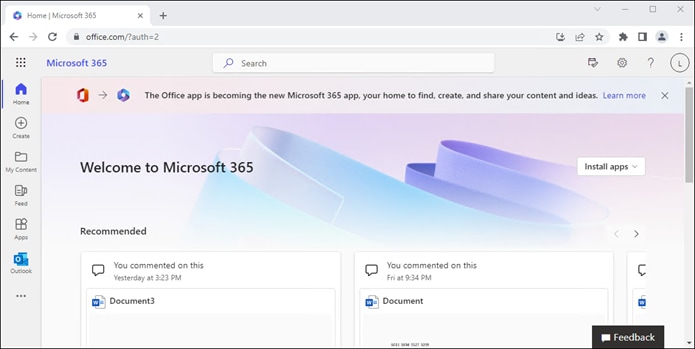
Validation Test #9: Verify API SaaS DLP policy triggers on potential data loss event
Step 1. Create a file containing test US credit card numbers and save it on the managed device. In this example, a text file called Private Data is created with the following data:
6011 1834 5527 3209
Discover
6011 2150 2716 5024
Discover
4328 1373 5449 1554
Visa
5430 3563 9033 0772
MasterCard
6011 0430 8746 4644
Discover
6011 6766 2381 3665
Discover
Step 2. While logged into the Microsoft 365 tenant added to Umbrella, navigate to OneDrive.

Step 3. Click Upload > Files.

Step 4. Navigate to the created file.
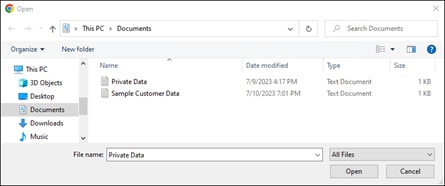
OneDrive will confirm the file has been uploaded to My files.
![]()
Step 5. Navigate to My Files in OneDrive.

Step 6. Hover over the uploaded file and click the share button.
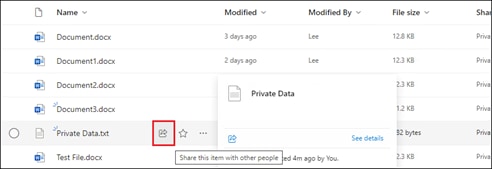
Step 7. Confirm “Anyone with the link can edit” chosen and click Copy link. This will create a public link that can be accessed by anyone.

Step 8. Verify the file has been shared.
![]()
Step 9. From the Umbrella dashboard, navigate to Reporting > Additional Reports > Data Loss Prevention.
Step 10. Wait a few minutes. Eventually, the DLP event should be logged, and the publicly accessible link revoked according to the DLP policy created.

Viewing details from the event show a timeline of what occurred with the file.
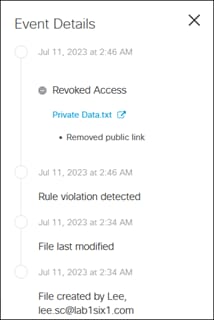
Step 11. Refresh the OneDrive page and verify that the file is no longer shared publicly.
![]()
Validation Test #10: Verify Digital Experience for Users
Step 1. From the ThousandEyes dashboard, navigate to Endpoint Agents > Overview.

Step 2. In the Browser Sessions section, click View all visited sites.
Step 3. Click Add a filter and choose the domain for the LinkedIn. Click one of the bars in the time chart. These are times browser activity for the monitored domain was collected. By default, ThousandEyes will show the last 24 hours, but the time can be changed by clicking 24h, 7d, 14d, or moving the sliders shown in the lower part of the diagram.
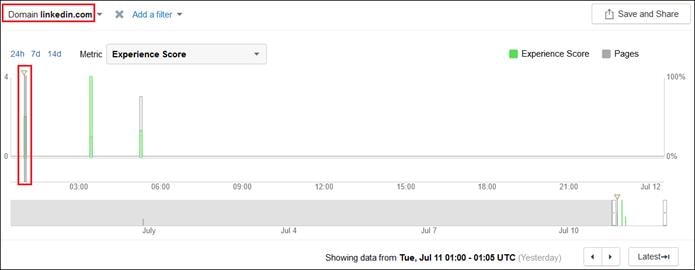
Step 4. At the bottom of the page, should be the calculated user experience score at that specific point of time based on page load time. Click www.linkedin.com.
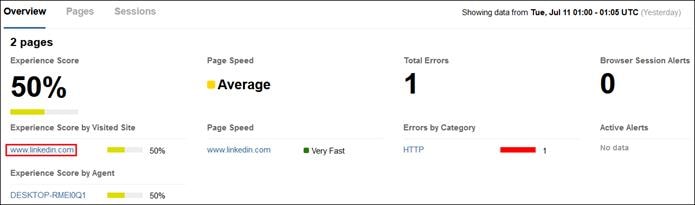
Step 5. In the pop-up window, a graphical representation of the traffic path should appear. Because the domain for LinkedIn was not added to the Traffic steering configuration, it is sent over the VPN tunnel. In the lower right corner are Loss, Latency, and page load times that can be used to troubleshoot performance issues. Despite no loss and low latency, the Experience Score for this page is 0%. Clicking the information button beside HTTP shows LinkedIn returned an error response. Clicking the arrow near the top right shows us the result of the other page.
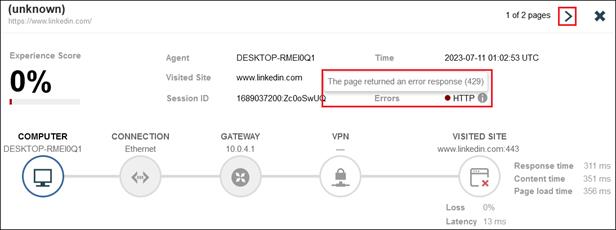
For the second page logged, the Experience Score is 100% and the page loaded successfully. Close the window.
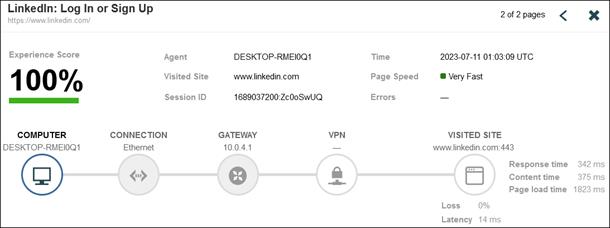
Step 6. Change the filter to search for the domain office.com and click one of the logged sessions.
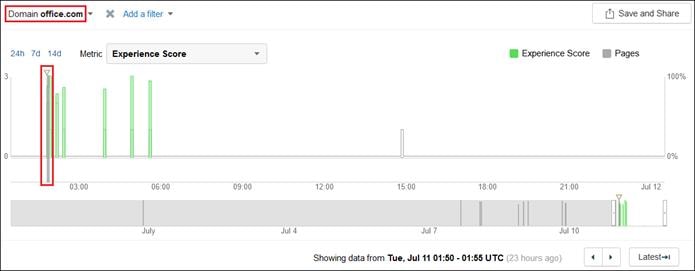
Step 7. At the bottom of the page, verify the experience score for office.com. Click www.office.com.
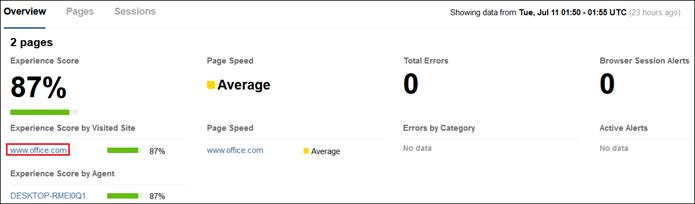
Because the domain for office.com was added to the Traffic steering configuration, it is sent directly to the Microsoft 365 web server. Viewing the initial page shows there was a redirect from http to https that caused 352 ms of additional latency.
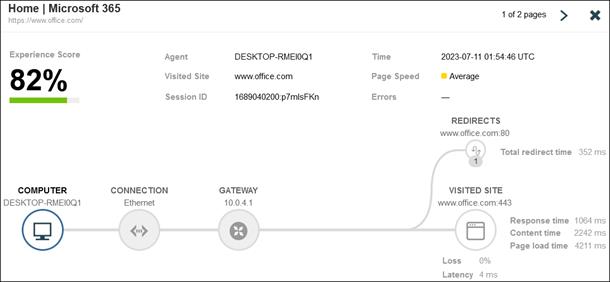
Clicking on the arrow in the top right shows that the next page loaded does not have a redirect and has a faster page load time. Close the window.
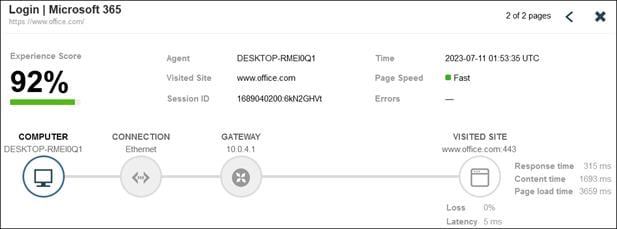
Step 8. In the Views column, navigate to Scheduled Tests > HTTP Server.
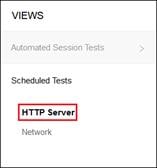
Step 9. Change the test to the one created for Facebook.
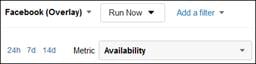
Step 10. In the Map tab at the bottom of the screen, the Status by Phase section shows successful connection Phases until HTTP. Hovering over the red circle on the right shows the ThousandEyes Endpoint agent on the managed device received an HTTP Error.
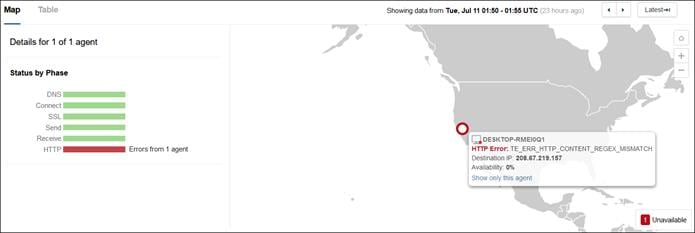
Step 11. Click the Table tab then click Headers.
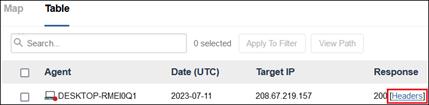
Step 12. Click the Request Headers and validate that the ThousandEyes agent is receiving response from Umbrella that blocks Facebook.

Digital Experience Monitoring (Underlay)
Validation Test: Verify reachability to Secure Access headend
Step 1. Before testing, briefly do something that would affect connectivity to the Secure Connect headend from the ThousandEyes Enterprise agent. This could include blocking traffic from the agent.
Step 2. From the ThousandEyes dashboard, navigate to Cloud and Enterprise Agents > Views.

Select the test created to track reachability to the Secure Connect headend with ICMP.
![]()
Step 3. ThousandEyes should show a time graph for the Metric Loss by default. Hovering over the graph should show 0% indicating no loss if there is no network or configuration issue. In the diagram below, 0% loss is seen for most of the last 24 hours. There is a section of red slightly before 9:00 on the graph which will be reviewed later.
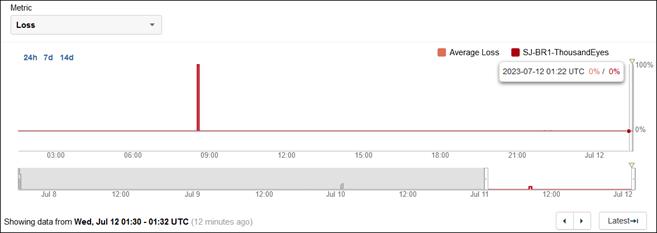
Step 4. On the bottom of the page in the Map section, statistics for Loss, Latency, and Jitter are shown.
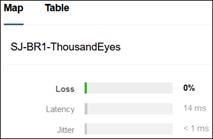
Step 5. In the Views column, navigate to Network > Path visualization.
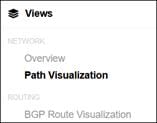
Step 6. Path Visualization shows a graphical representation of the path to the Secure Connect headend. The blue circle closest to the ThousandEyes agent shows information about the gateway.
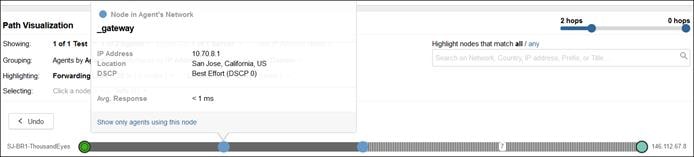
Clicking the white circle shows information on the 7 hop path between the SD-WAN router and the Secure Connect headend.
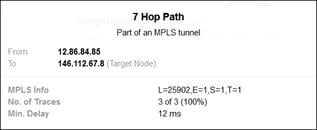
Step 7. Return to the Overview tab.
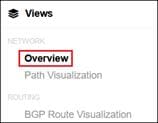
Step 8. Click the red bar seen in the graph.
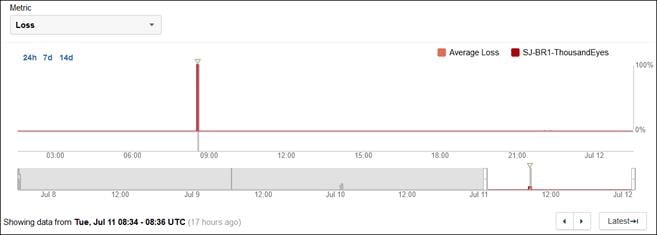
Step 9. On the bottom of the page in the Map section, 100% Loss is confirmed by the ThousandEyes Enterprise agent at that time.
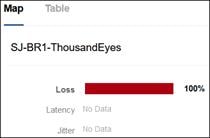
Step 10. Navigate to Network > Path visualization. In comparison, the ThousandEyes agent could not ping the gateway. This could indicate a layer 2 issue or a configuration issue on the ThousandEyes Enterprise agent.

Private Application Access – On-prem Worker
Validation Test #1: Verify Access to Private Application
Step 1. From any browser/client on the managed device, navigate to the private application.
Step 2. From the Umbrella dashboard, navigate to Reporting > Core Reports > Activity Search.
Step 3. Click the Filter button on the top left, if necessary, then in the Response section on the left, click Allowed. On the top right, select Firewall. Search parameters for the IP addresses of the devices can be added to further limit the number of results. Verify the allow entries have been logged.
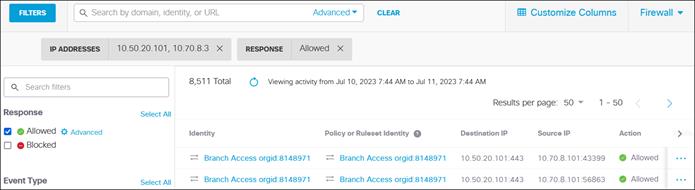
Validation Test #2: Verify FWaaS restricts access to network
Step 1. Use Putty or another SSH client to attempt an SSH session to the private application.

The SSH client should fail to connect.
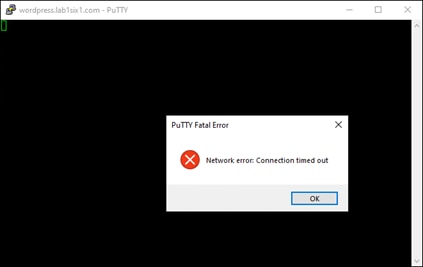
Step 2. From the Umbrella dashboard, navigate to Reporting > Core Reports > Activity Search.
Step 3. Click the Filter button on the top left, if necessary, then in the Response section on the left, click Blocked. On the top right, select Firewall. Search parameters for the IP addresses of the devices can be added to further limit the number of results. Verify the block entries have been logged.

Validation Test #3: Verify Digital Experience for Users over Secure Connect
ThousandEyes Endpoint Agent tests have been executed in the Secure Remote Worker section. The following tests will focus on the ThousandEyes Enterprise agent located at the branch.
Step 1. From the ThousandEyes dashboard, navigate to Cloud & Enterprise Agents > Views.
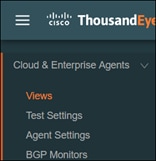
Step 2. Select the test created to track reachability to the private application.
![]()
Step 3. Confirm reachability to the private application. A blip in availability from the Underlay test can be seen here.
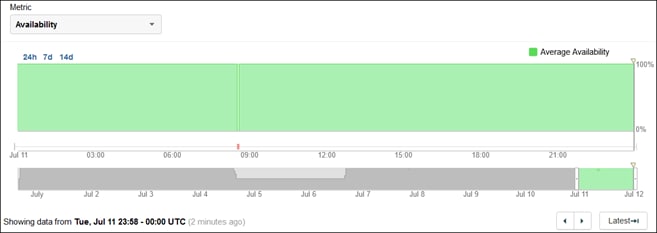
Step 4. Return to the Overview tab
Step 5. ThousandEyes will show a time graph with the Metric Loss by default. Hovering over the graph should show 0% indicating no loss if there is no network or configuration issue.
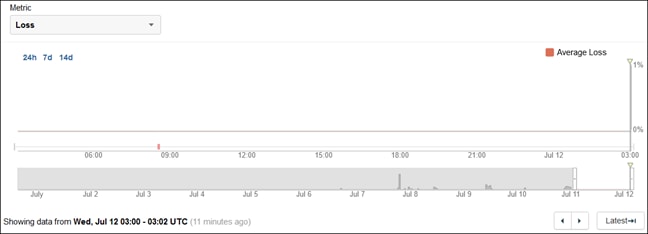
Step 6. The Map section shows statistics for Loss, Latency, and Jitter to the private application.
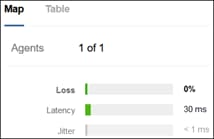
Secure Internet Access – On-prem Worker
Validation Test #1: Verify Secure Client successfully installed on managed device and DNS security enabled
Step 1. Open Secure Client and click the gear in the lower right.

Step 2. Click the Umbrella section and confirm DNS and Web Protection is enabled. Additionally, confirm the username of the user logged in is collected by the module.
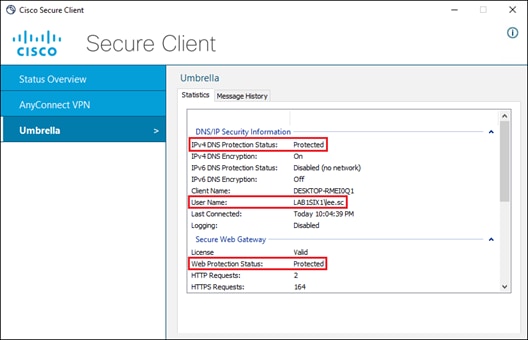
Step 3. In any browser, navigate to https://welcome.umbrella.com to confirm the device is using Umbrella DNS.
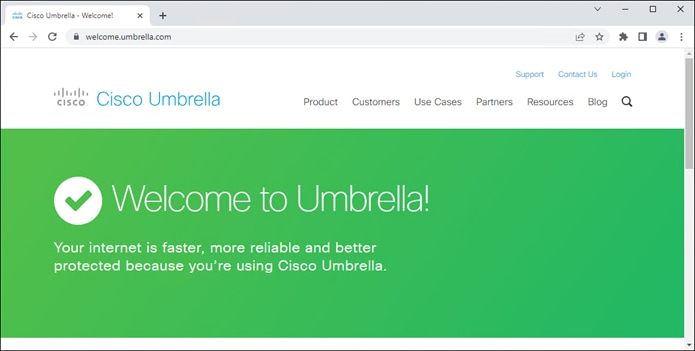
Validation Test #2: Verify Content Filtering is being applied
Step 1. In any browser, navigate to https://facebook.com. An Umbrella block page should be returned.

Step 2. In any browser, navigate to https://linkedin.com. Access to the site should be granted.
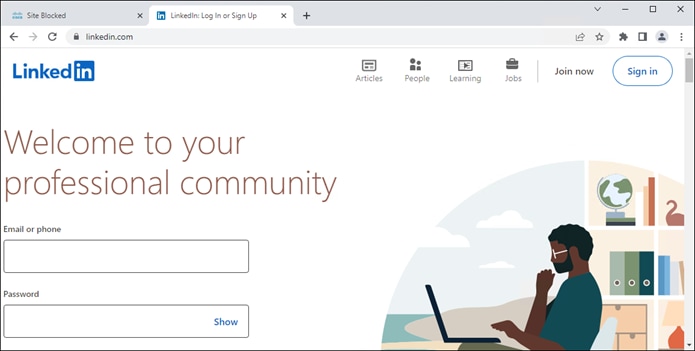
Step 3. From the Umbrella dashboard, navigate to Reporting > Core Reports > Activity Search.

Step 4. Click the Filter button on the top left, if necessary, then in the Response section on the left, click Blocked. On the top right, select Web. Search parameters for the user can be added to further limit the number of results. Verify the block entry for Facebook has been logged.
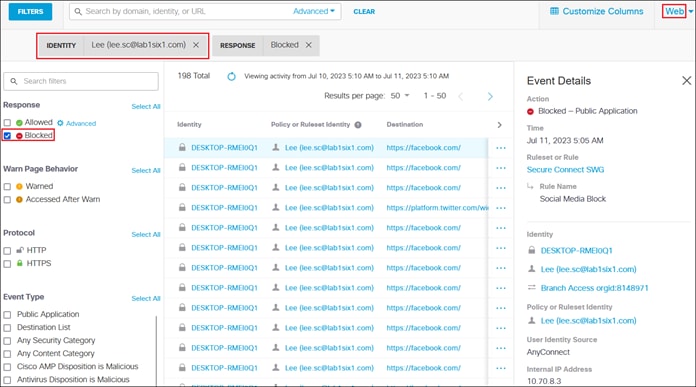
Step 5. Change the value in the Response section to Allowed. Additionally, the linkedin.com domain can be added to the search field. Verify the allow entry for LinkedIn has been logged.
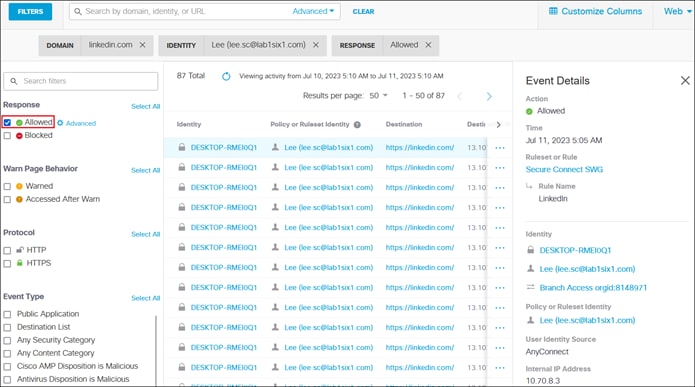
Validation Test #3: Verify Malware detected and prevented from download
Step 1. From the managed device, navigate to https://www.eicar.org/download-anti-malware-testfile/ and select one of the available eicar test files to attempt a download.
An Umbrella block page should be returned.

Step 2. From the Umbrella dashboard, navigate to Reporting > Core Reports > Activity Search.
Step 3. Click the Filter button on the top left, if necessary, then in the Response section on the left, click Blocked. On the top right, select Web. Search parameters for the user can be added to further limit the number of results. Verify the block entries for attempted malware download have been logged.
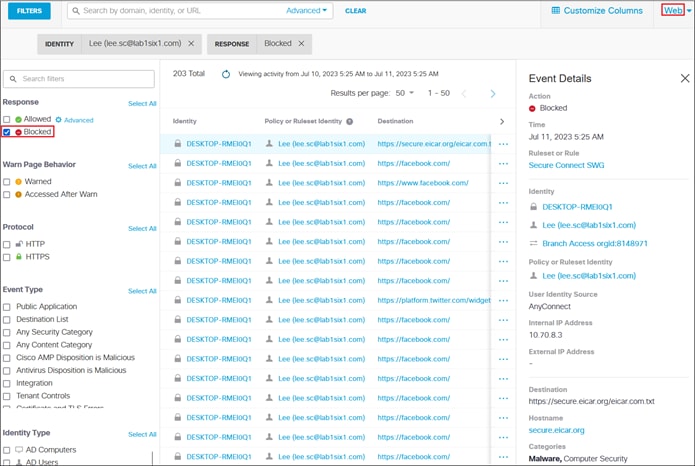
Step 4. Navigate to Reporting > Core Reports > Security Activity.
The security incident should also be logged here.
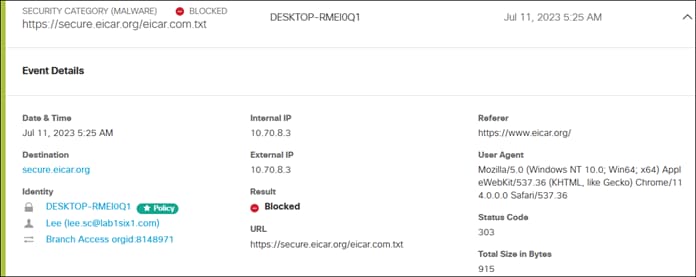
Validation Test #4: Verify FWaaS policy is being applied
Step 1. Download and install the qBittorrent application on the managed device.

Step 2. Navigate to https://ubuntu.com/download/alternative-downloads and scroll down to the BitTorrent section. Select an OS version to torrent.
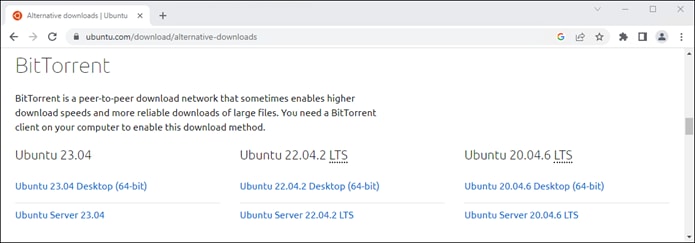
Step 3. Open the file.
Step 4. Click Ok in the qBittorrent application.

Step 5. qBittorrent will attempt to download the file from a P2P network but stay in the stalled status.

Step 6. From the Umbrella dashboard, navigate to Reporting > Core Reports > Activity Search.
Step 7. Click the Filter button on the top left, if necessary, then in the Response section on the left, click Blocked. On the top right, select Firewall. Search parameters for the user can be added to further limit the number of results. Verify the block entries for P2P activity have been logged.
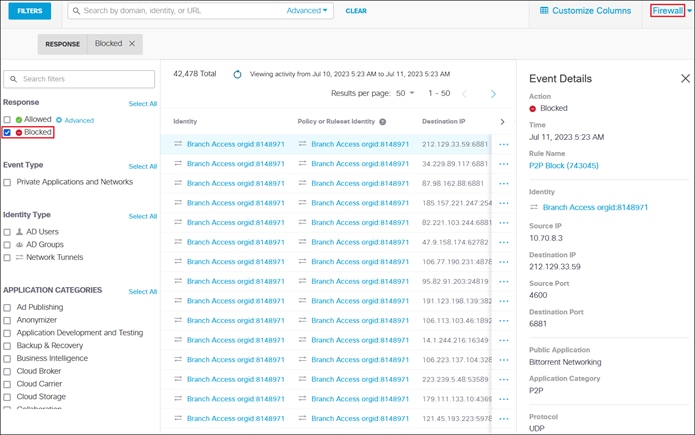
Validation Test #5: Verify IPS is triggered
Step 1. From any browser on the managed device, navigate to http://ips.demo.umbrella.com:8081/eicartest.txt. The connection should be reset.
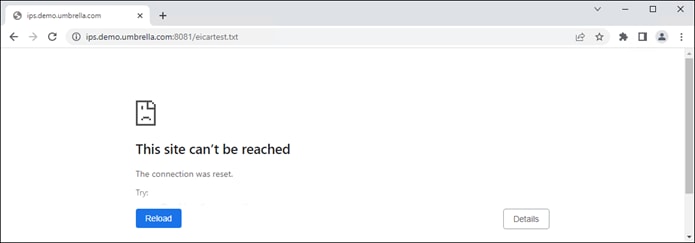
Step 2. From the Umbrella dashboard, navigate to Reporting > Core Reports > Activity Search.
Step 3. On the top right, select IPS. Verify the block entries for the IPS activity have been logged.
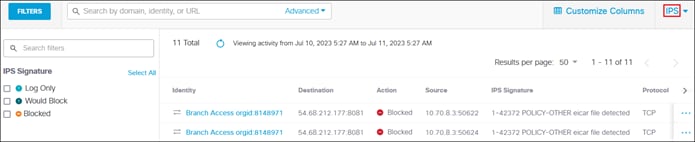
Validation Test #6: Verify CASB application control and file control
Step 1. Prior to logging into Dropbox with the managed device, log into Dropbox from a separate device not going through Secure Connect. Upload a non-batch test file. Upload a batch file with some code inside. For example:
@ECHO OFF
ECHO Hello! This batch file should have been blocked but wasn't. Verify the Umbrella Web Policy!
PAUSE
Step 2. On the managed device, create a file to simulate sensitive data. For example, a txt file called Sample Customer Data.
Step 3. From any browser on the managed device, navigate to https://dropbox.com and log in. Attempt to upload the created file to Dropbox.
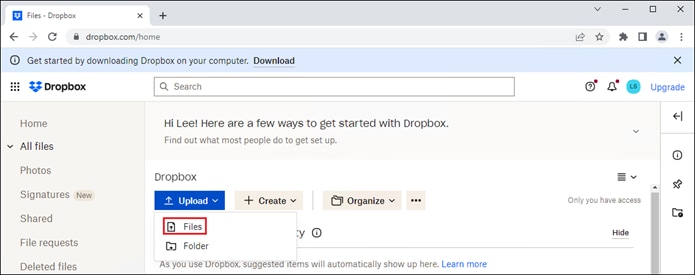
Dropbox should report an error from the user’s perspective.

Step 4. From the Umbrella dashboard, navigate to Reporting > Core Reports > Activity Search.
Step 5. Click the Filter button on the top left, if necessary, then in the Response section on the left, click Blocked. On the top right, select Web. Search parameters for the user can be added to further limit the number of results. Verify the block entries for attempted Dropbox upload have been logged.
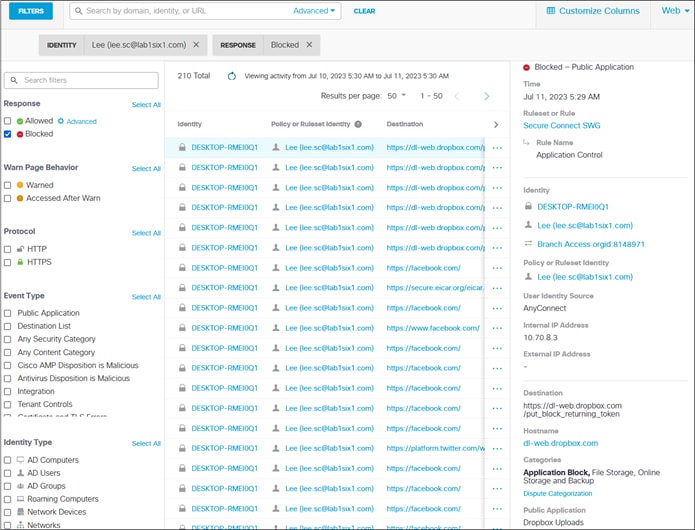
Step 6. The user should still be able to download files, however they should not be able to download batch files based on the file inspection configuration in the Web policy. Attempt to download a non-batch file and verify it completes.
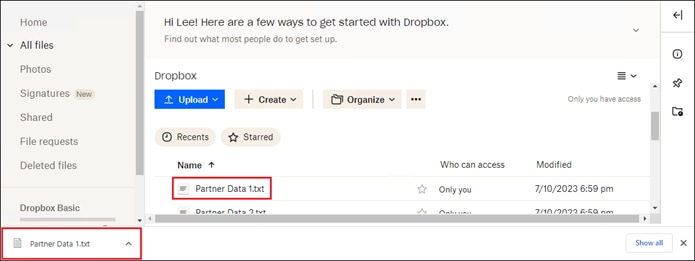
Step 7. Attempt to download the batch file.
The download should fail.
Step 8. Pivot back to Reporting > Core Reports > Activity Search in the Umbrella dashboard and verify the block was logged.
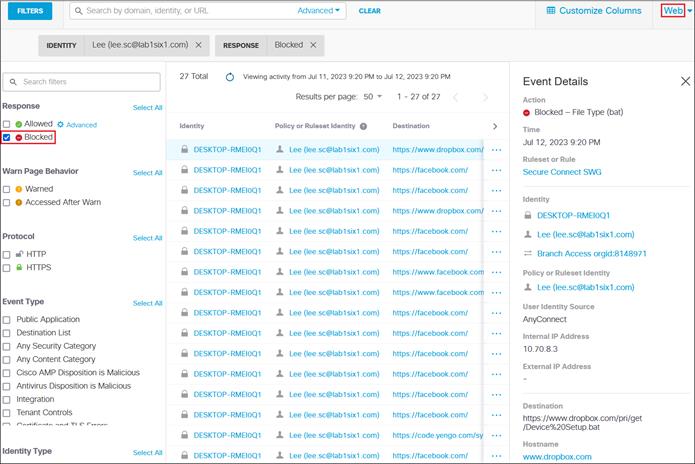
Validation Test #7: Verify Real-time DLP policy prevents potential data loss event
Step 1. From any browser on the managed device, navigate to https://openai.com/chatgpt and log in. Attempt to send a query containing test sensitive information.
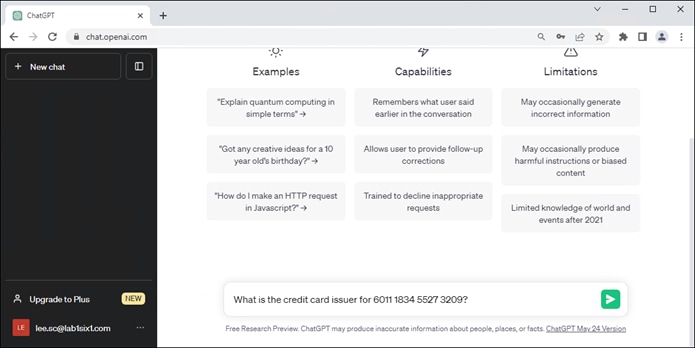
ChatGPT should report an error from the user’s perspective.
Note: An additional prerequisite for the DLP policy to take effect was blocking QUIC in the Umbrella Firewall. For more information on disabling QUIC, reference Symptoms of QUIC enabled on Google Chrome.
Step 2. From the Umbrella dashboard, navigate to Reporting > Additional Reports > Data Loss Prevention.

Step 3. Verify that a Real Time DLP has been logged for the attempted DLP event.

Validation Test #8: Verify SaaS Application protected by SAML and MFA
Step 1. From any browser on the managed device, navigate to https://office.com and log in.
Entering the user’s credentials should redirect the user to Duo SSO.
Step 2. Enter the primary credentials for the user.
Step 3. A Duo push should be sent to the user. Approve the Duo push.

Access to the site should be granted.

Validation Test #9: Verify API SaaS DLP policy prevents potential data loss event
Step 1. If the Secure Remote Worker version of this test was executed, steps 1 – 5 can be skipped and similar behavior can be seen by sharing the uploaded Private Data file again. Otherwise, create a file containing test US credit card numbers and save it on the managed device. In this example, a text file called Private Data is created with the following data:
6011 1834 5527 3209
Discover
6011 2150 2716 5024
Discover
4328 1373 5449 1554
Visa
5430 3563 9033 0772
MasterCard
6011 0430 8746 4644
Discover
6011 6766 2381 3665
Discover
Step 2. While logged into the Microsoft 365 tenant added to Umbrella, navigate to OneDrive.
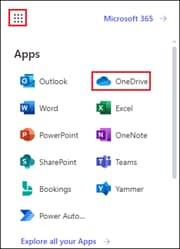
Step 3. Click Upload > Files.

Step 4. Navigate to the created file.
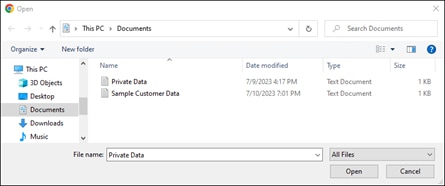
OneDrive will confirm the file has been uploaded to My files.
![]()
Step 5. Navigate to My Files in OneDrive.

Step 6. Hover over the uploaded file and click the share button.

Step 7. Confirm Anyone with the link can edit chosen and click Copy link. This will create a public link that can be accessed by anyone.
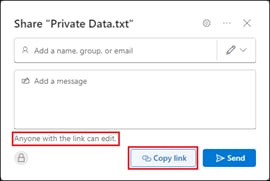
Step 8. Verify the file has been shared.
![]()
Step 9. From the Umbrella dashboard, navigate to Reporting > Additional Reports > Data Loss Prevention.
Step 10. Wait a few minutes. Eventually, the DLP event should be logged, and the publicly accessible link revoked according to the DLP policy created.

Step 11. Viewing details from the event show a timeline of what occurred with the file. Because the same file that used shared in the secure remote worker section was shared again, the output may look different than the original.
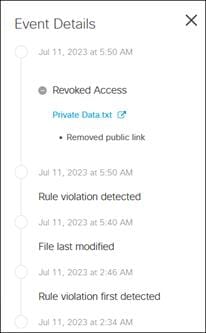
Step 12. Refresh the OneDrive page and verify that the file is no longer shared publicly.
![]()
Validation Test #10: Verify Digital Experience for Users
Step 1. From the ThousandEyes dashboard, navigate to Cloud & Enterprise Agents > Views.

Step 2. Select the test created to track reachability to Facebook.

Step 3. Hovering over the time graph should show at least 1 agent experiencing errors.
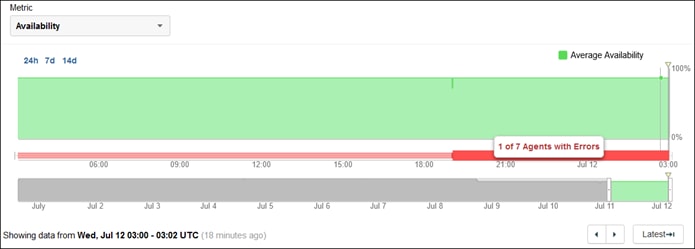
Step 4. Click the Table tab at the bottom of the page. The ThousandEyes Enterprise agent should show the attempt to facebook.com was redirected to an OpenDNS (Umbrella) block page.
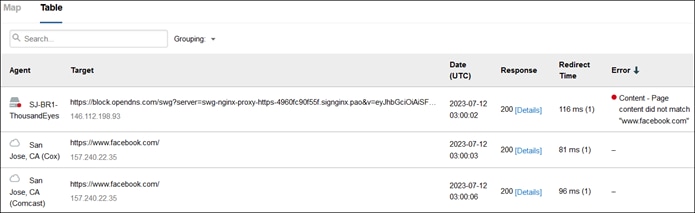
Step 5. Select the test created to track reachability to LinkedIn.
![]()
Step 6. Hover over the time chart to see availability at various times.
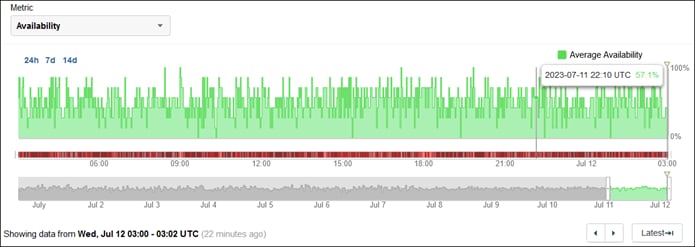
Step 7. Click the Table tab at the bottom of the page. Tests from not just the Enterprise agent, but also cloud agents indicate LinkedIn is returning HTTP status code 429 often. This correlates with the data collected from the Endpoint agent earlier within validations.
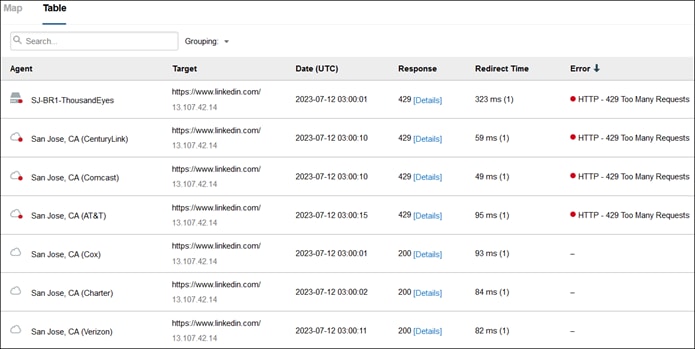
Step 8. In the Views column, navigate to Network > Overview.
Step 9. Verify if there is loss to LinkedIn.
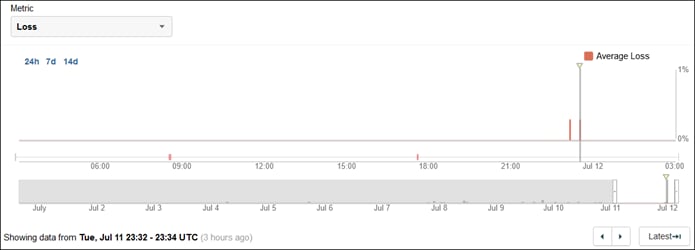
Step 10. Click the Table tab at the bottom of the screen. The Branch ThousandEyes agent reports no Loss at the selected time. It also reports Latency, Jitter, and any errors which can be compared with cloud agents.
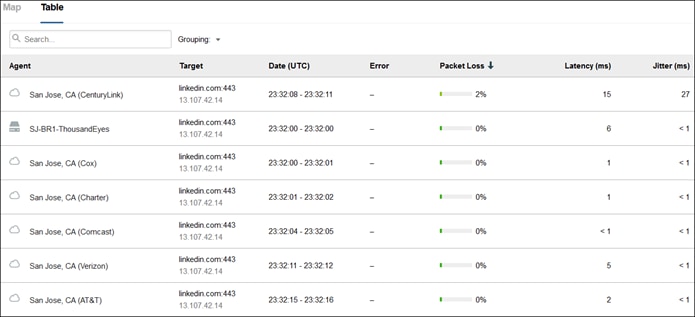
Step 11. Select the test created to track reachability to Microsoft 365.

Step 12. Hover over the time chart to see availability at various times.
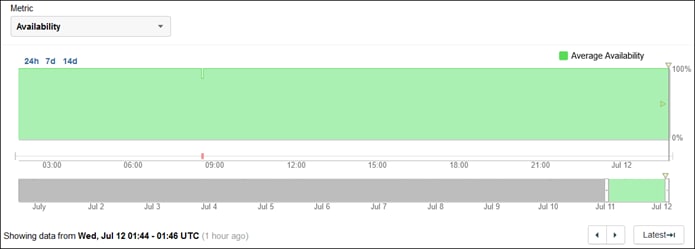
Step 13. In the Views column, navigate to Network > Overview.
Step 14. Verify if there is loss to Microsoft 365.
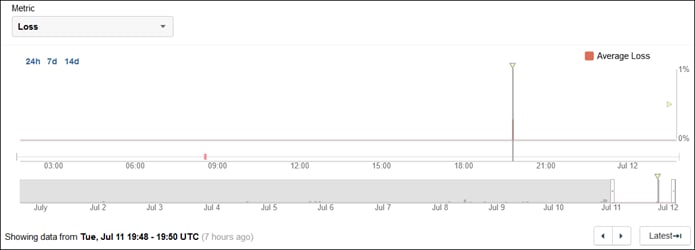
Step 15. Click the Table tab at the bottom of the screen. The Branch ThousandEyes agent reports no Loss at the selected time. It also reports Latency, Jitter, and any errors which can be compared with cloud agents.
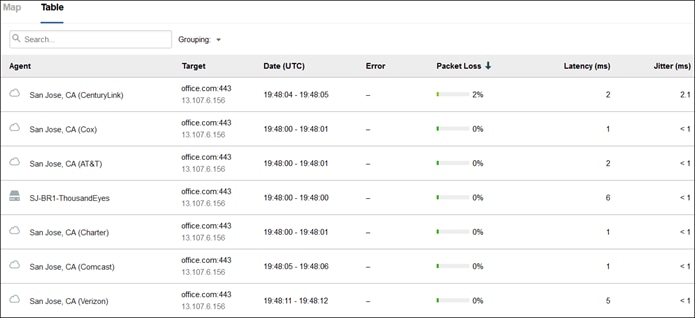
Appendix A – Acronyms Defined
| Definition |
|
| AD |
Active Directory |
| API |
Application programming interface |
| AVC |
Application Visibility and Control |
| AWS |
Amazon Web Services |
| B2B |
Business to Business |
| BYOD |
Bring Your Own Device |
| CA |
Certification Authority |
| CASB |
Cloud Access Security Broker |
| CIDR |
Classless Inter-Domain Routing |
| CPU |
Central Processing Unit |
| DC |
Data Center |
| DDoS |
Distributed Denial of Service |
| DEM |
Digital Experience Monitoring |
| DHCP |
Dynamic Host Configuration Protocol |
| DLP |
Data Loss Prevention |
| DNS |
Domain Name System |
| ECMP |
Equal-Cost Multi-Path Routing |
| FQDN |
Fully Qualified Domain Name |
| FWaaS |
Firewall as A Service |
| GPO |
Group Policy Object |
| HA |
High Availability |
| HTTP/HTTPS |
HyperText Transfer Protocol/Secure HyperText Transfer Protocol |
| IaaS |
Infrastructure as a Service |
| ICMP |
Internet Control Message Protocol |
| IdP |
Identity Provider |
| IKEv2 |
Internet Key Exchange version 2 |
| IoT |
Internet of Things |
| IPS |
Intrusion Prevention System |
| IPsec |
Internet Protocol Security |
| ISP |
Internet Service Provider |
| L3/L4/L7 |
Layer 3/Layer 4/Layer 7 |
| LAN |
Local Area Network |
| MDM |
Mobile Device Management |
| MFA |
Multi-Factor Authentication |
| MPLS |
Multiprotocol Label Switching |
| MX |
Meraki Security |
| OLA |
Operational Level Agreement |
| OS |
Operating System |
| OSPF |
Open Shortest Path First |
| OVA |
Open Virtual Appliance |
| PAT |
Port Address Translation |
| PEM |
Privacy Enhanced Mail |
| PKCS |
Public Key Cryptography Standards |
| POSIX |
Portable Operating System Interface |
| QUIC |
Quick UDP Internet Connections |
| RBI |
Remote Browser Isolation |
| RFC |
Request for Comments |
| SaaS |
Software as a Service |
| SAML |
Security Assertion Markup Language |
| SASE |
Secure Access Service Edge |
| SD-WAN |
Software Defined Wide Area Network |
| SLA |
Service-Level Agreement |
| SNI |
Server Name Indicator |
| SOAR |
Security as a Service |
| SSE |
Security Service Edge |
| SSH |
Secure Socket Shell |
| SSL |
Secure Sockets Layer |
| SSO |
Single Sign On |
| SWG |
Secure Web Gateway |
| TCP |
Transmission Control Protocol |
| TLS |
Transport Layer Security |
| UDP |
User Datagram Protocol |
| URL |
Uniform Resource Locators |
| VoIP |
Voice over IP |
| VPN |
Virtual Private Network |
| VRRP |
Virtual Router Redundancy Protocol |
| VTI |
Virtual Tunnel Interface |
| WAN |
Wide Area Network |
| XML |
Extensible Markup Language |
| ZTNA |
Zero Trust Network Access |
Appendix B – Software Versions
Considering the architecture discussed in the previous section of this document, all the capabilities and Cisco solutions can be mapped as below.
| Product |
Platform |
Version |
| Cisco Catalyst 8500 Edge router |
IOS-XE |
17.11.01a |
| CSC AnyConnect VPN Module |
Software Agent |
5.0.01242 |
| CSC Cloud Management Module |
Software Agent |
1.0.1.400 |
| CSC Umbrella Roaming Security Module |
Software Agent |
5.0.01242 |
| Duo Authentication Proxy |
Software |
5.8.1 |
| Linux host for Duo Authentication Proxy, DNG, and WordPress |
Ubuntu |
22.04.2 |
| Meraki MX250 |
MX |
18.107.2 |
| Microsoft 365 |
Cloud Offering |
SaaS |
| Microsoft Active Directory |
Microsoft Server |
2016 |
| ThousandEyes Endpoint Agent |
Software Agent |
1.158.2 |
| ThousandEyes Enterprise Agent |
Software |
1.165 |
| WordPress |
Software |
6.2.2 |
| WP SAML Auth Plugin |
Software Plugin |
2.1.3 |
Appendix C - References
● Cisco Secure Client Administrator Guide
● Cisco ThousandEyes Documentation
● Cisco Umbrella Documentation
If you have feedback on this design guide or any of the Cisco Security design guides, please send an email to ask-security-cvd@cisco.com.